
This is restricted by YouTube due to surgical images. Click “Watch on YouTube” in order view presentation.
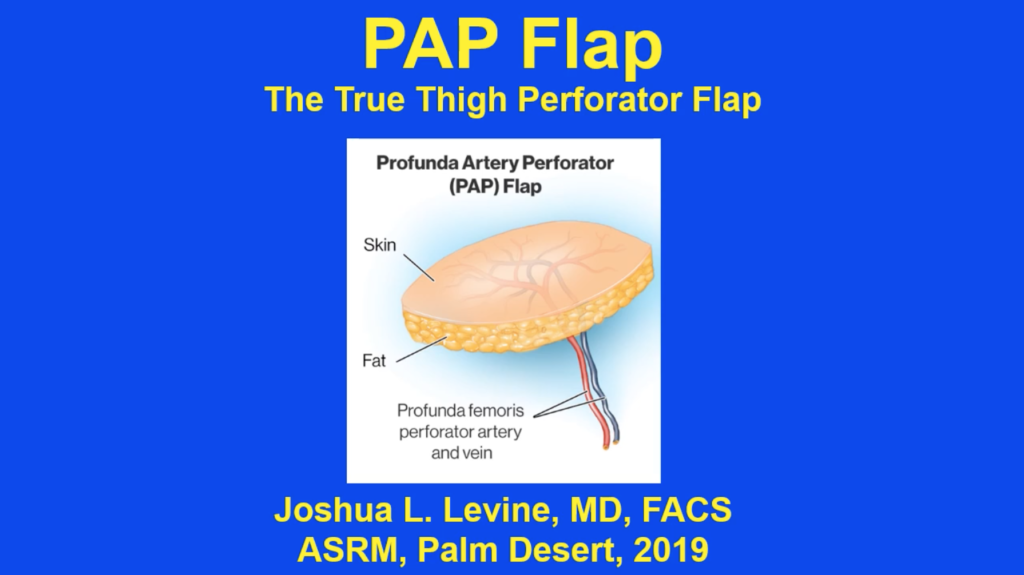
Dr. Joshua L. Levine Explains PAP flap Breast Reconstruction Procedure for ASRM 2019 Palm Desert
Transcription of above presentation:
This is a presentation that I recently gave at the American Society of Reconstructive Microsurgery meeting. The intention of the presentation was to compare the PAP flap or the profunda artery perforator flap to another reconstructive option using the thigh as a donor site called the TUG flap, which is a muscle-sacrificing procedure, whereas the PAP flap is a muscle-preserving procedure in that it is a true perforator flap.
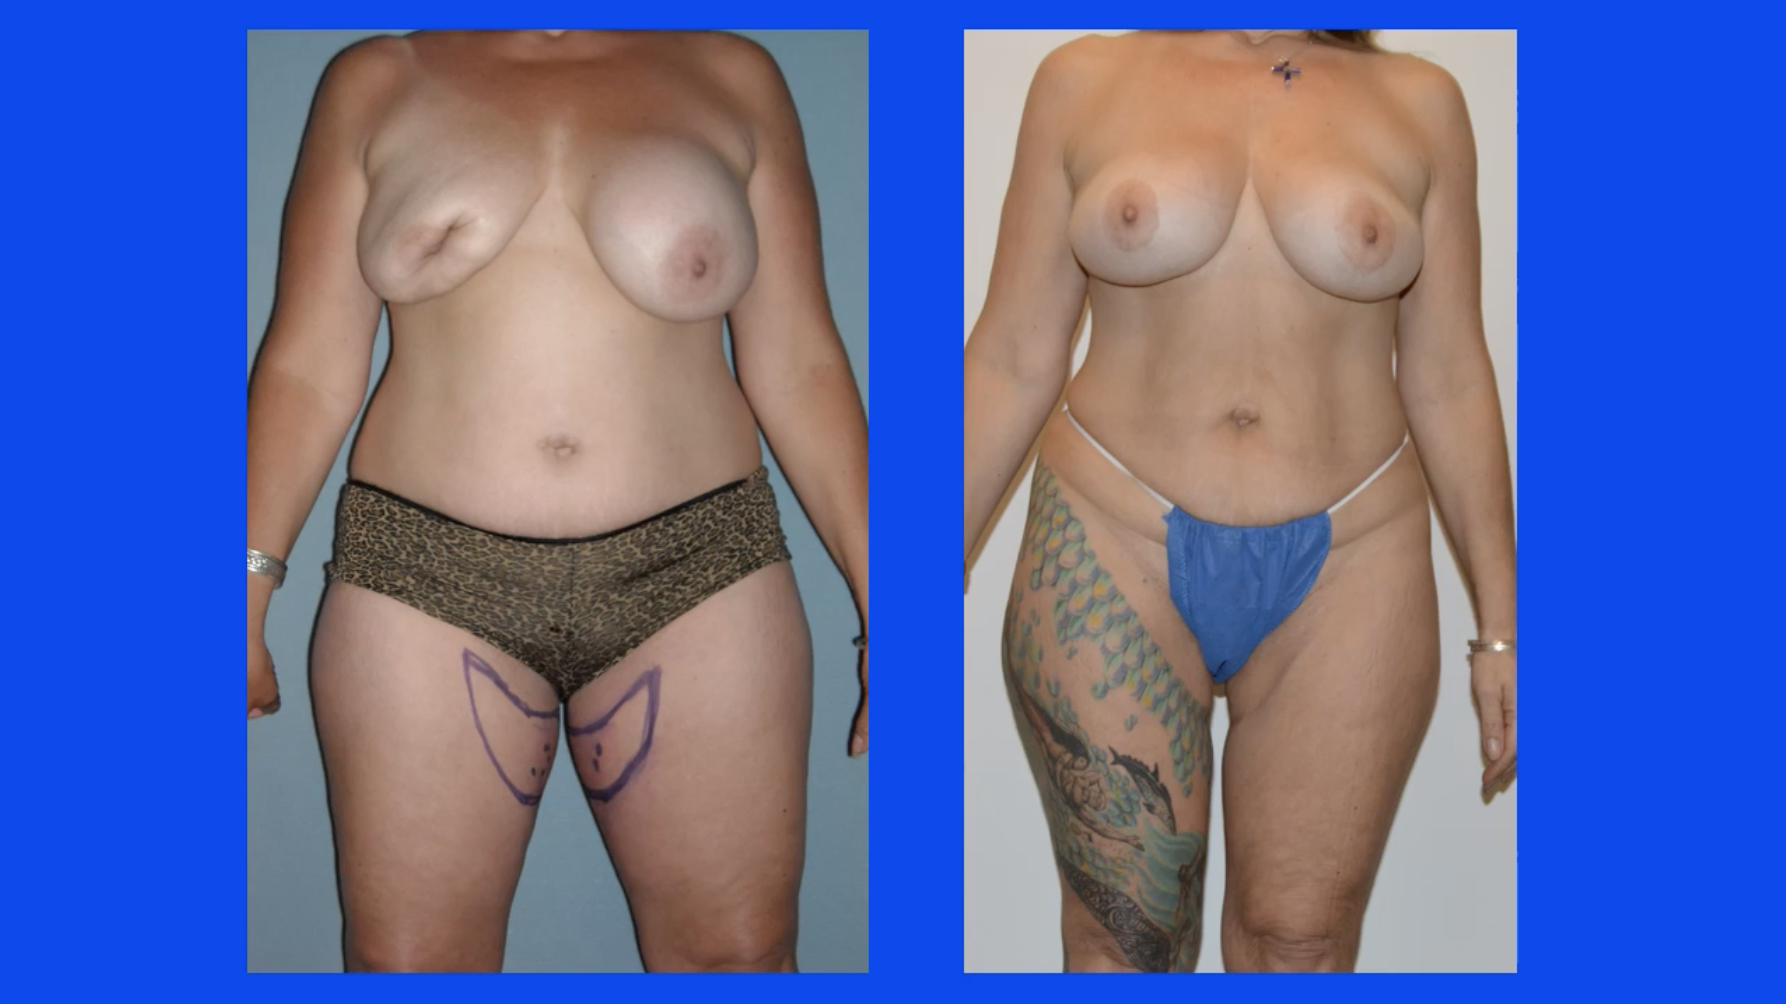
In the old days and even sometimes today, patients are offered an operation called the TUG flap, which stands for transverse upper gracilis flap. This is a patient I operated on 10 years ago who had the TUG flap and, by virtue of the fact that the gracilis muscle was harvested and used along with the overlying skin and fat, the inner thigh resulted in a deformity which the patient was unhappy with and had to camouflage it with this tattoo. We no longer need to do that operation as a result of our understanding of perforator flap anatomy.

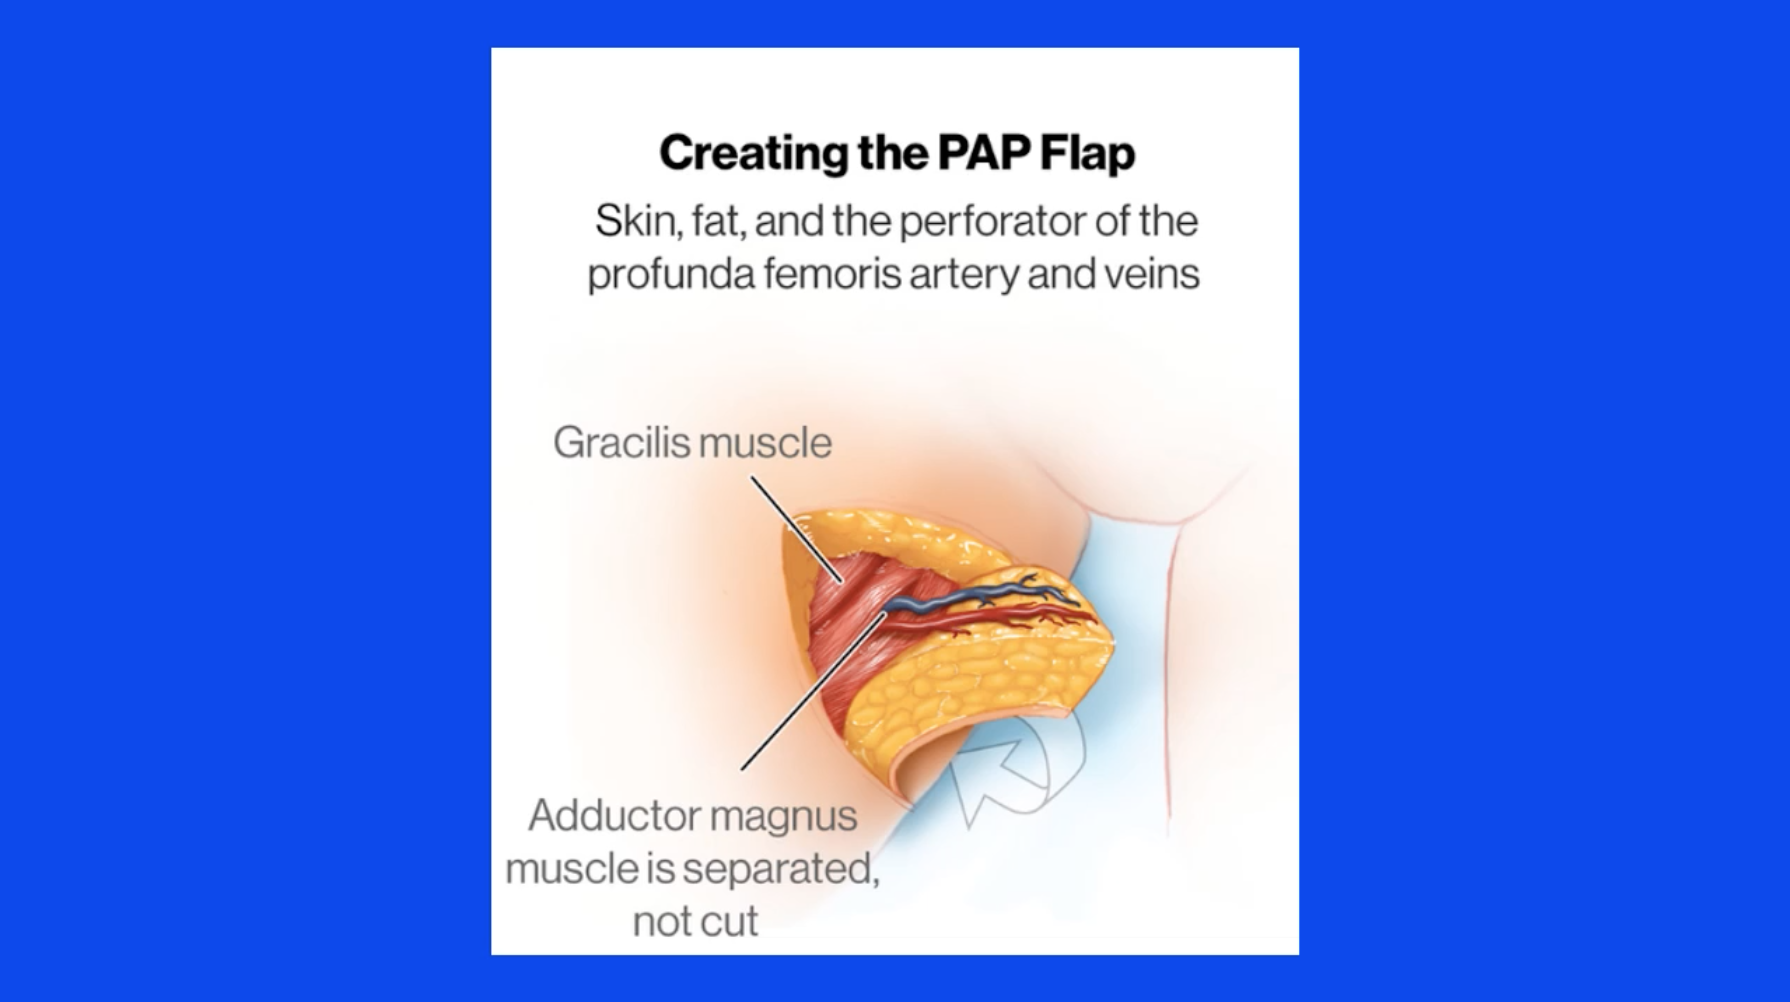
The PAP flap or profunda artery perforator flap is a true perforator flap in that it only uses skin and fat and the perforating blood vessel that supplies it. This tissue is harvested from the back of the leg or the posterior side of the leg, inner thigh, and it uses only skin and fat and a blood vessel. This blood vessel perforates through a large muscle and, therefore, we call it a perforator flap. The blood vessels that supply the overlying skin and fat perforate through the adductor magnus muscle of the posterior medial thigh.
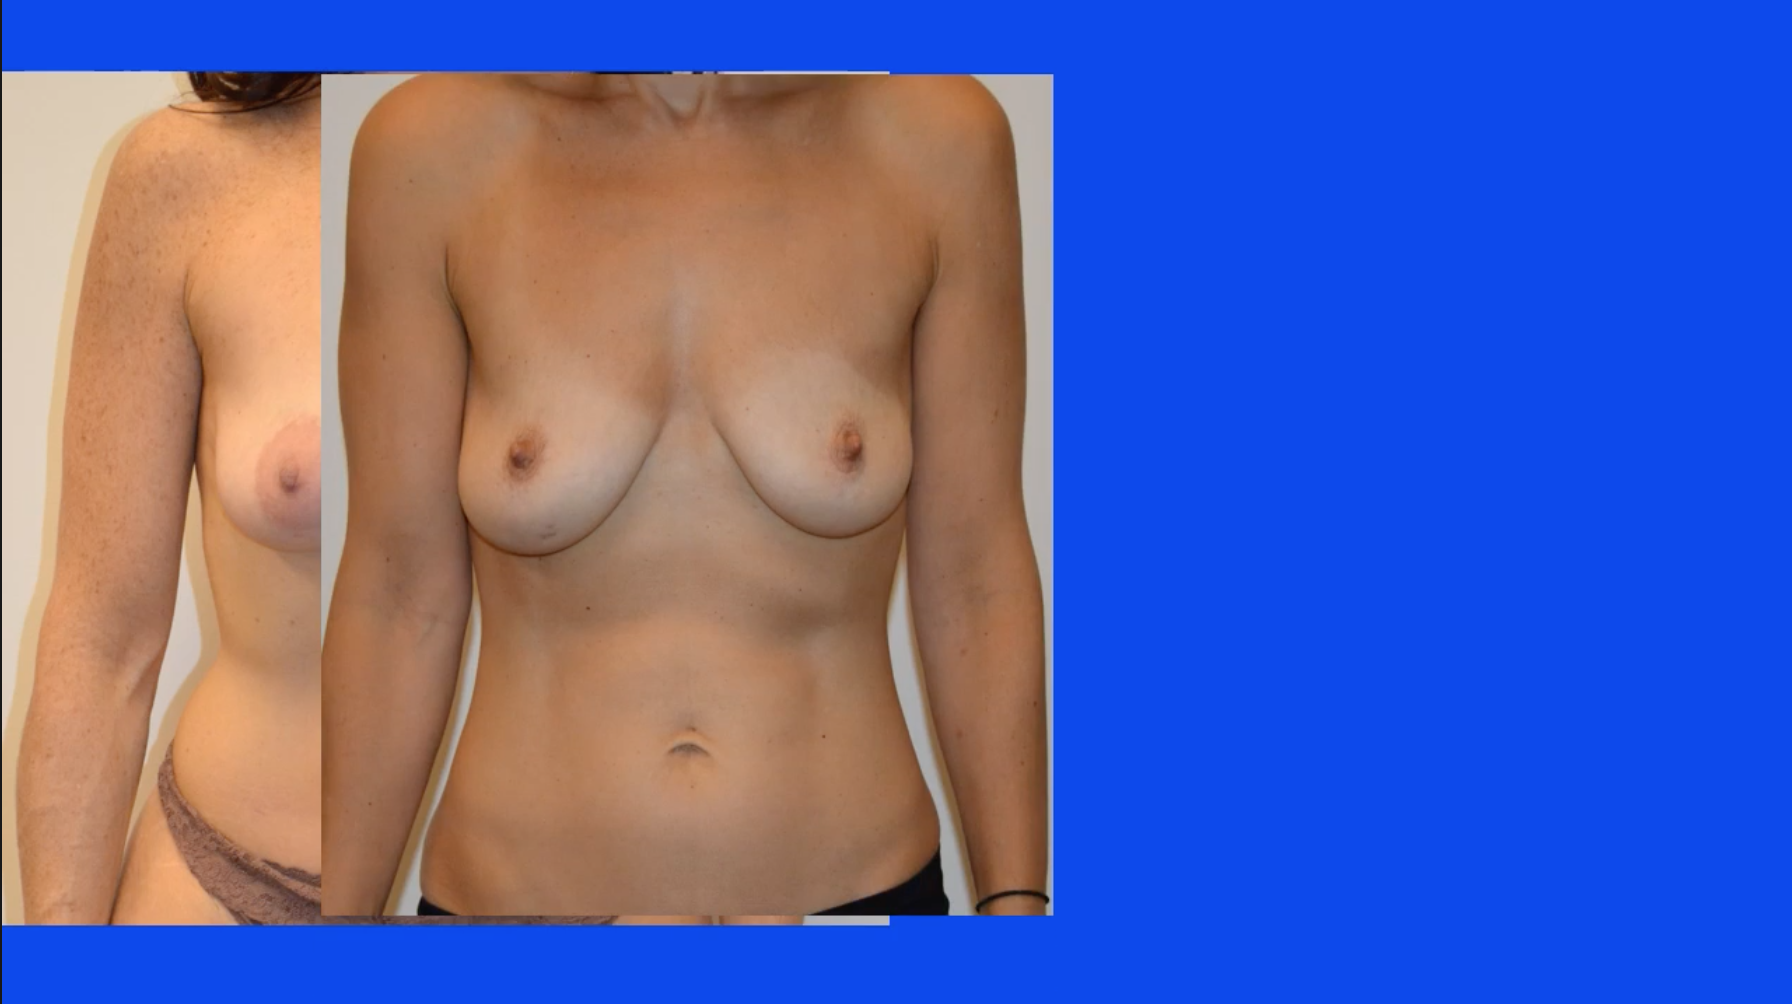
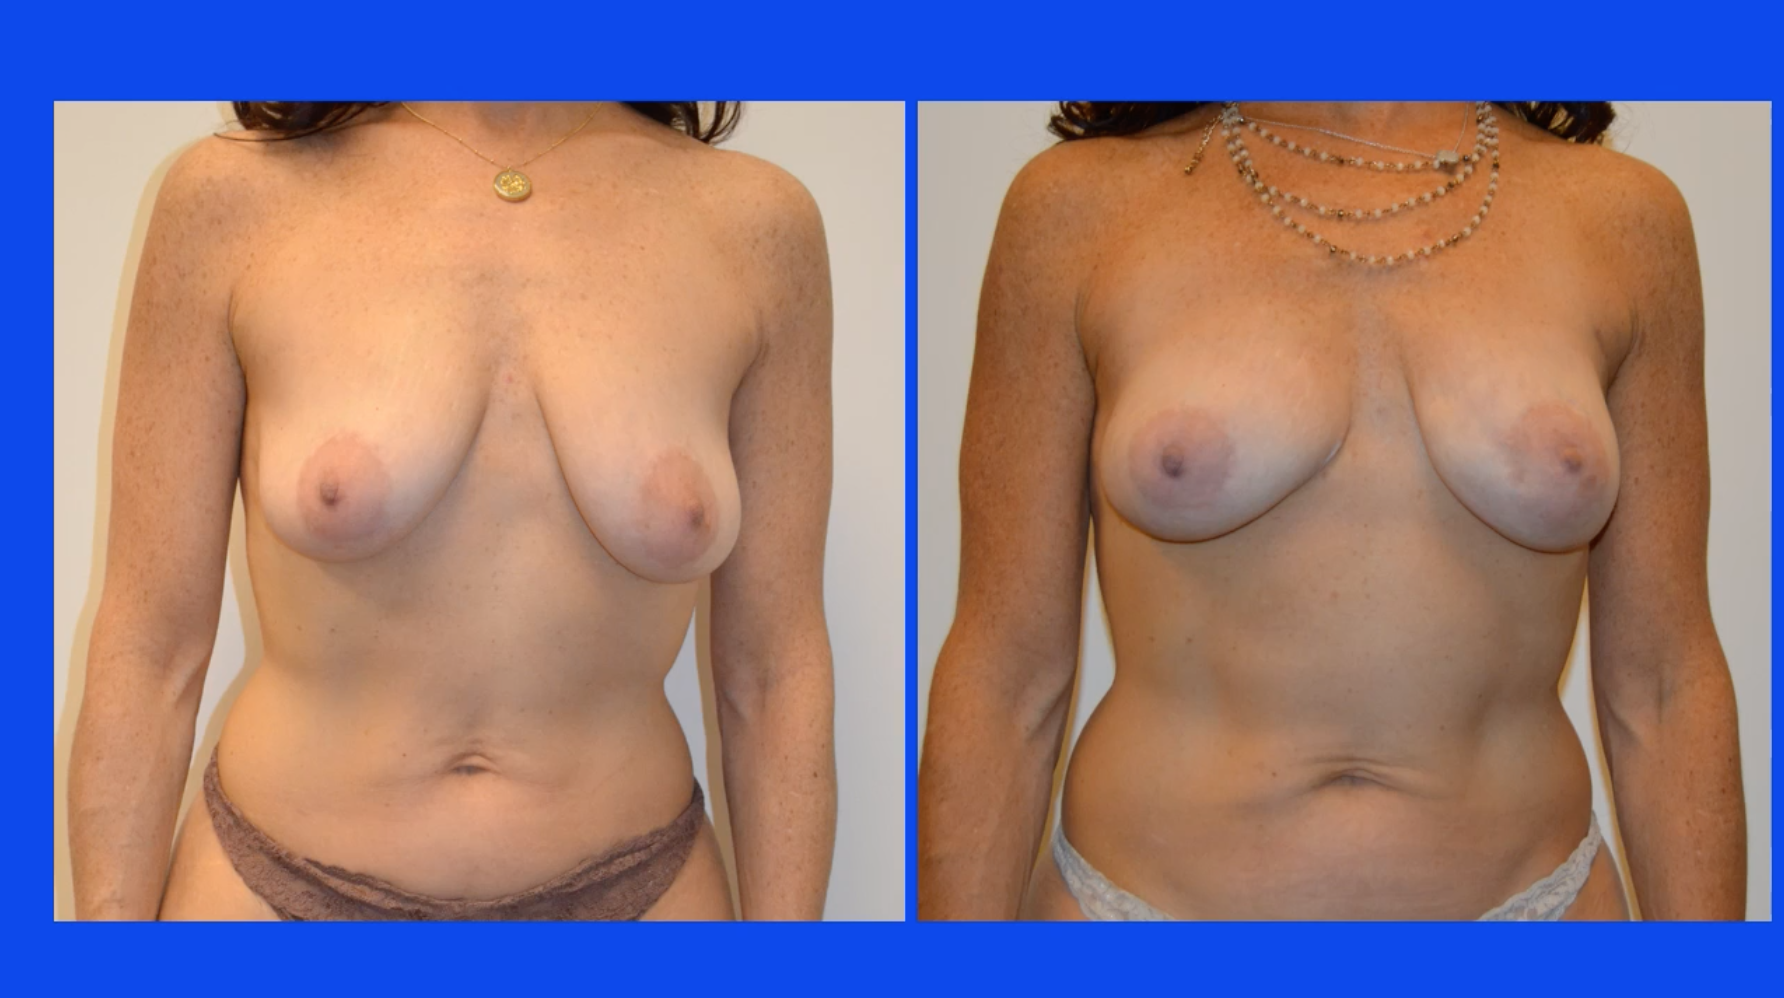
Patients who are candidates for this operation typically are thin patients requiring bilateral breast reconstruction like this BRCA-gene-mutation patient:
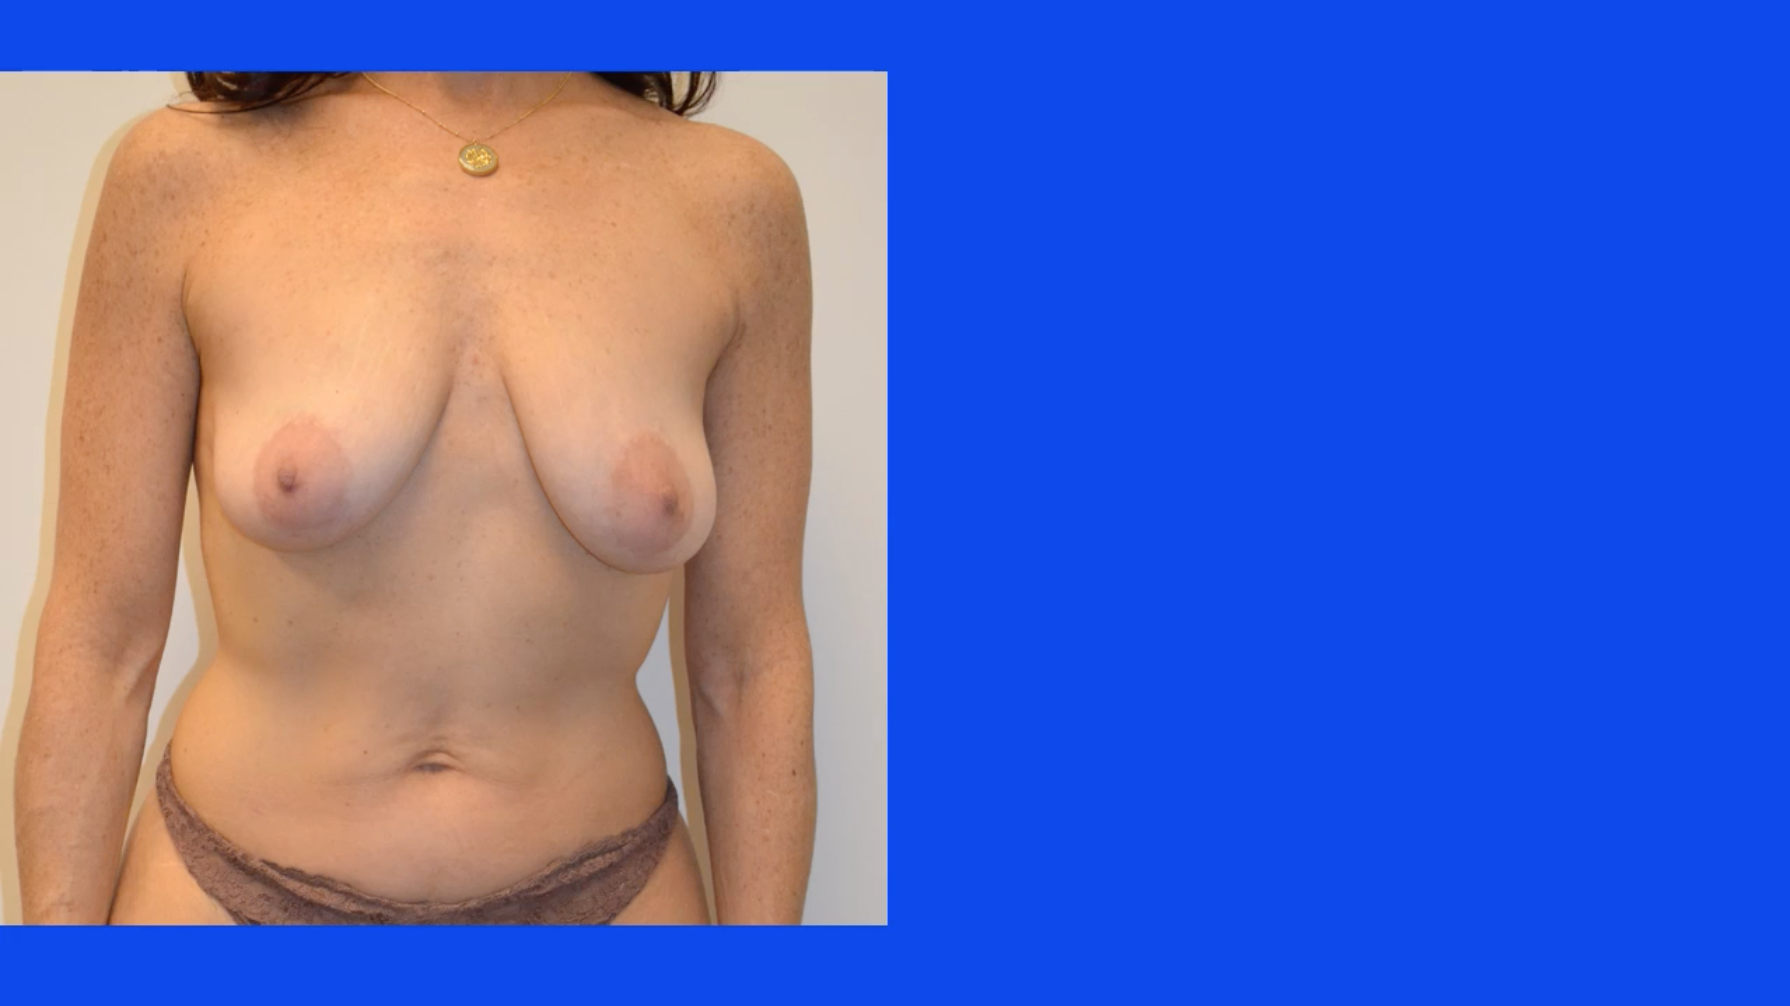
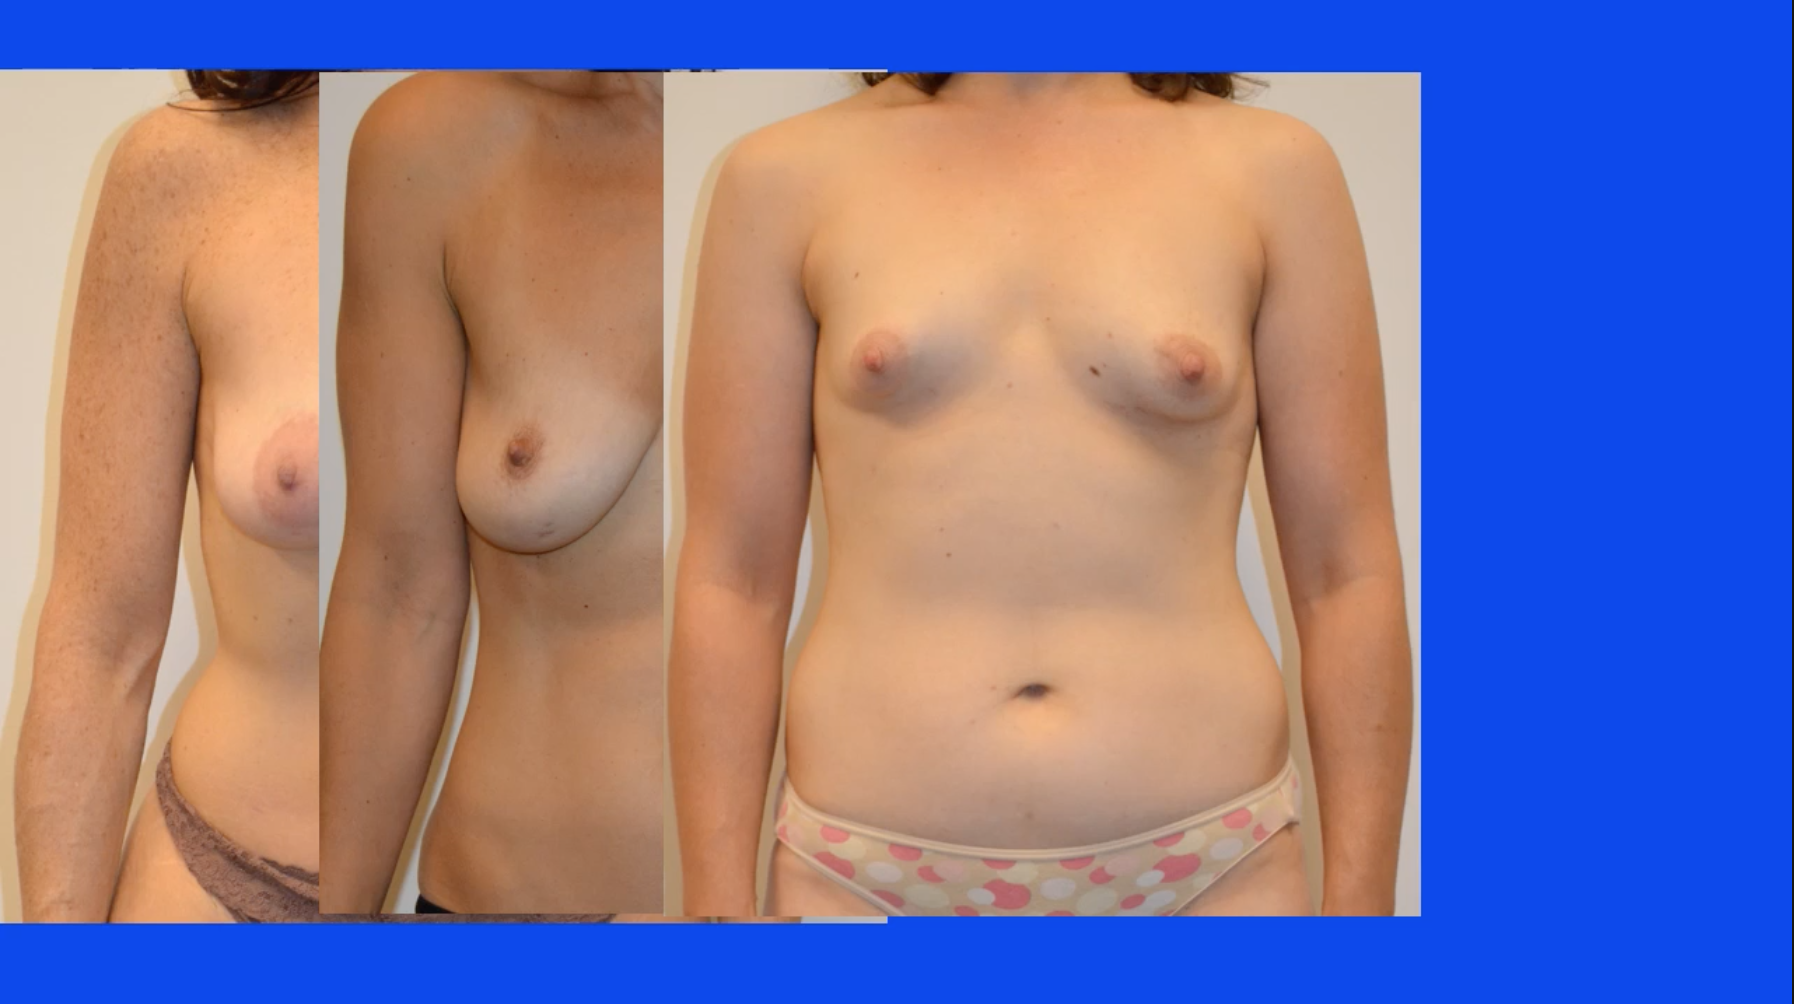
Here’s another example of a thin patient:
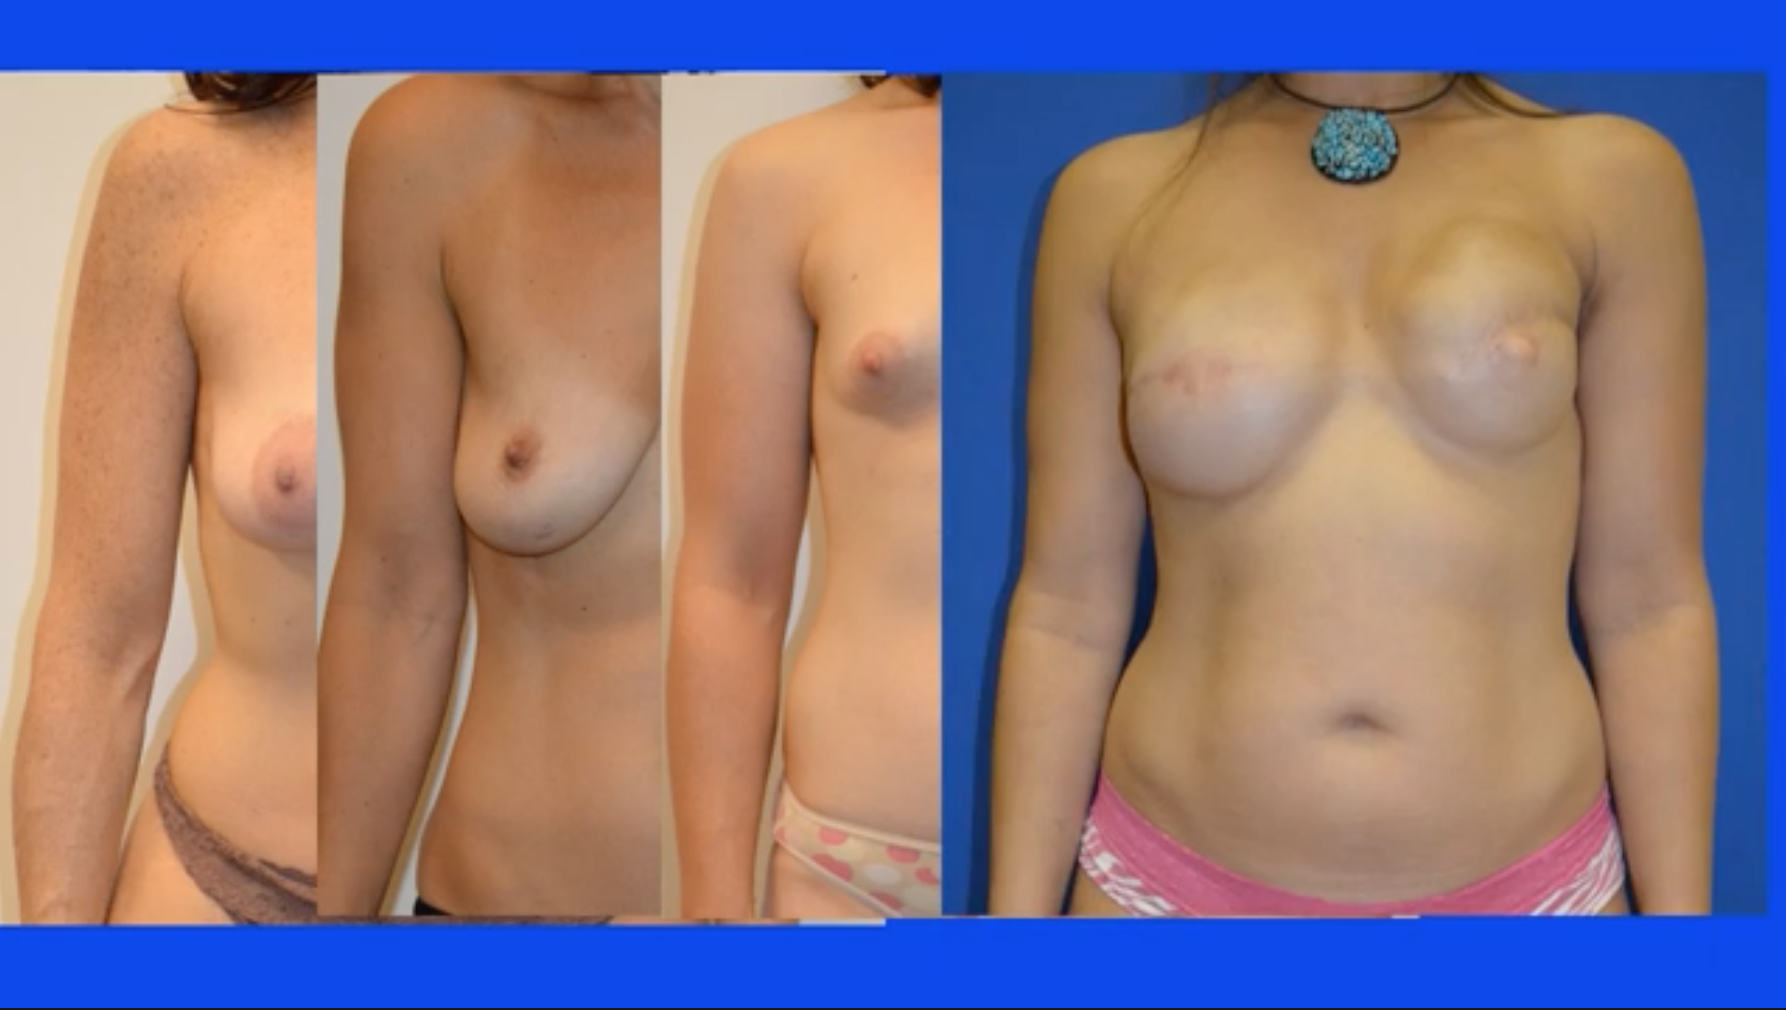
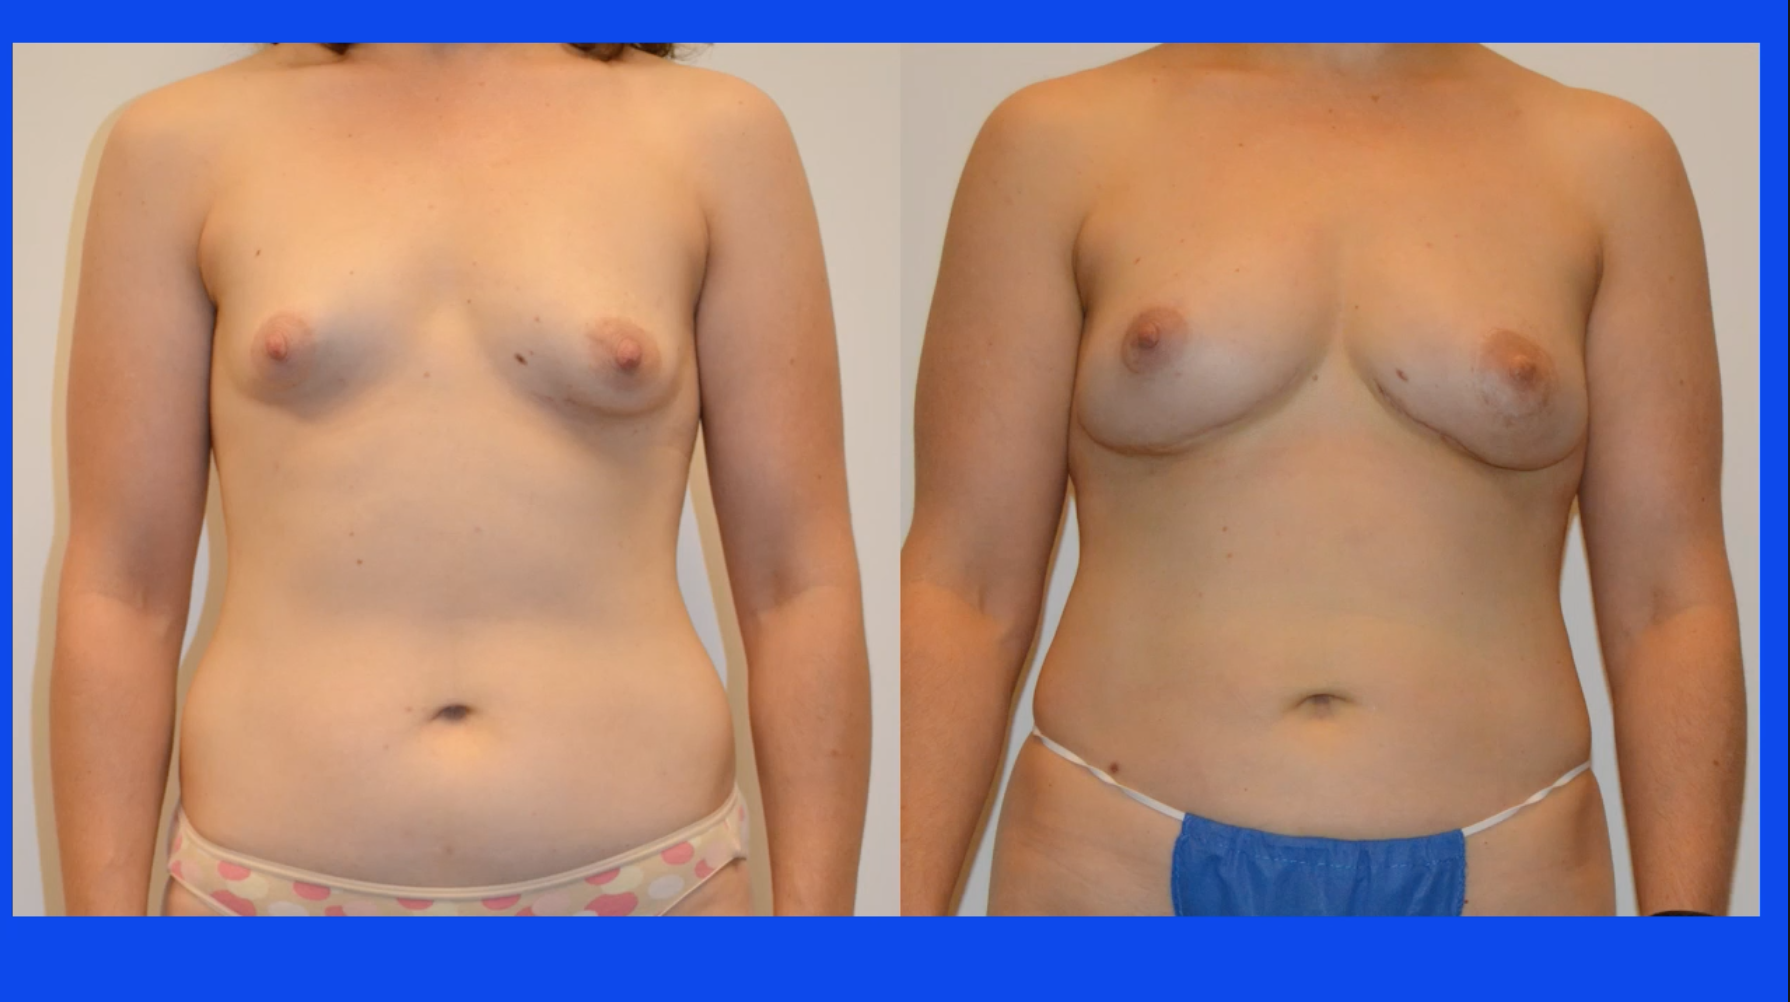
Here’s an example of a woman also with a BRCA gene mutation needing bilateral reconstruction not wanting to use her abdomen because she would prefer not to have to see the incision on the abdomen when she looked in the mirror:
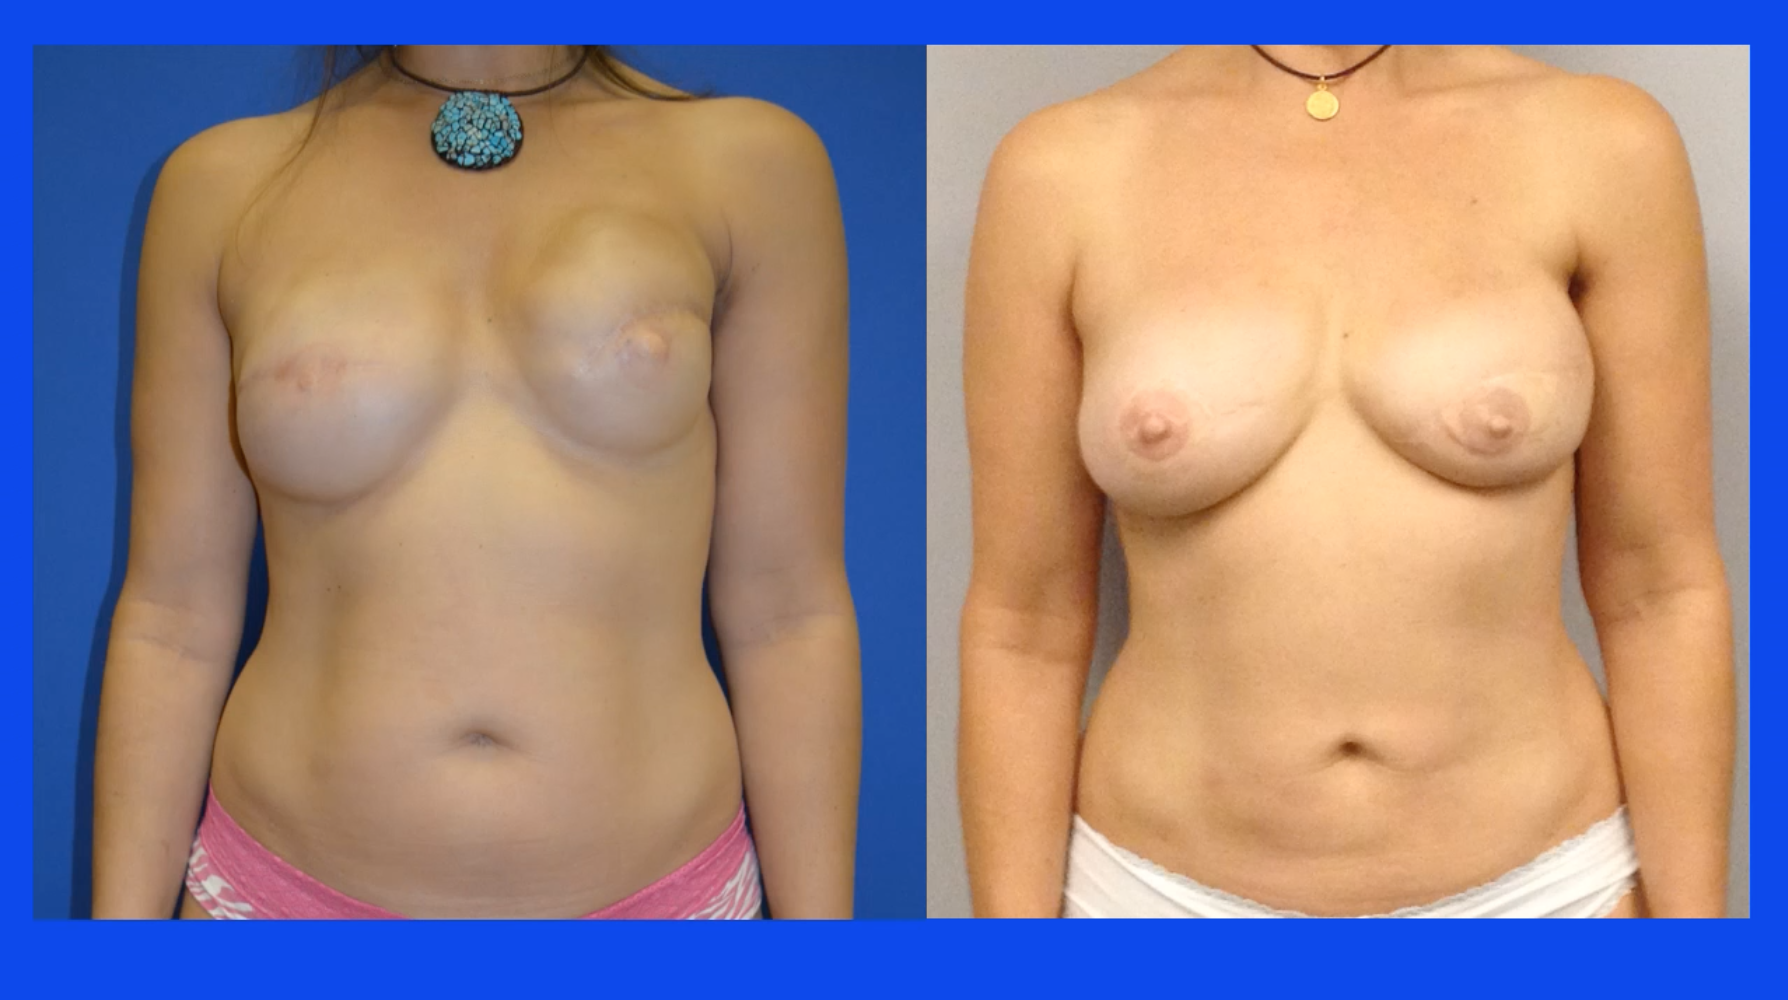
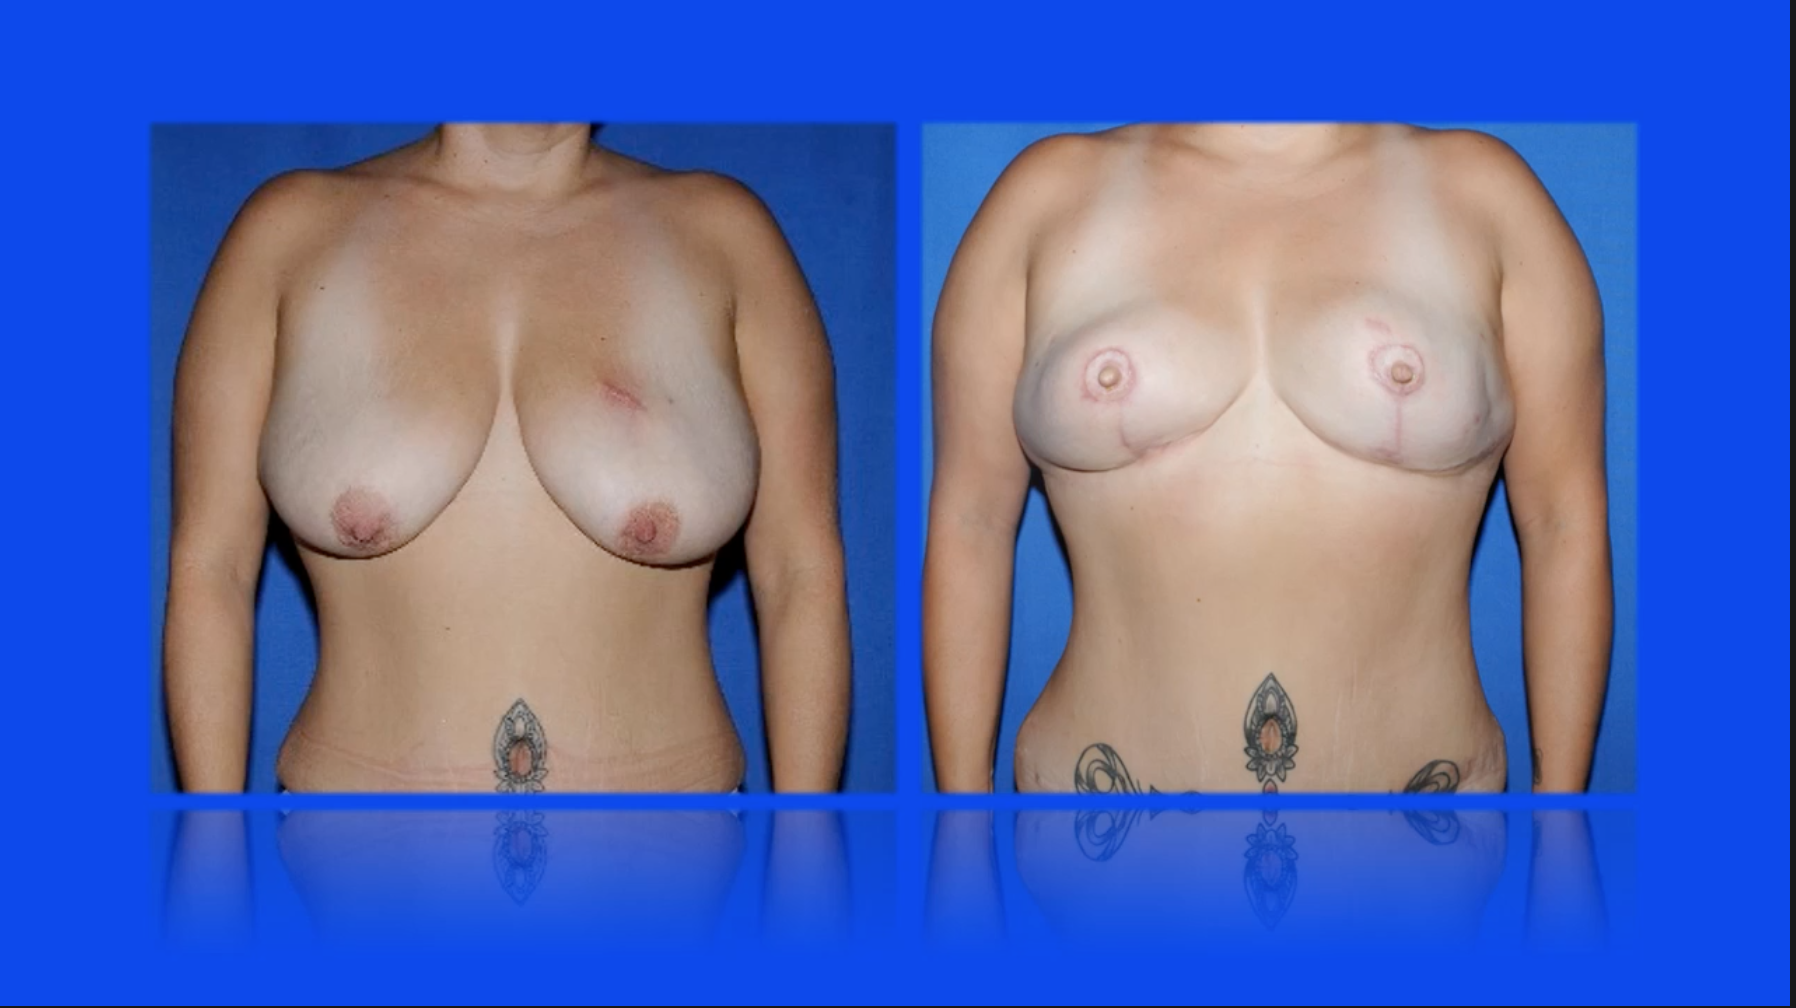
Here’s another example of a patient who had cancer and bilateral reconstruction with implants but, as you can see, the implants failed, so they needed to be replaced with their own body tissue:
So, patients, again, who are candidates, are patients who don’t want to sacrifice any muscle.
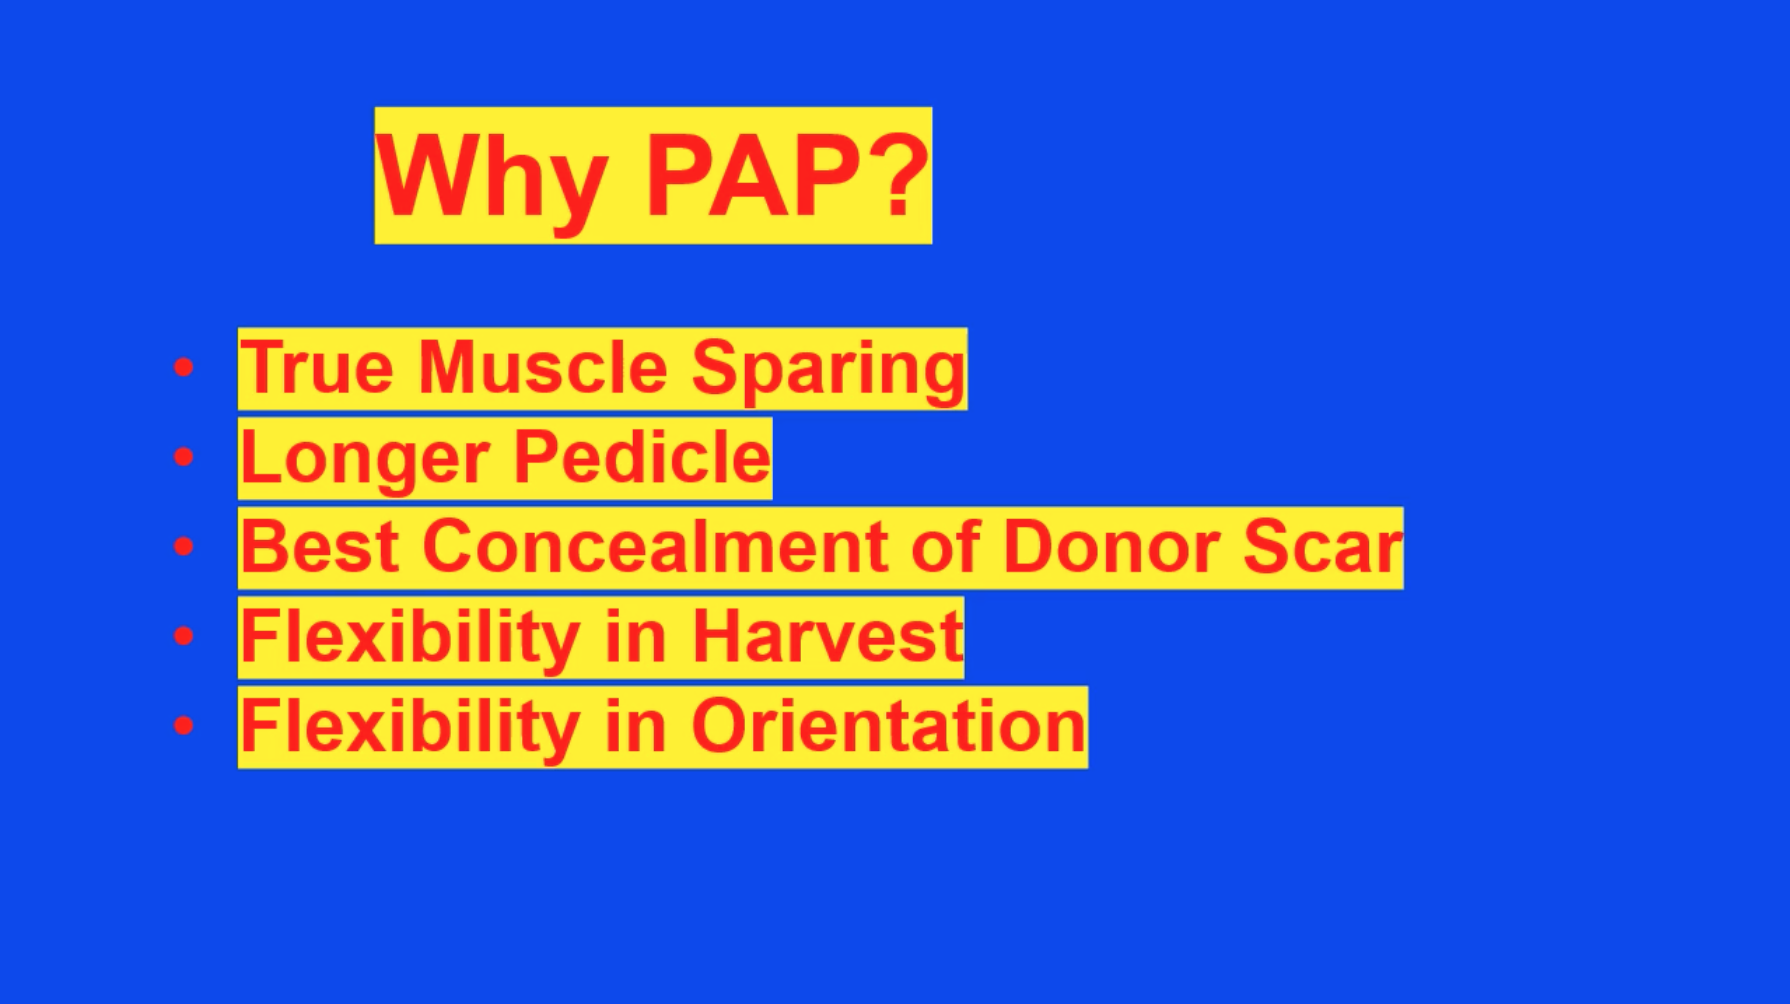
One of the advantages from a reconstructive point of view is that we get a longer pedicle, which is the blood vessel that supplies the tissue, making the inset in the chest easier. It’s very favorable in terms of concealment of the donor scar either within the buttock crease or in the back of the leg. We can harvest this flap in a transverse or vertical orientation, as I will discuss, and that gives us some flexibility for flap harvest and also for insetting.
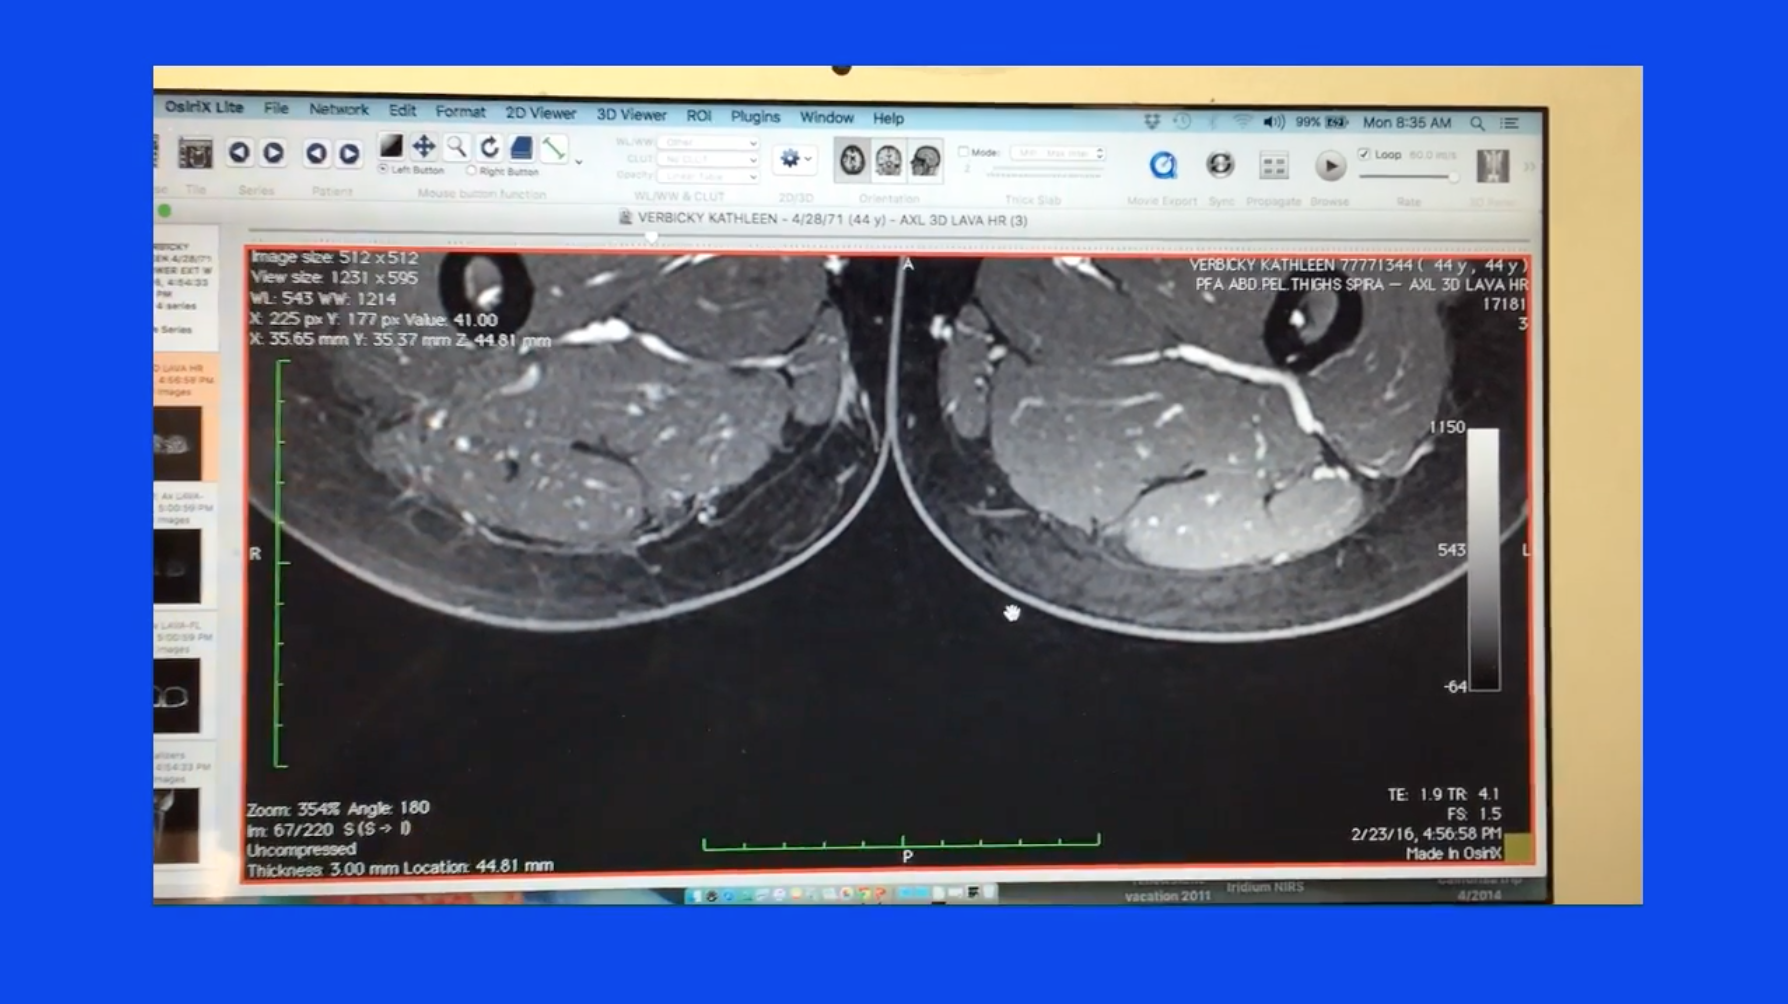
All patients undergoing this procedure undergo a preoperative MR angiogram, and this gives us a lot of information about where the blood vessels are and what tissue can be harvested favorably and easily.
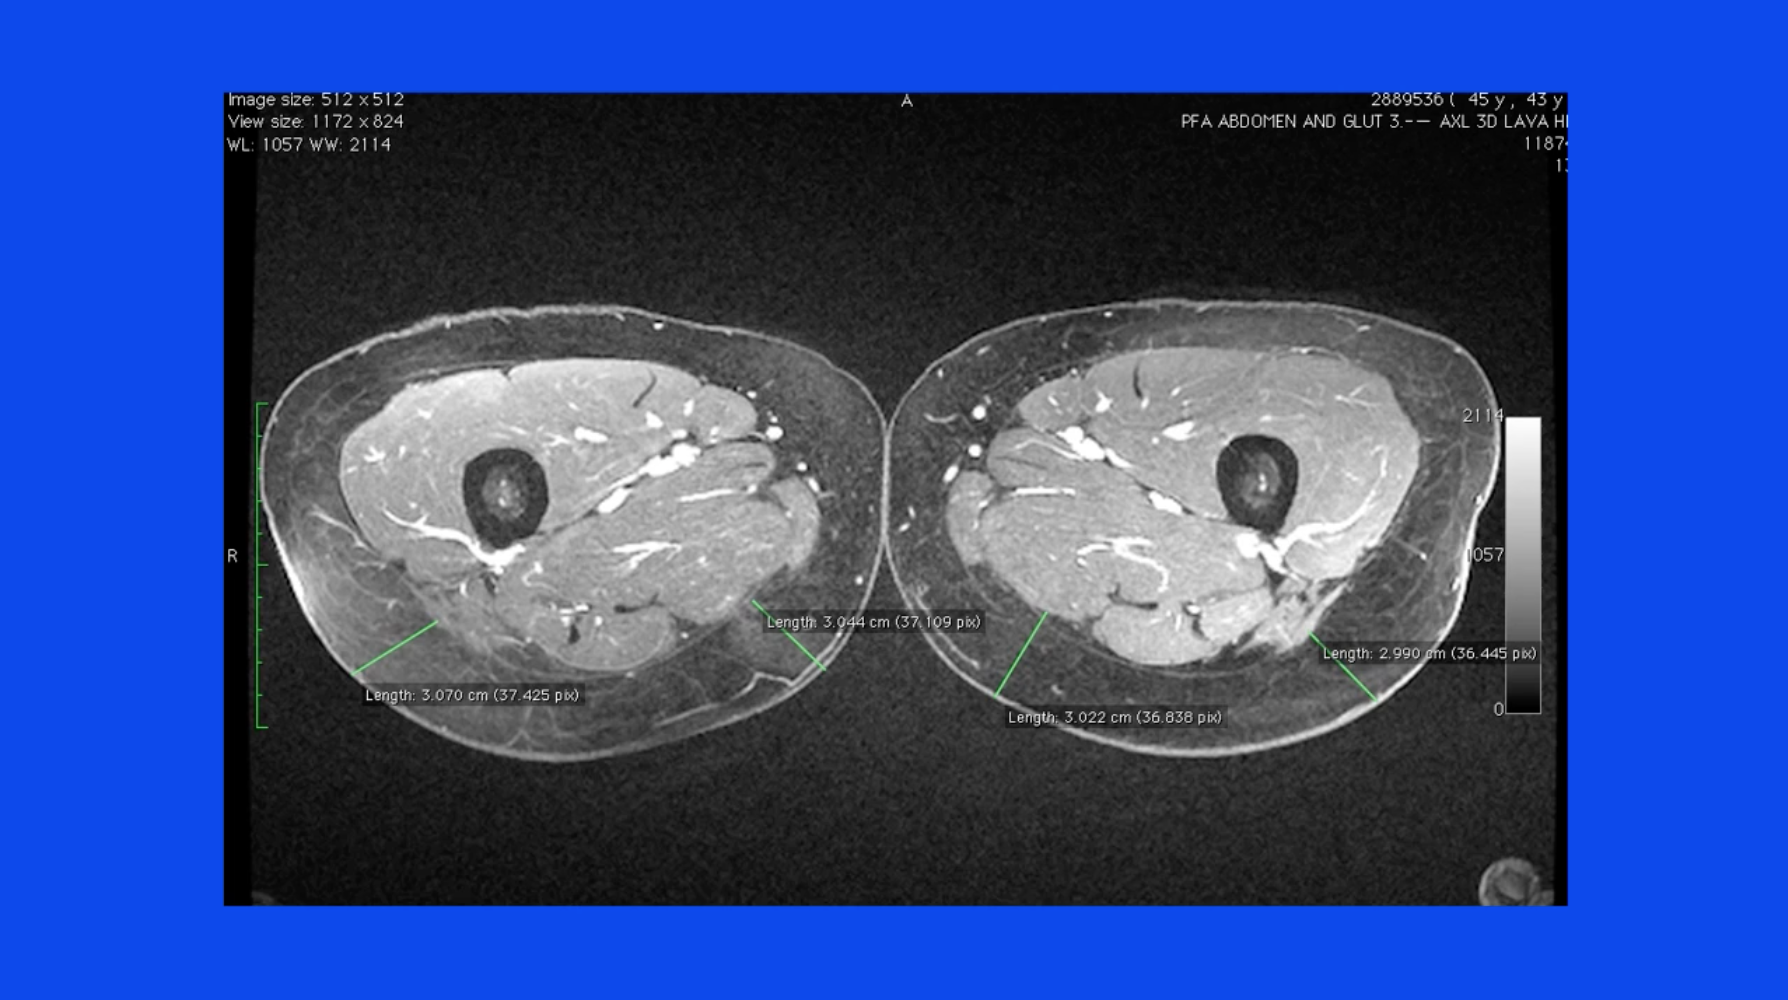
We can find the blood vessels perforating through the adductor magnus here, and we can see them coming out within the skin to supply the overlying skin and fat.
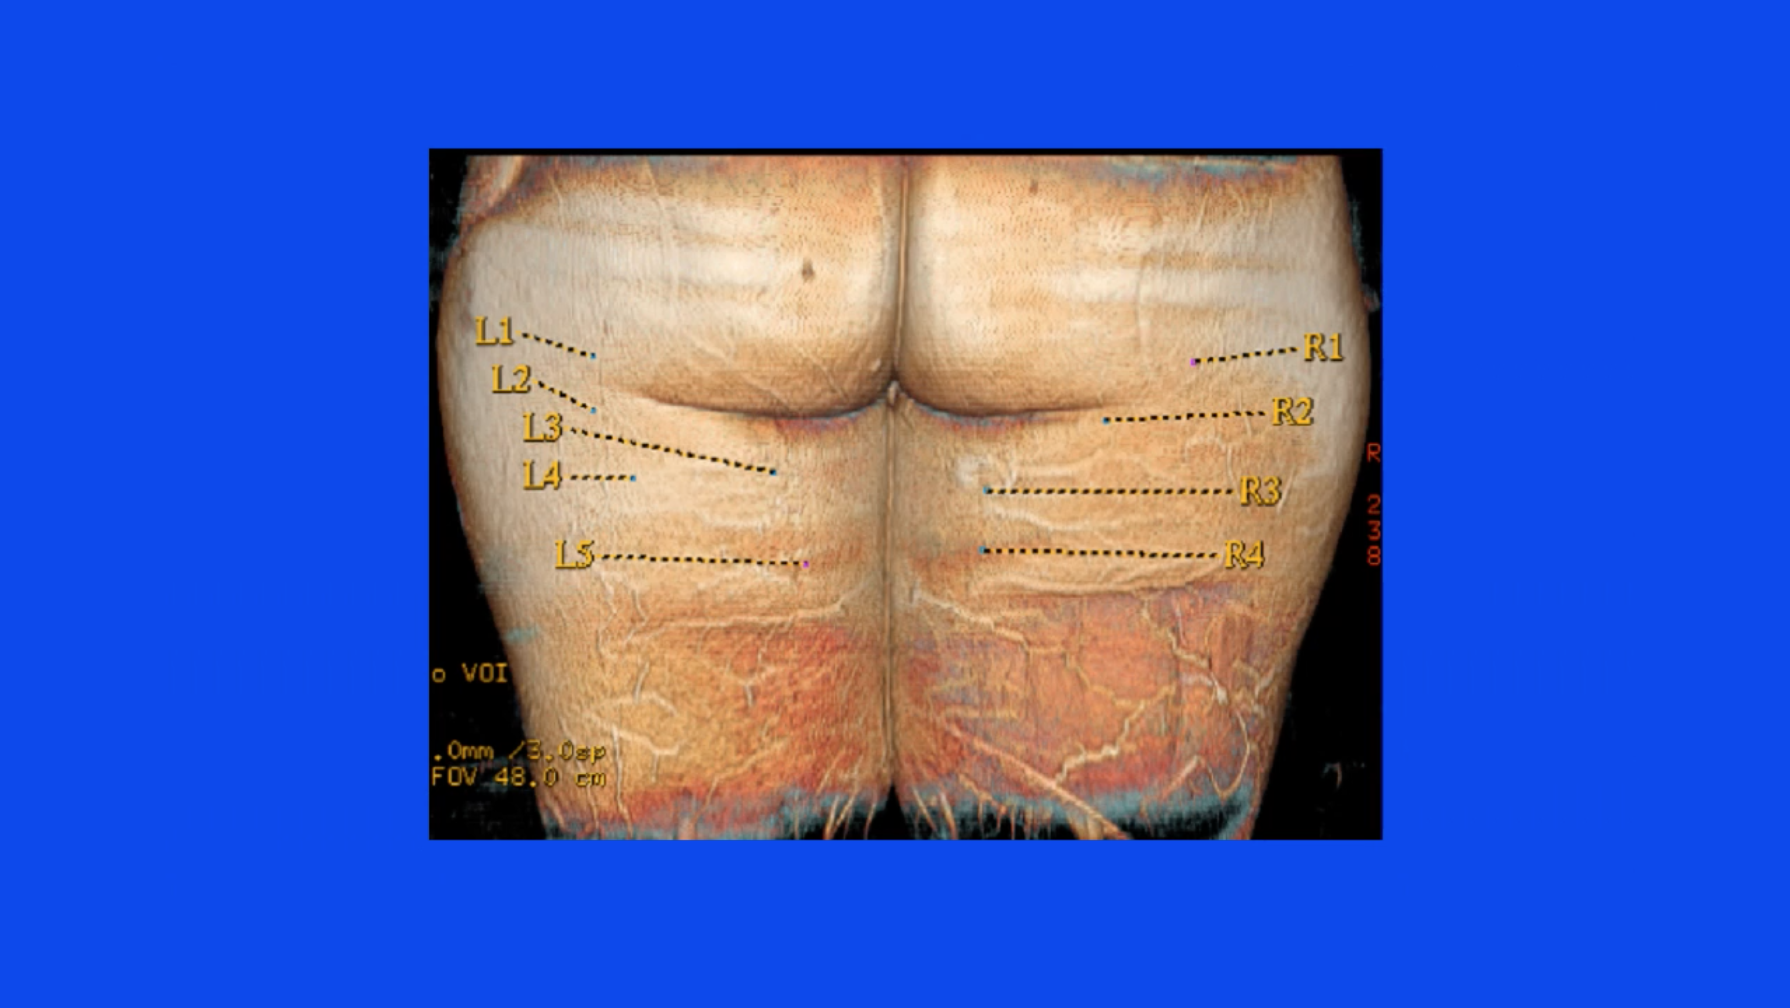
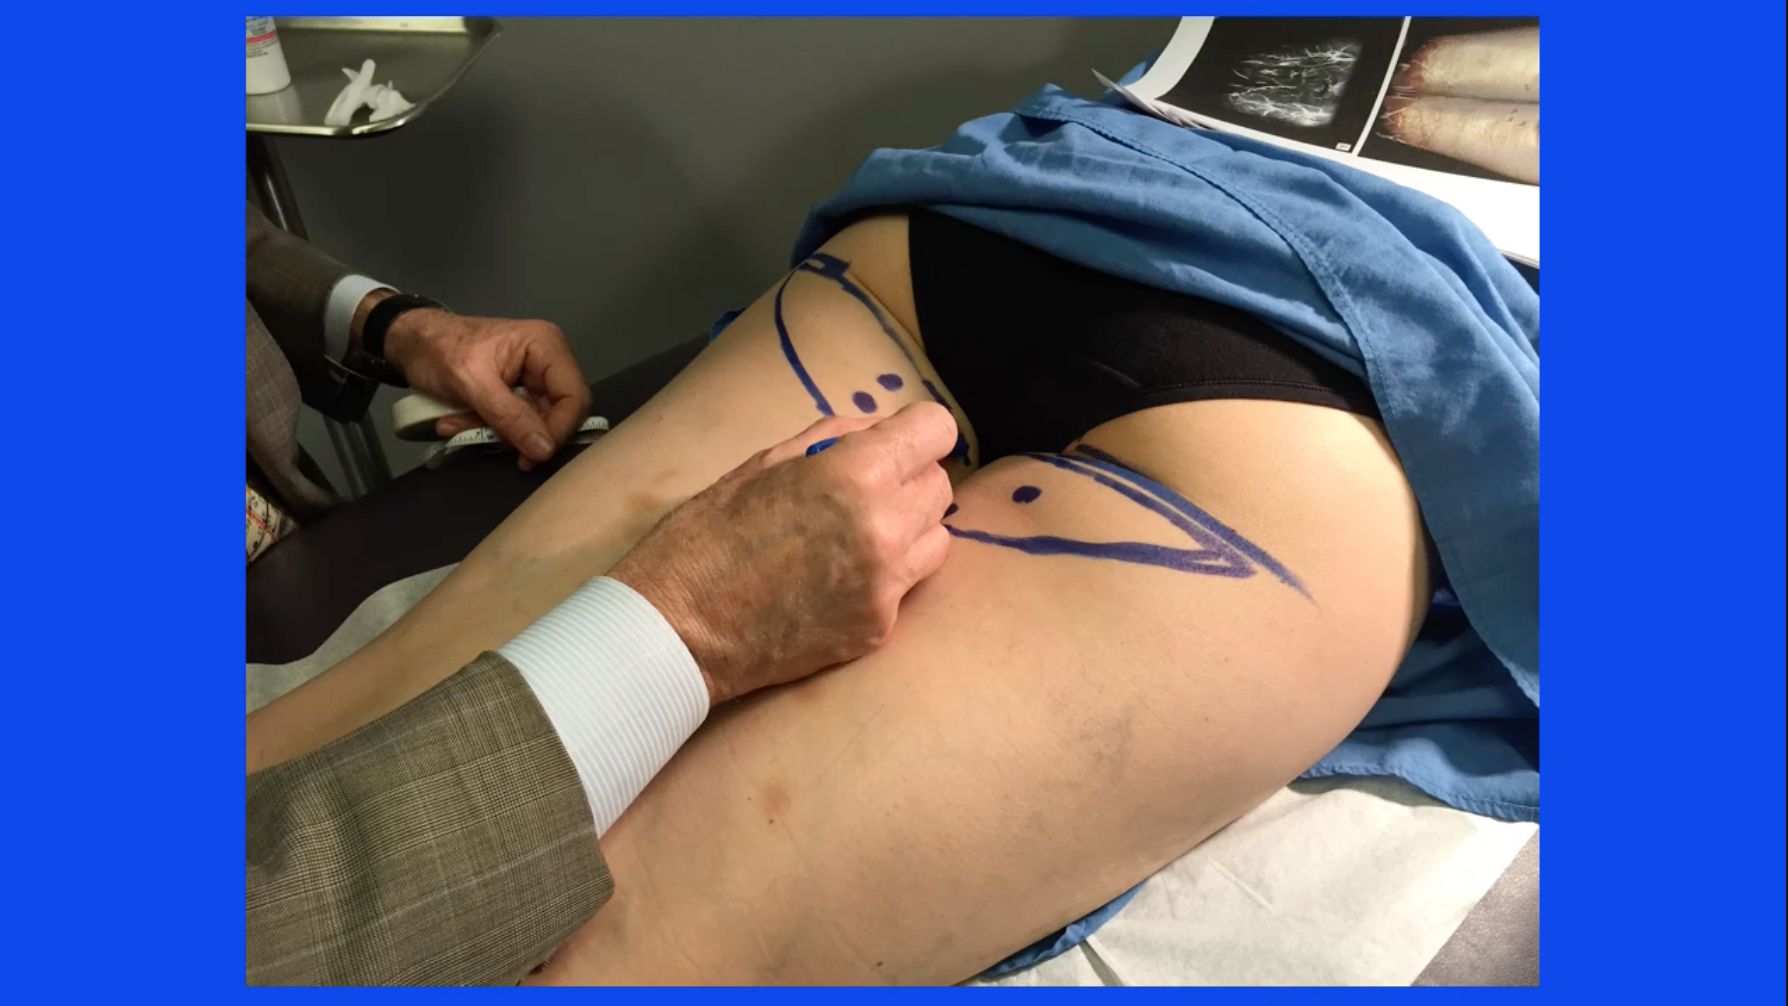
These blood vessels are then mapped with a 3D reconstruction and we find them on the patient the day before surgery and then mark the planned operation, knowing where the blood vessels are so that we can decide what skin and fat can be harvested safely to minimize any issues with the donor site.
The patient is prepared with the legs completely sterilized and draped into the field along with the arms so that these appendages can be manipulated intraoperatively for more maneuverability in the operating room.
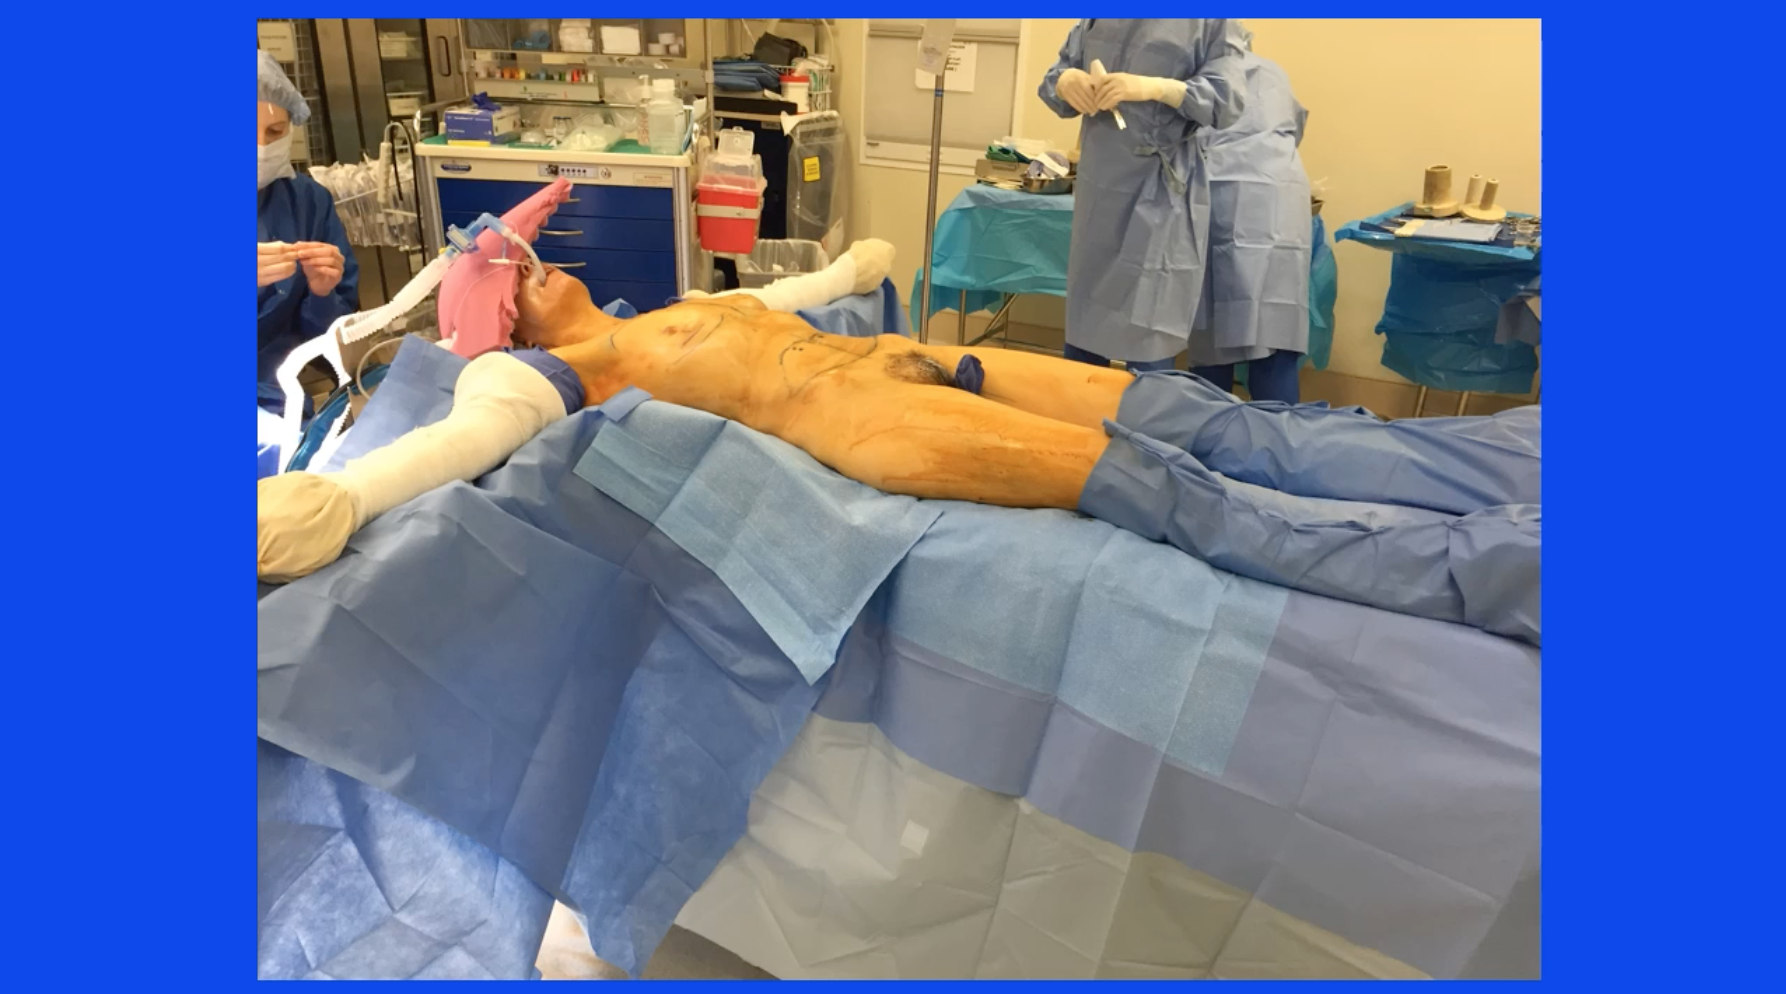
Typically, the operation will start with the patient in the supine position and the leg abducted.
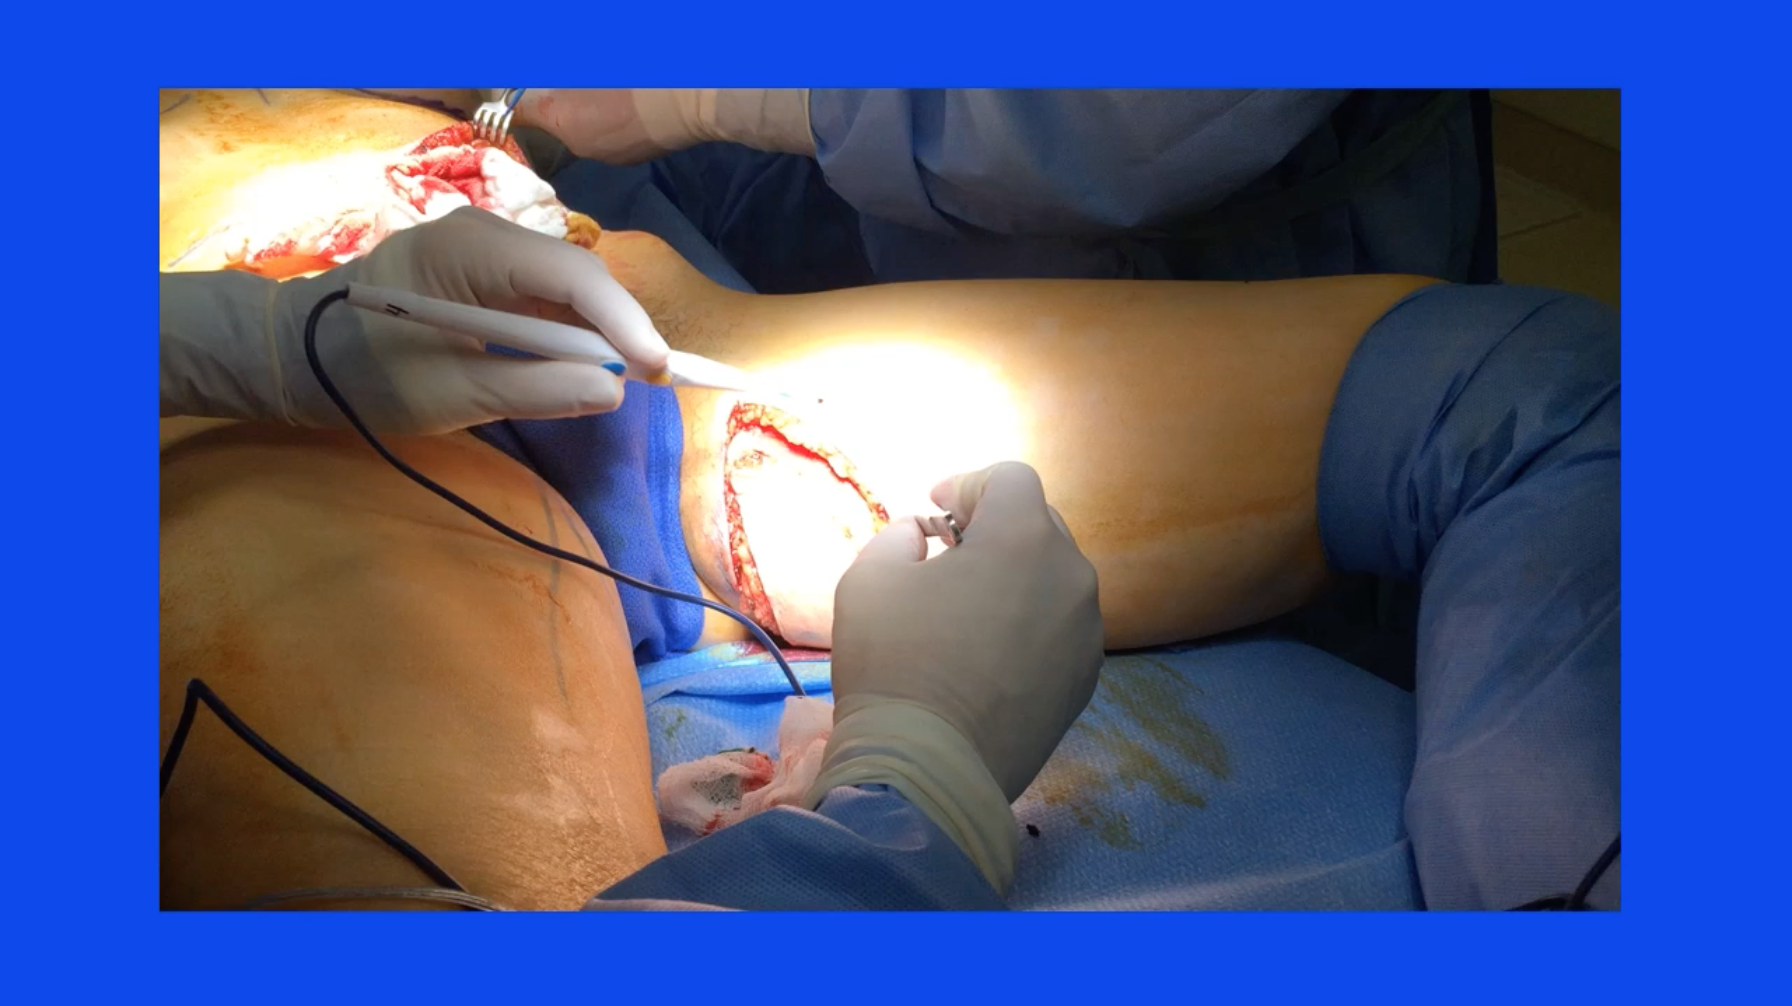
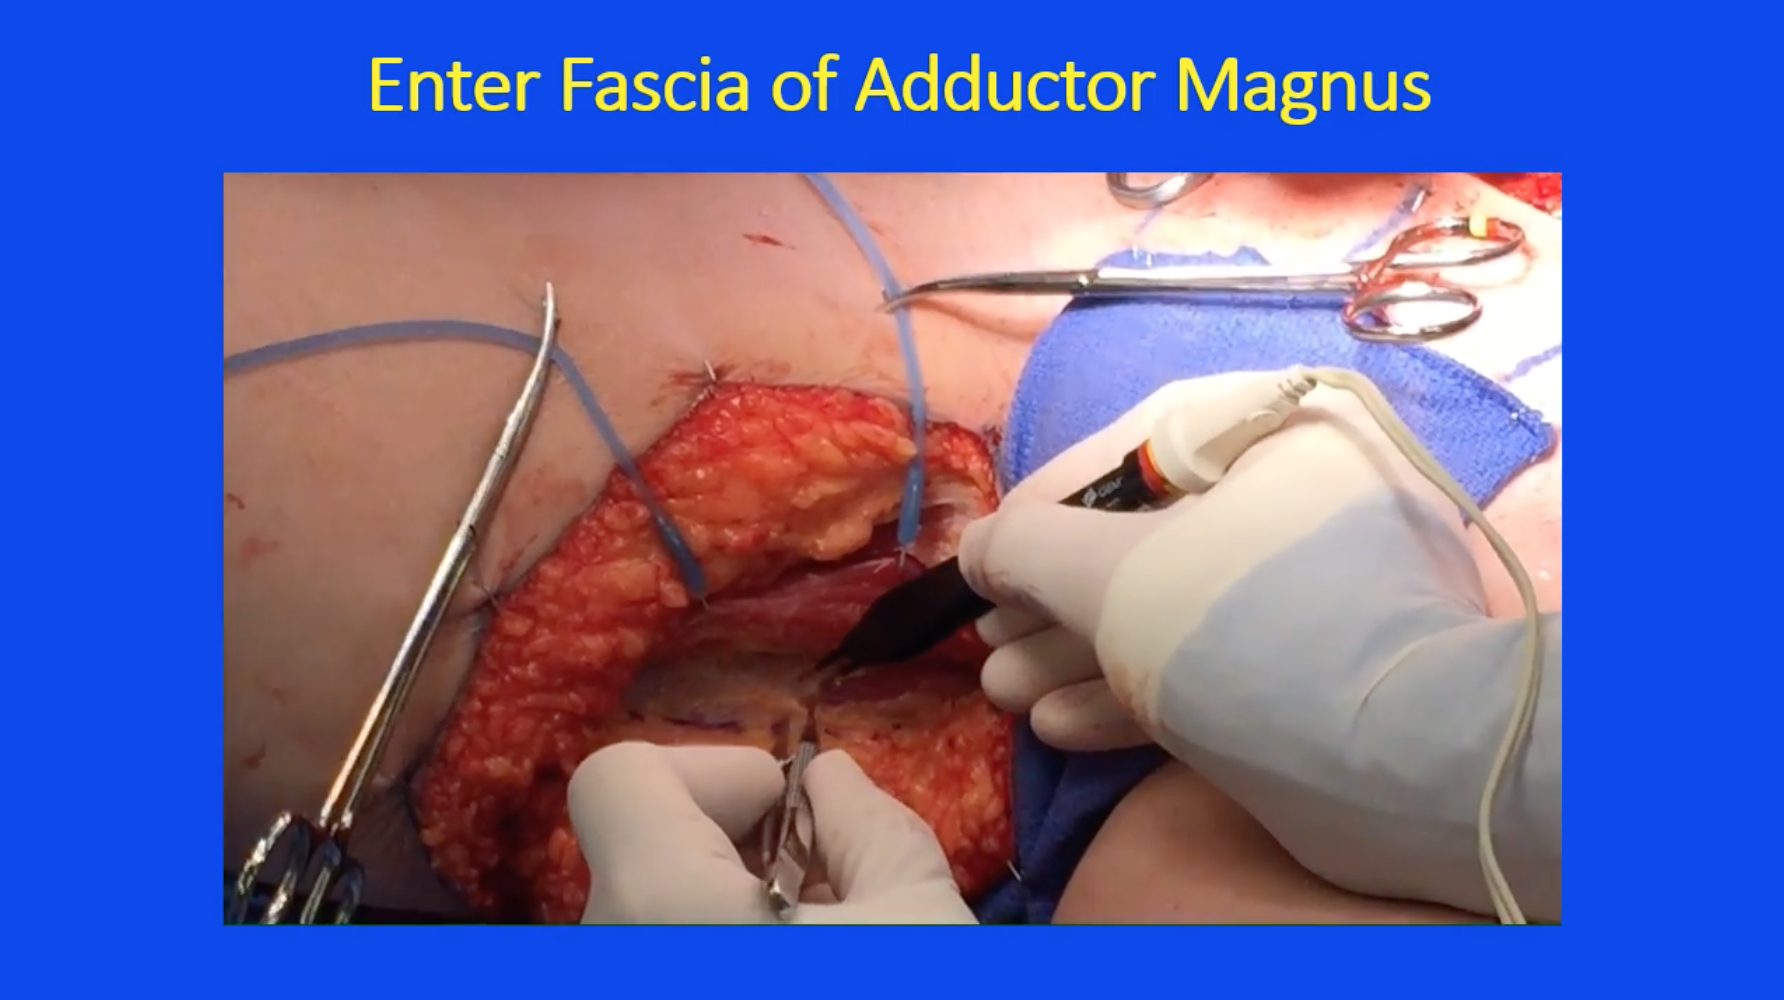
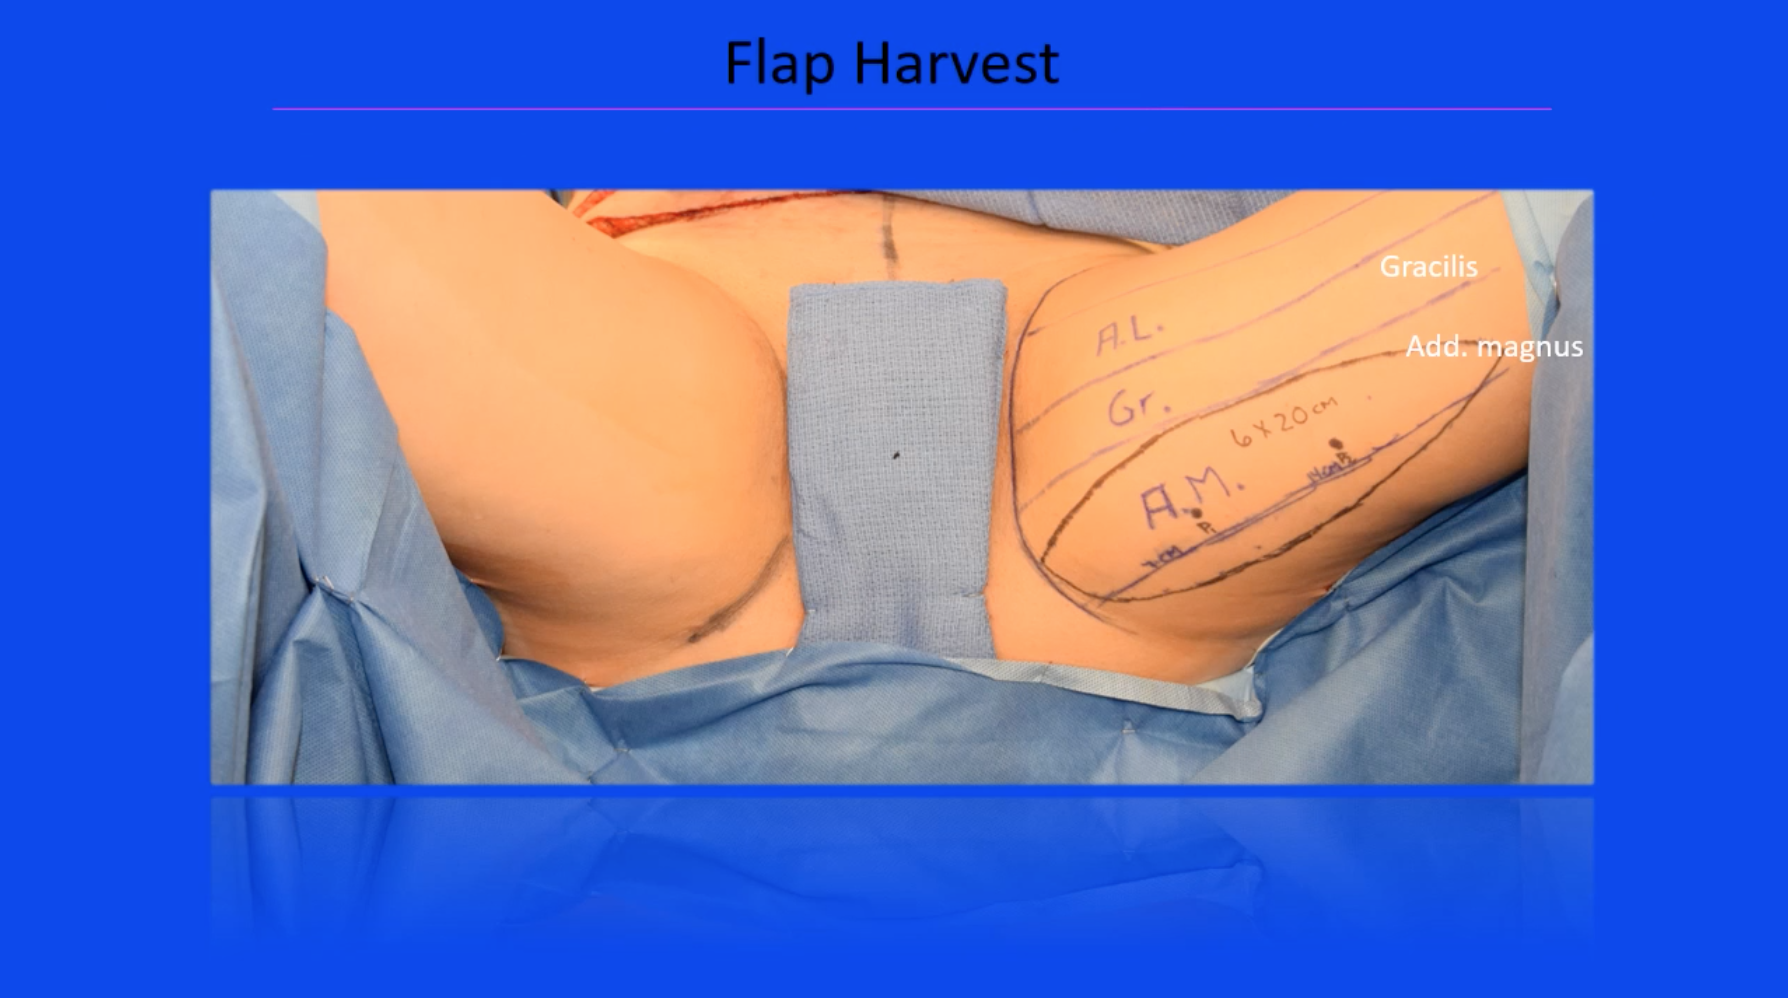
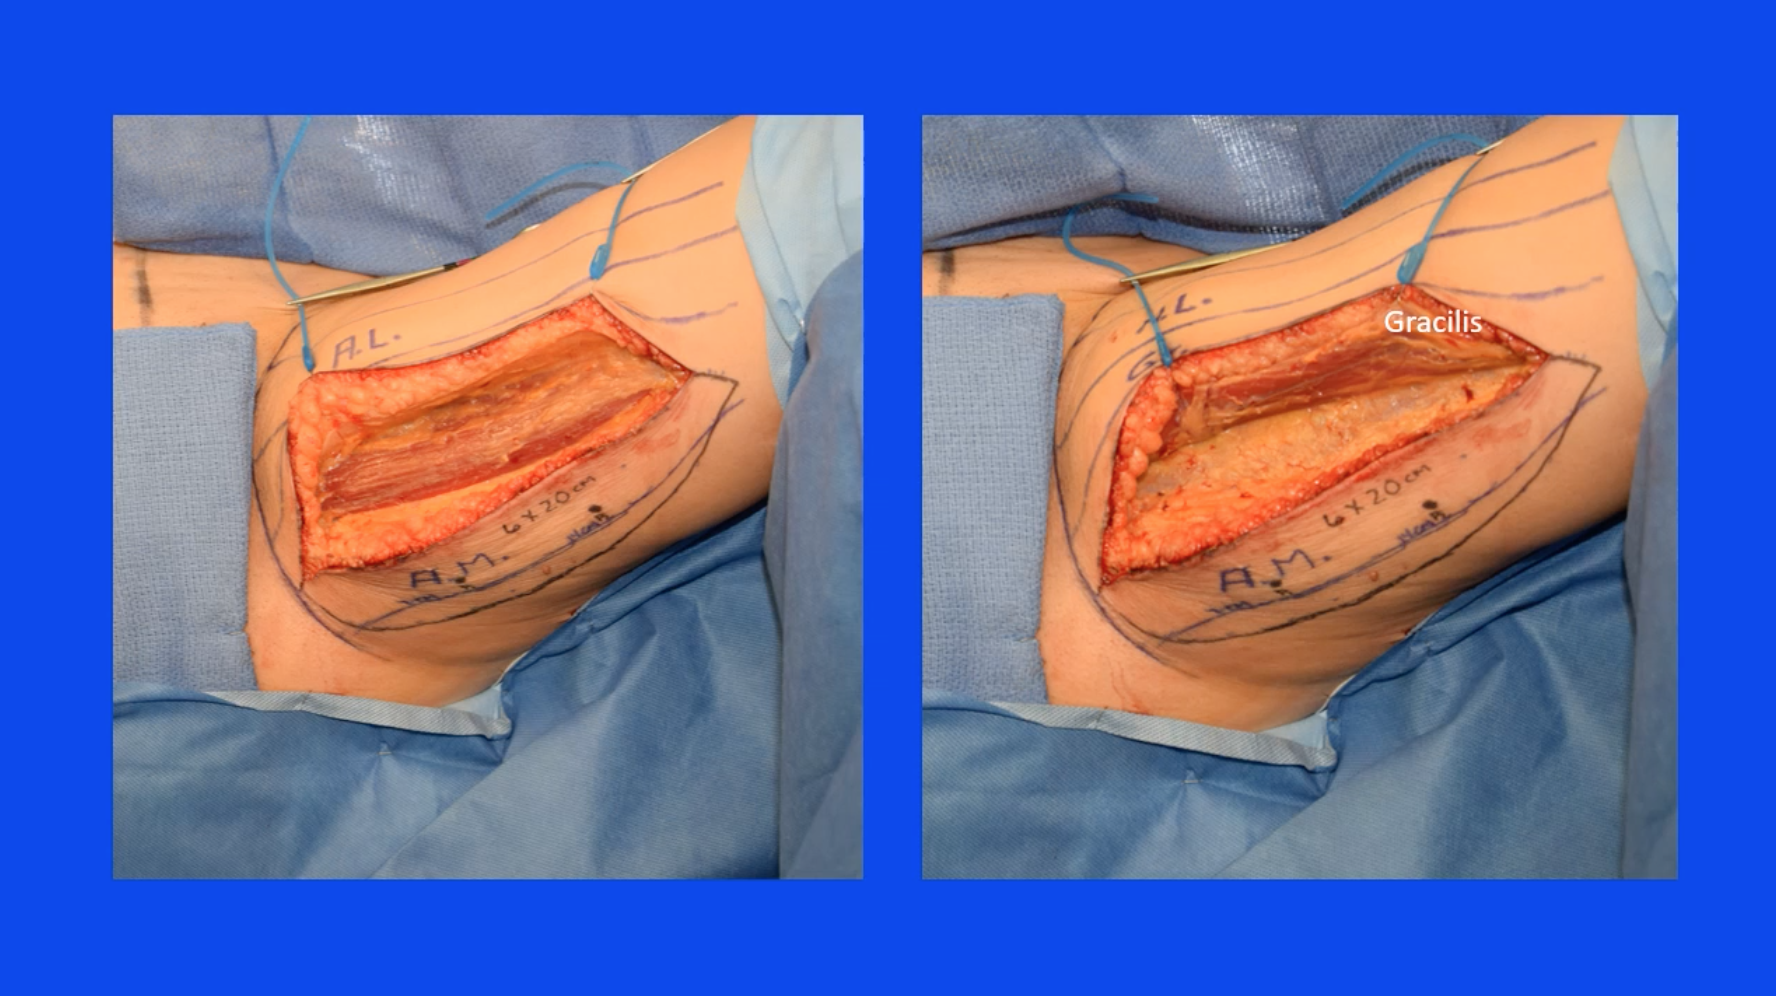
We find our landmarks and here we’re finding the adductor longus tendon, and then we incise down to the gracilis muscle. Once we identify the gracilis, we can then continue down and find the adductor magnus, and these blue dots here represent the perforators that we will be looking for once we elevate the skin and fat off of the two anterior muscles, the adductor longus and the gracilis. At that point, we will encounter the fascial covering of the adductor magnus. We can incise that fascia and begin looking for the perforators. Here we are identifying the posterior edge of the gracilis muscle and elevating the flap off of the gracilis.
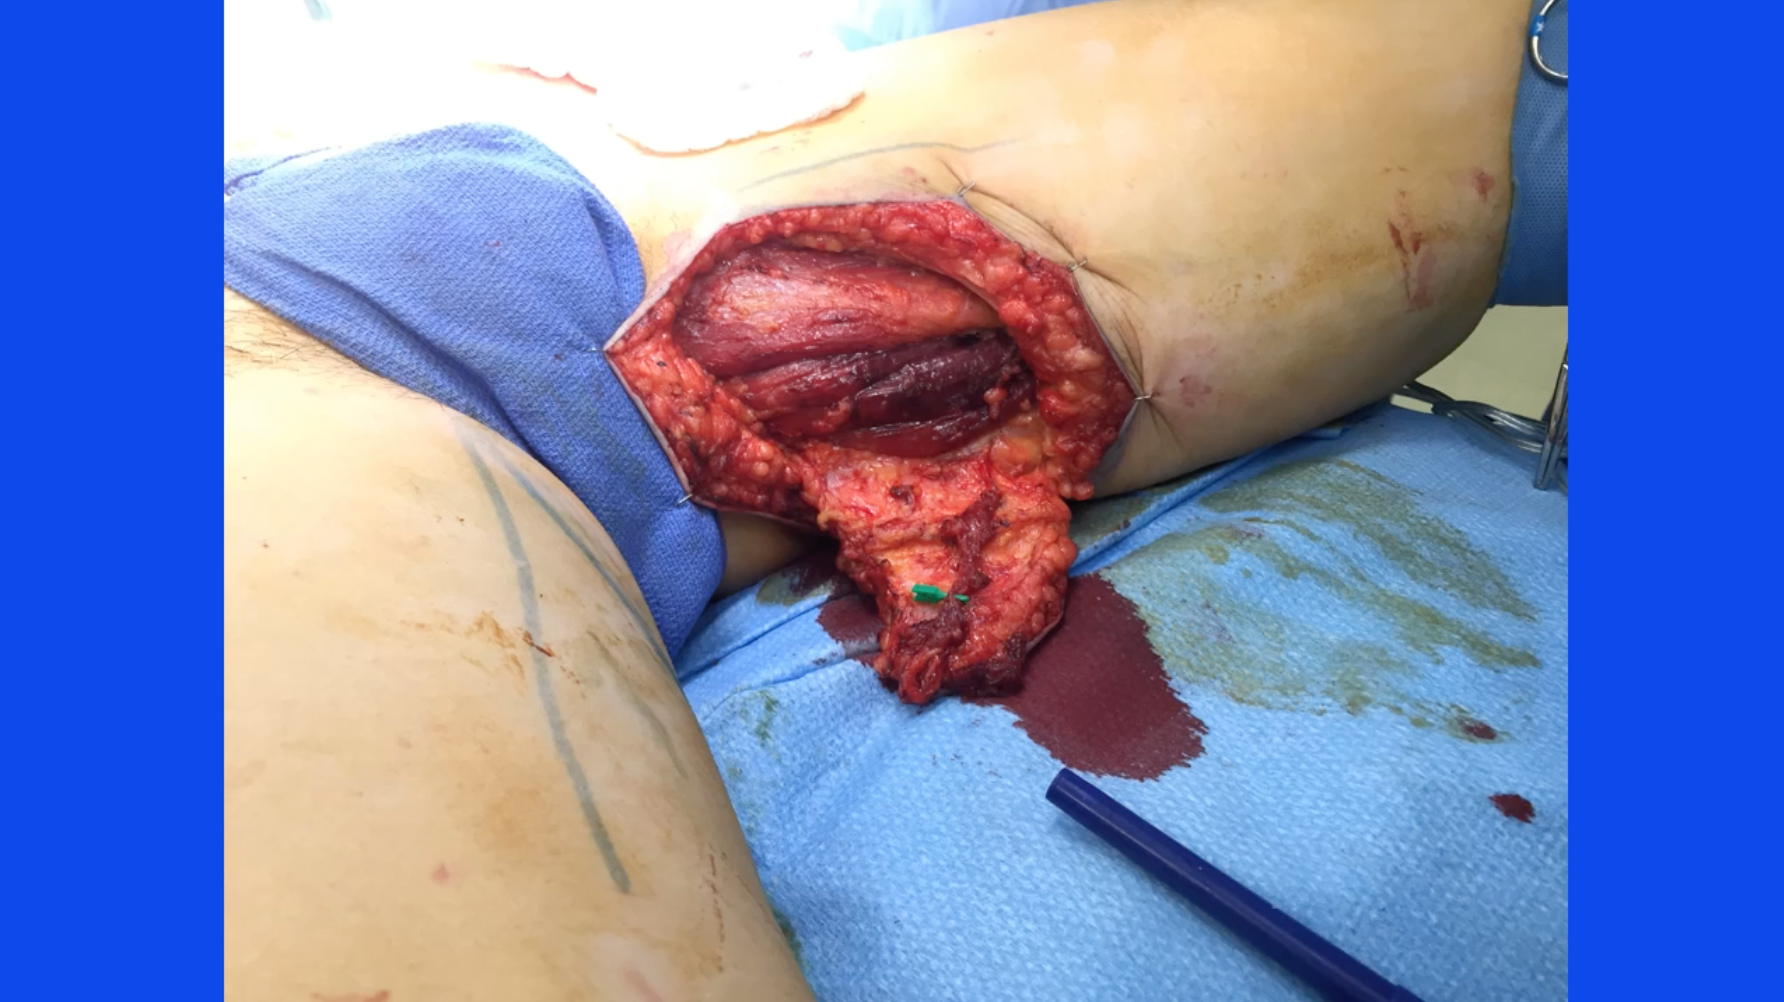
This is an example of harvesting two flaps simultaneously or a bilateral harvest, and you can see that we have elevated the skin and fat beyond the posterior edge of the gracilis and we’re now at the level of the adductor magnus where we can begin our search for the perforators.
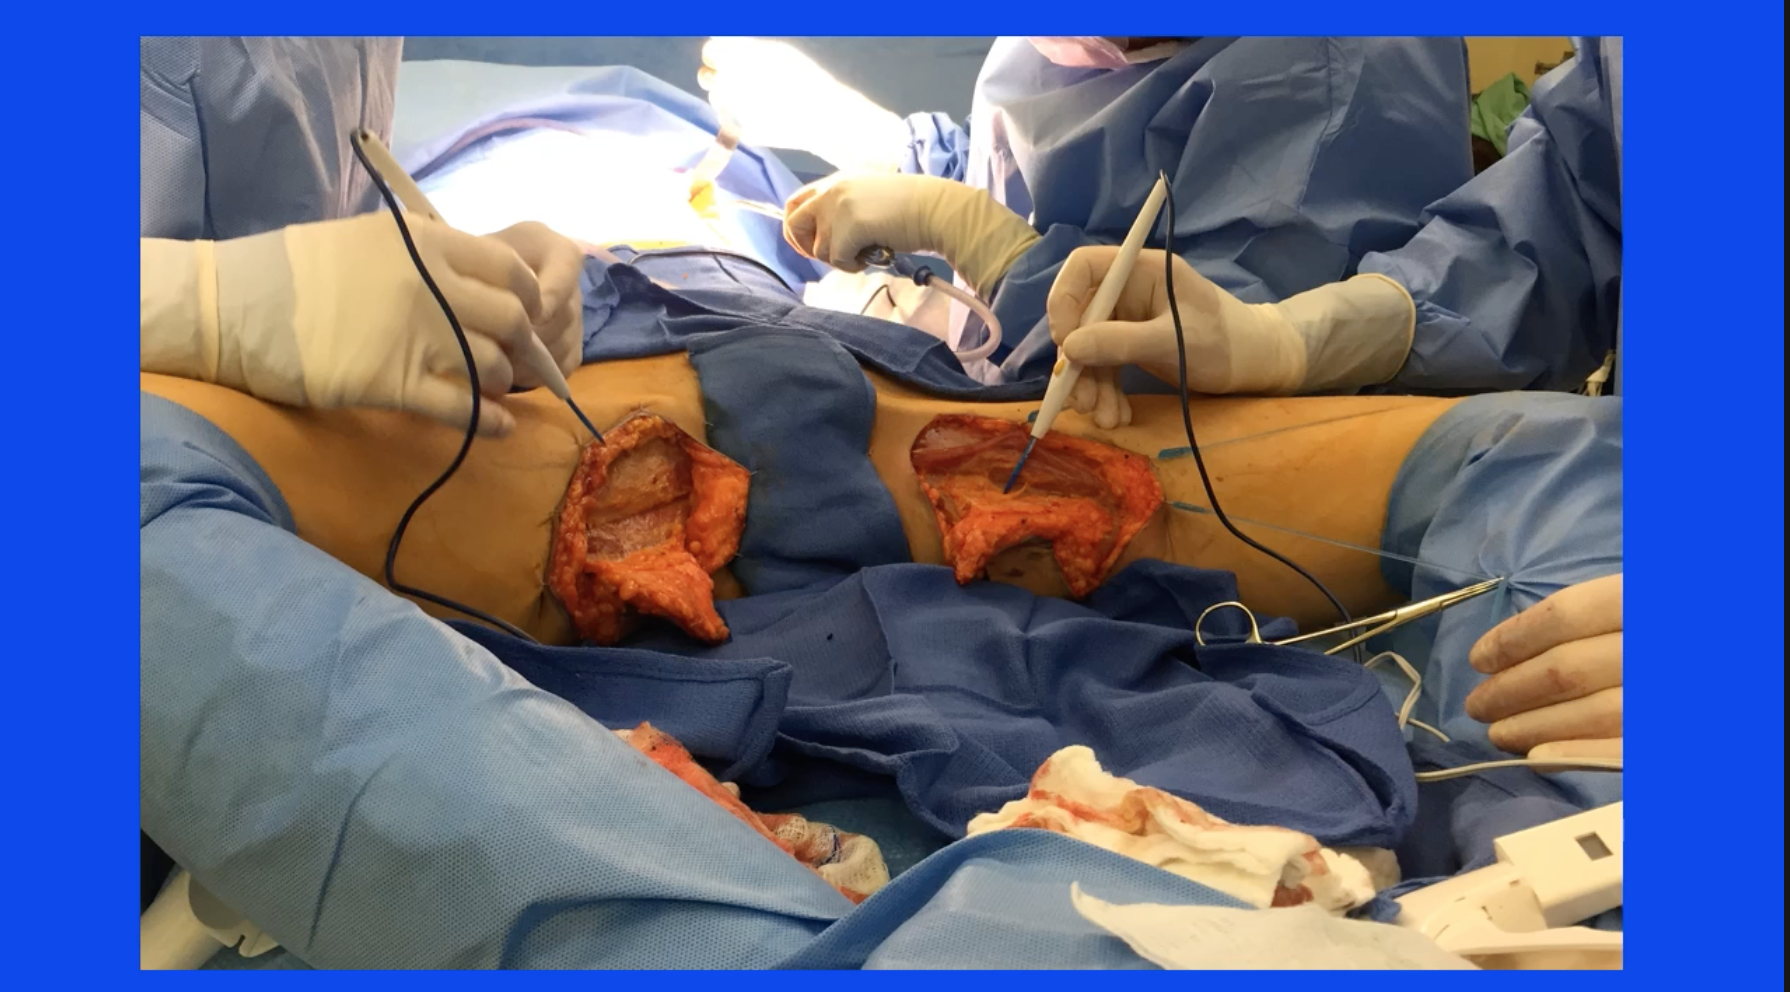
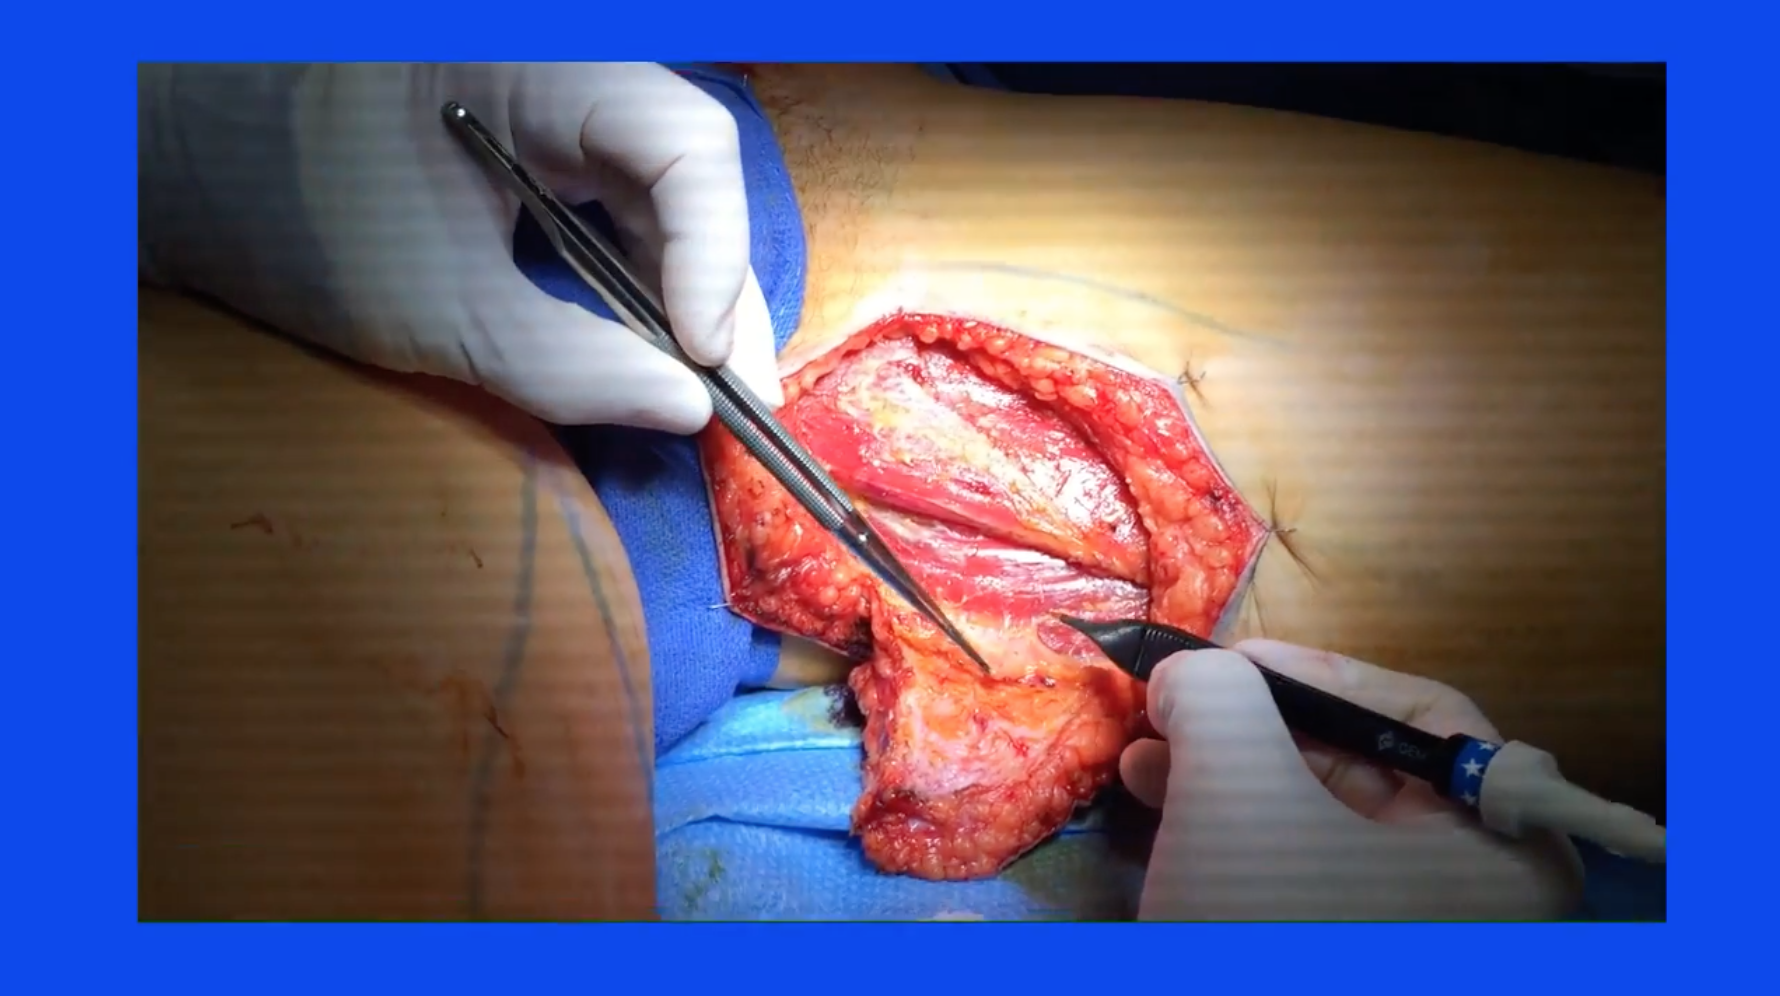
A key step in this procedure at this point is to, again, identify the posterior edge of the gracilis and then incise the thick fascial covering of the adductor magnus, and you can see as we do this the muscle belly of the adductor becomes very obvious and is delivered into the surgical field.
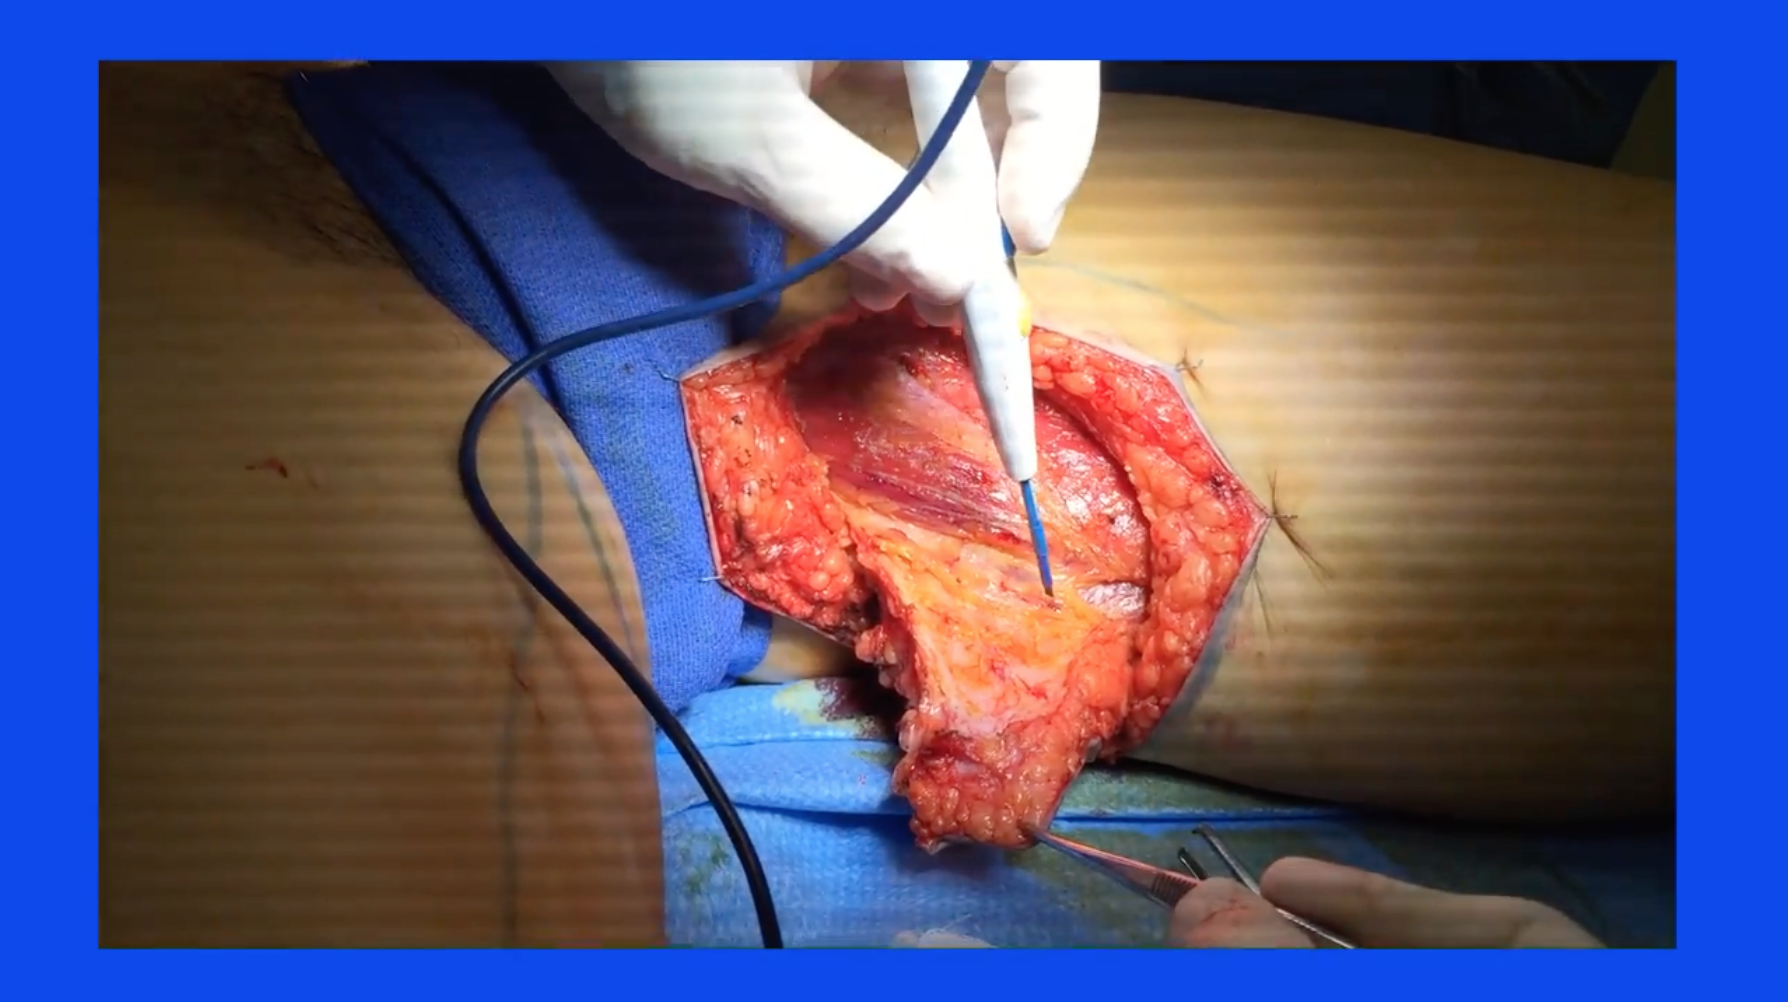
We know that the vessels will perforate through the magnus, so at this point we can begin our search for the appropriate perforator. On the patient’s right-hand side, this is the right leg with the knee off to the left of your screen and we are, again, incising the fascial covering of the magnus, this time with a bipolar electric cautery as opposed to the unipolar in the last slide. The key is to find that fascia, incise it, and then start looking at the magnus.
So, here, back to the left leg, we’re now continuing the dissection down through the magnus muscle [00:07:55 inaudible] where we expect to see our perforators.
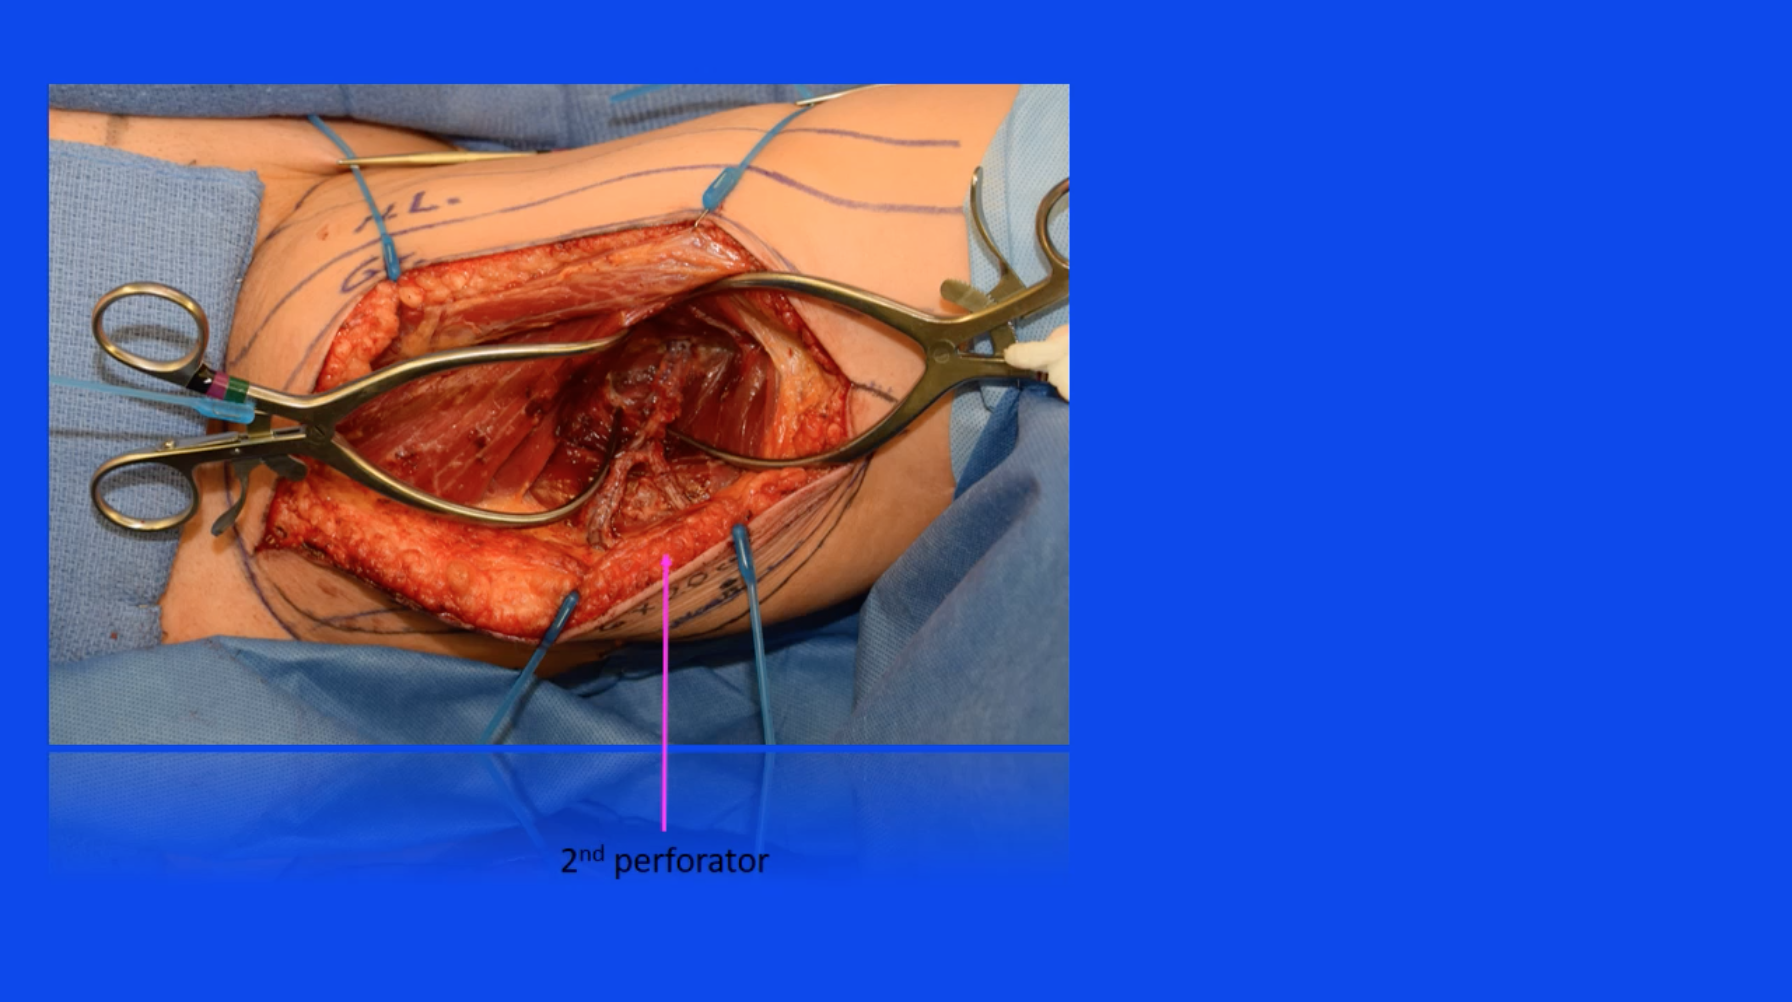
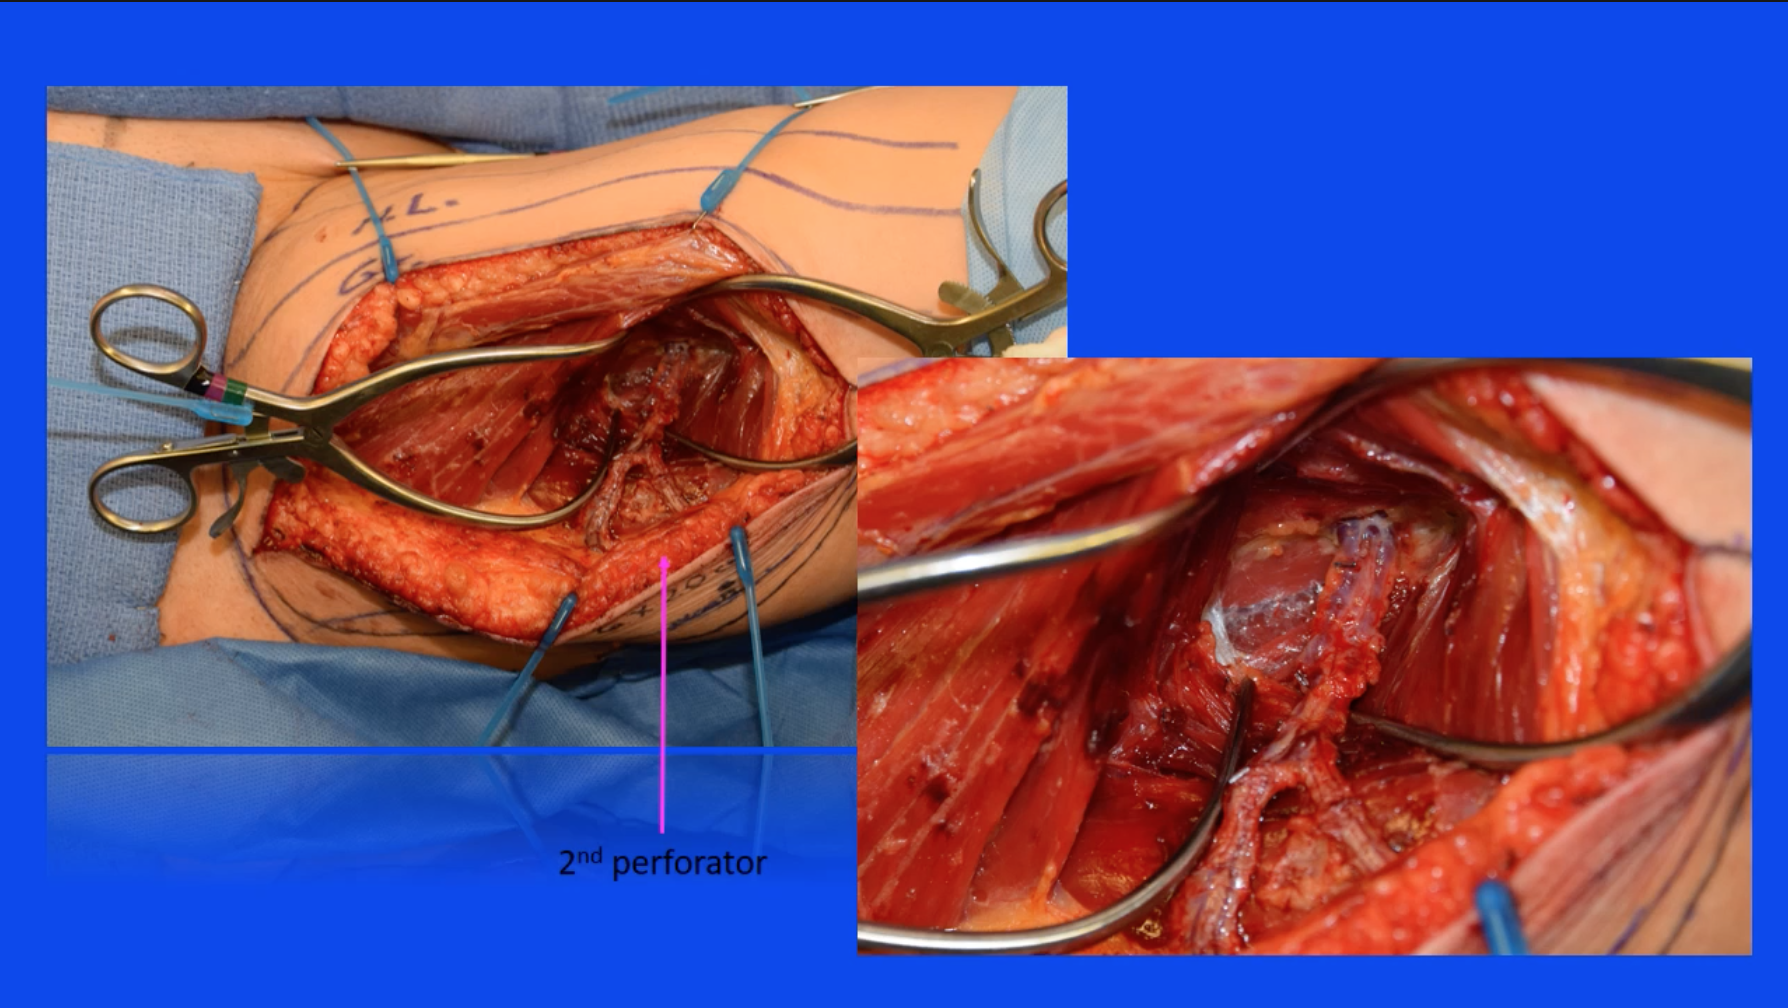
[00:08:07 Here is a dissection coming across one of the perforators and we can very delicately remove the [00:08:15 inaudible] to the perforator surrounding it [00:08:18 inaudible], and this enables us to evaluate the caliber and the position of the perforator [00:08:26 and the] flap. And then, according to our preoperative marking, there should be another perforator a little bit further distally [00:08:37 within this flap a little bit further back posteriorly, and here is a very careful dissection _____ find that blood vessel.] Now, once you’ve found two blood vessels, you can compare and decide which one is the more appropriate [00:08:54 to use in this flap.] Once the two blood vessels are exposed and [00:09:02 inaudible], we can [00:09:03 inaudible] and see [00:09:07 that] the more distal of the two is [00:09:09 inaudible] quality [00:09:12 inaudible] caliber, [00:09:13 so the more proximal will be clipped [00:09:16 inaudible].
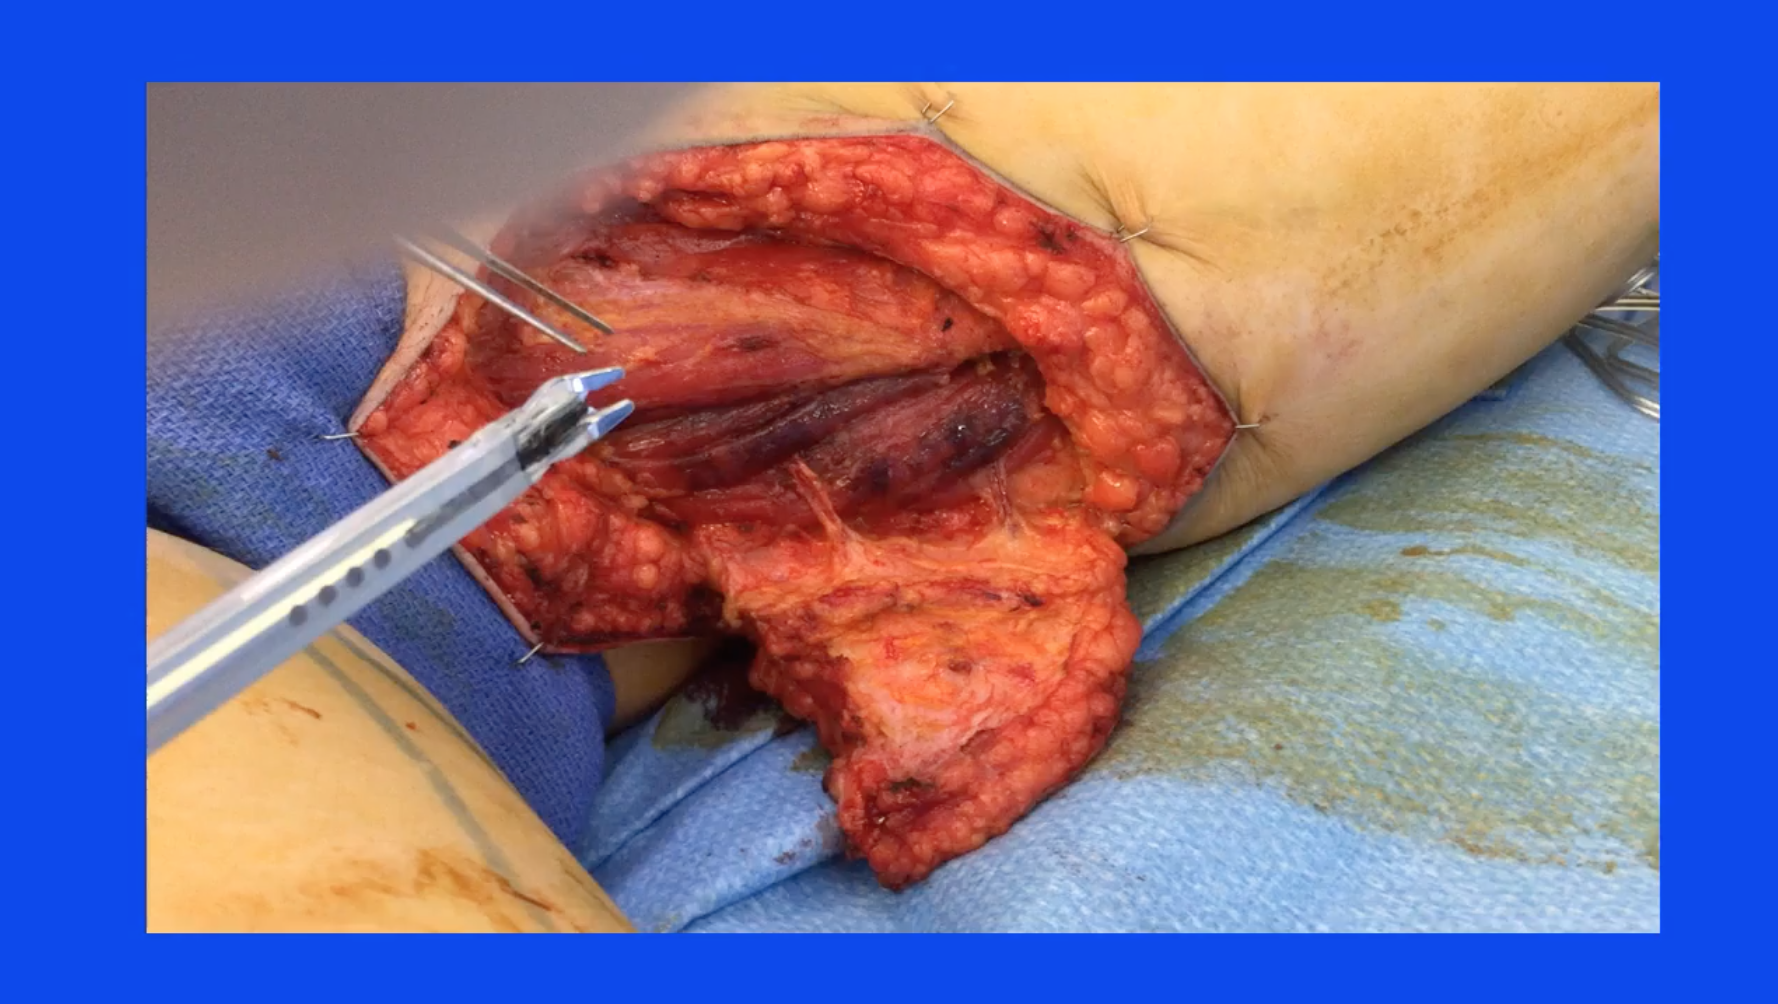
The dissection then follows the course of a normal perforator flap to provide adequate exposure until the pedicle is dissected all the way back to the takeoff at the profunda artery and vein.
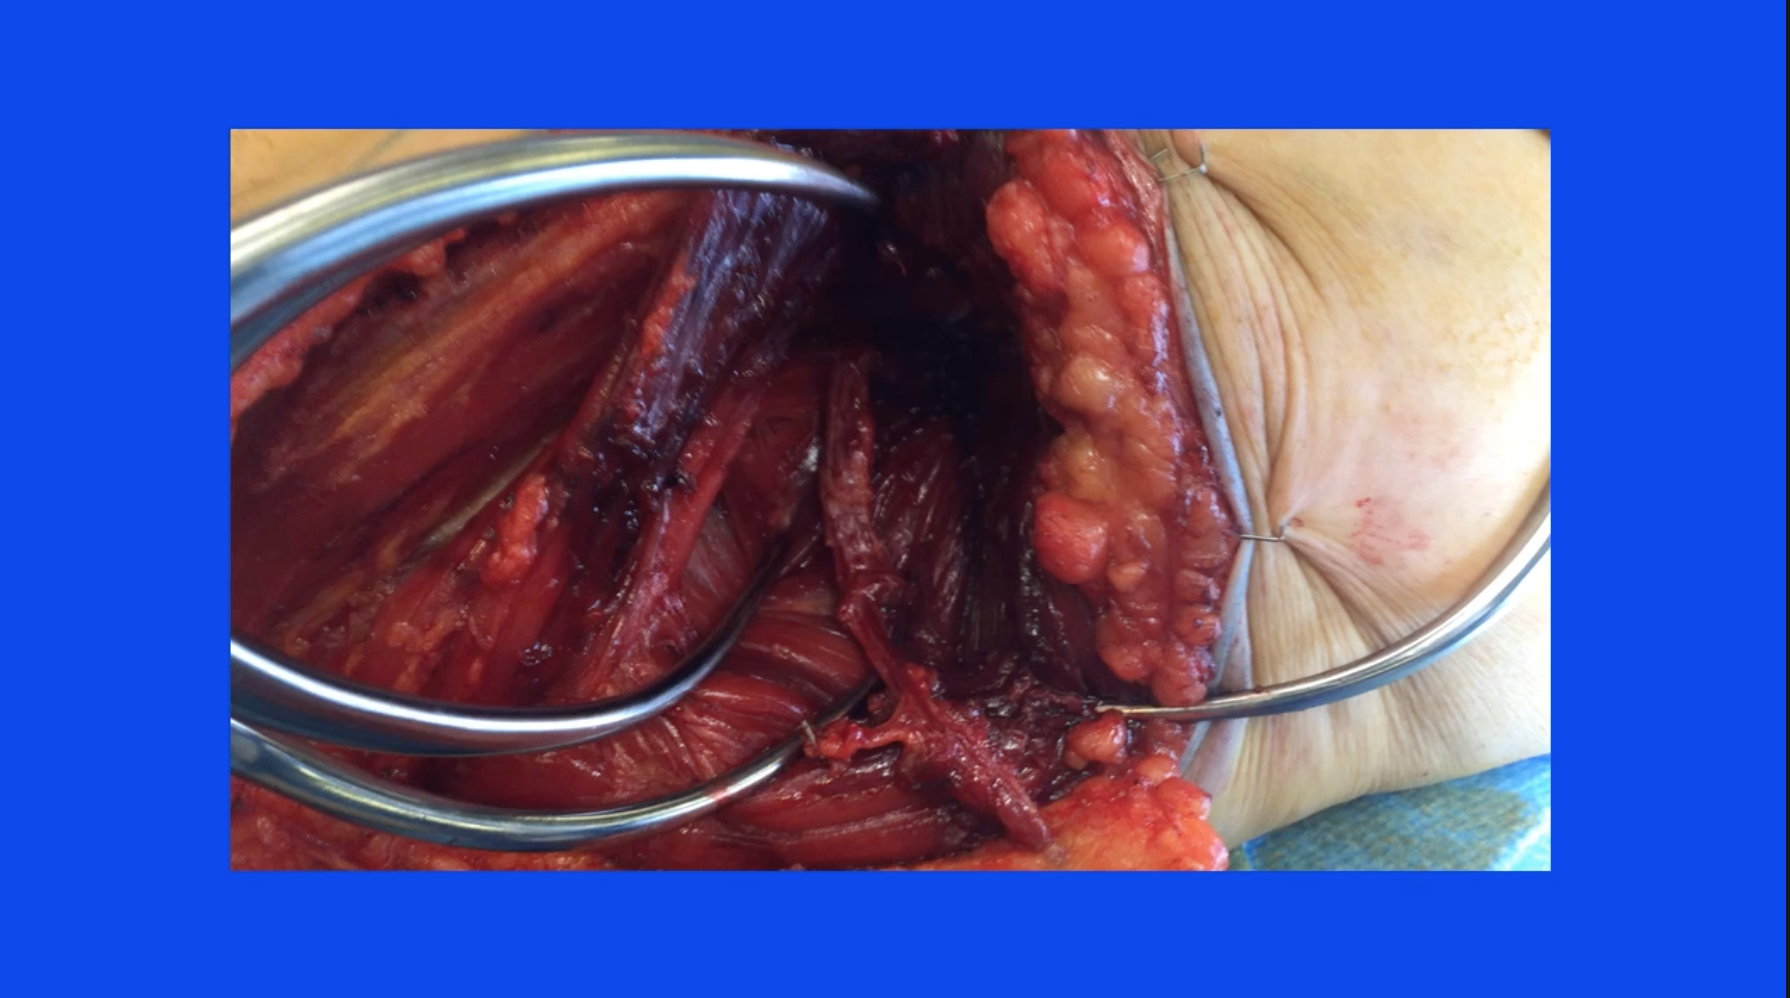

At that point, the blood vessels are harvested, they are ligated and divided at the takeoff at the profunda vessels and delivered into the field.
There’s no need to worry at this point about ischemia time because the flap is still perfused adequately from its remaining posterior attachments. At this point, the leg is adducted across the midline so that the posterior and lateral attachments can be separated and the flap can be harvested from the posterior lateral leg. Special care needs to be taken at this point not to harvest the deep fascia, which will contain the posterior femoral cutaneous nerve, and this should be preserved.
Alternatively, the flap can be harvested in the lithotomy position with the legs adducted, and this is especially useful when the flap orientation has been designed in a vertical position, and here we show the adductor longus, gracilis markings on the skin, the superficial markings, and the expected position of the perforators that shows the anterior incision having been made down to and then beyond the gracilis, and then the dissection within the adductor magnus.
Sometimes, and more frequently with a vertically oriented flap design, two or more vessels can be harvested in a row without sacrificing any muscle.
Again, the flap dissection should be carried all the way down to the profunda vessels.
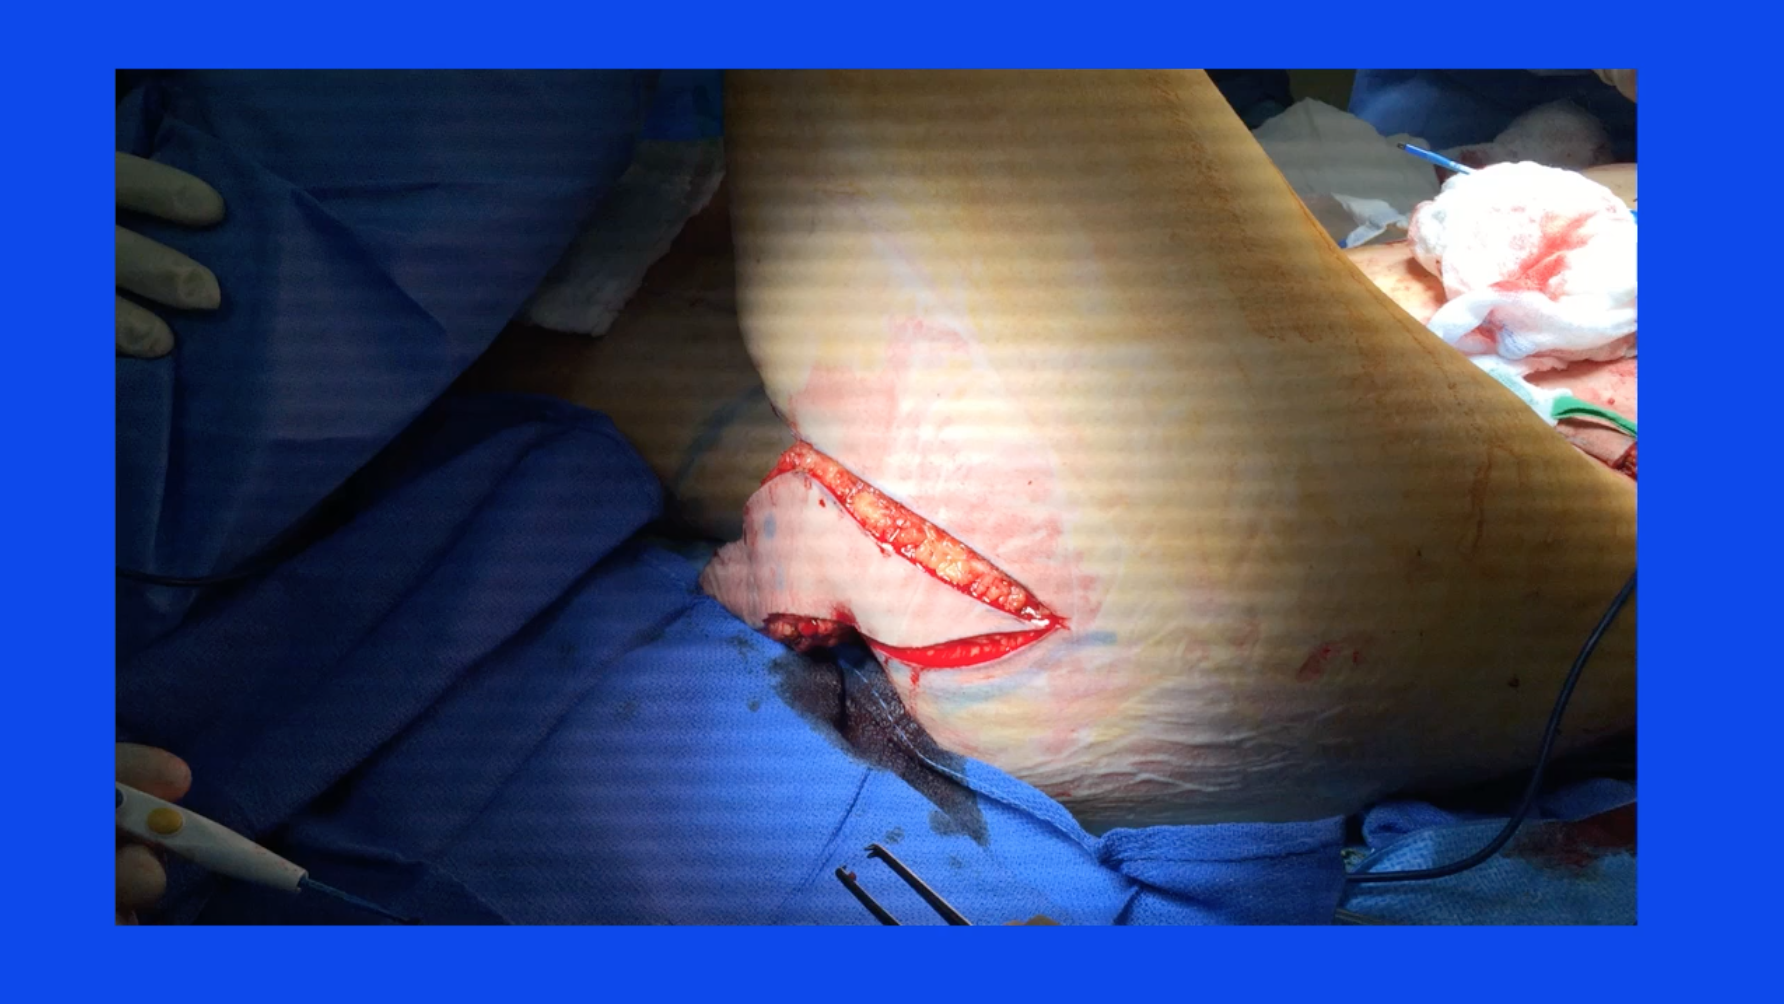
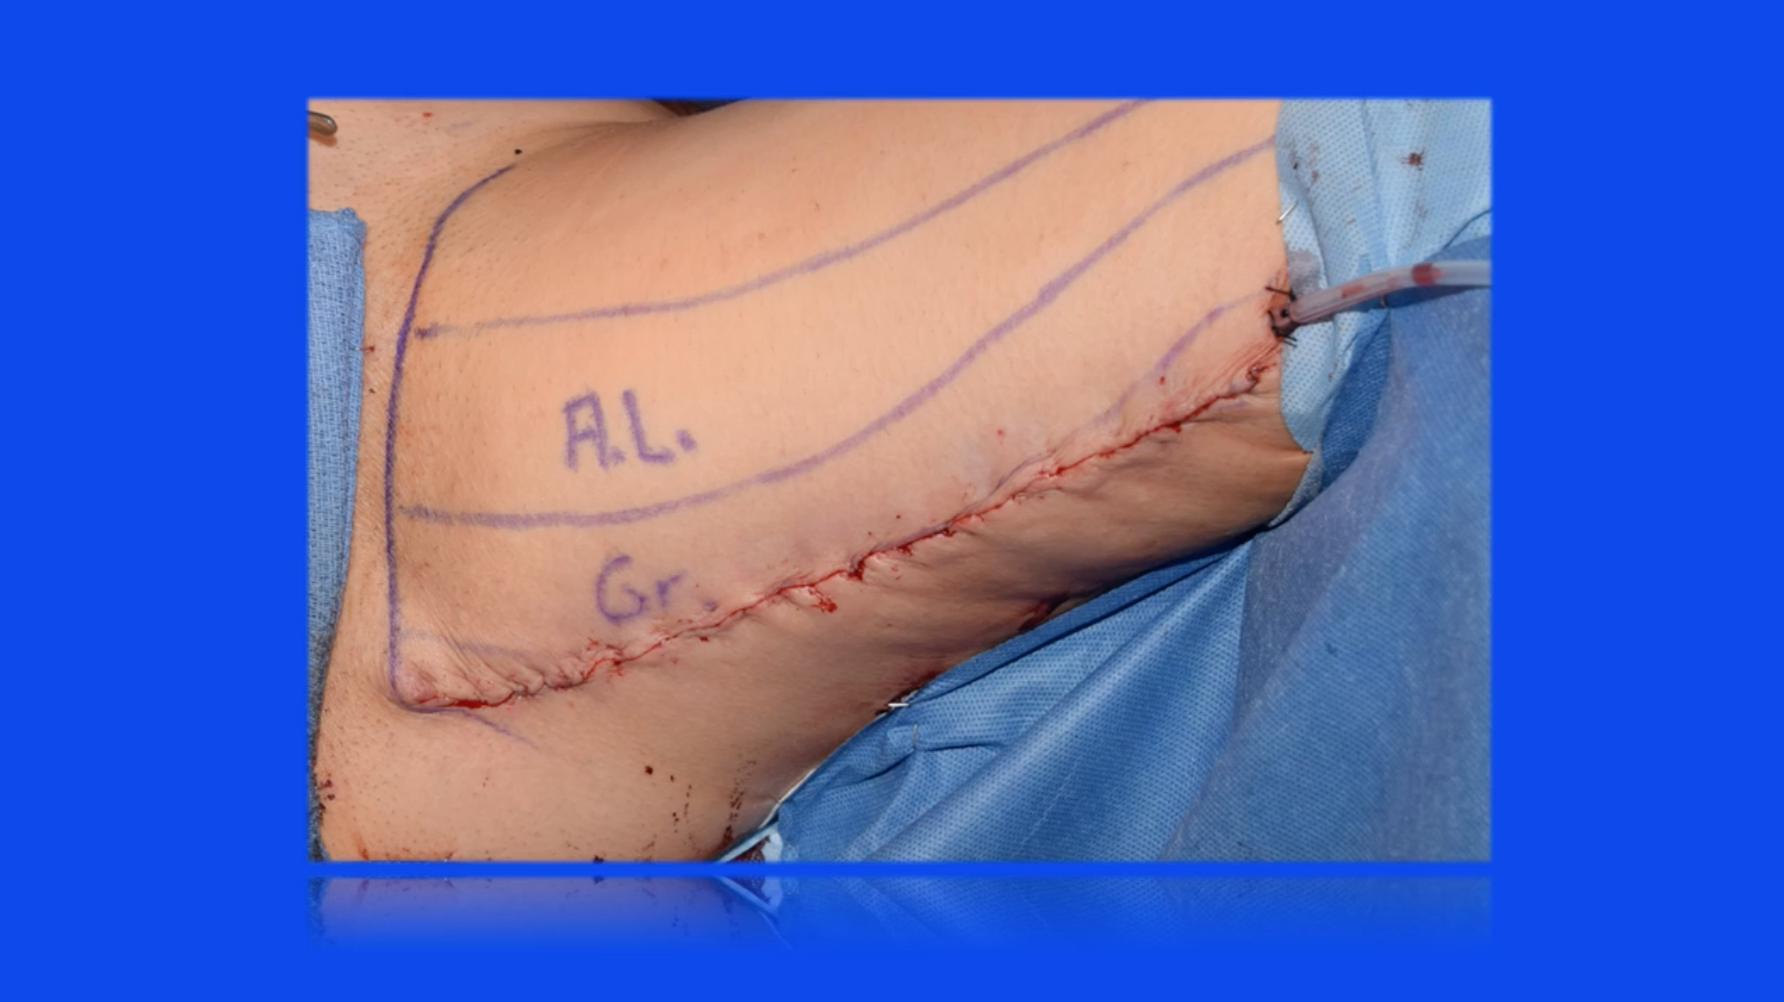
Flaps are harvested and then the skin is closed primarily, and the incision winds up in the posterior lateral thigh and not visible when the patient looks in the mirror and nicely positioned in the posterior medial thigh.
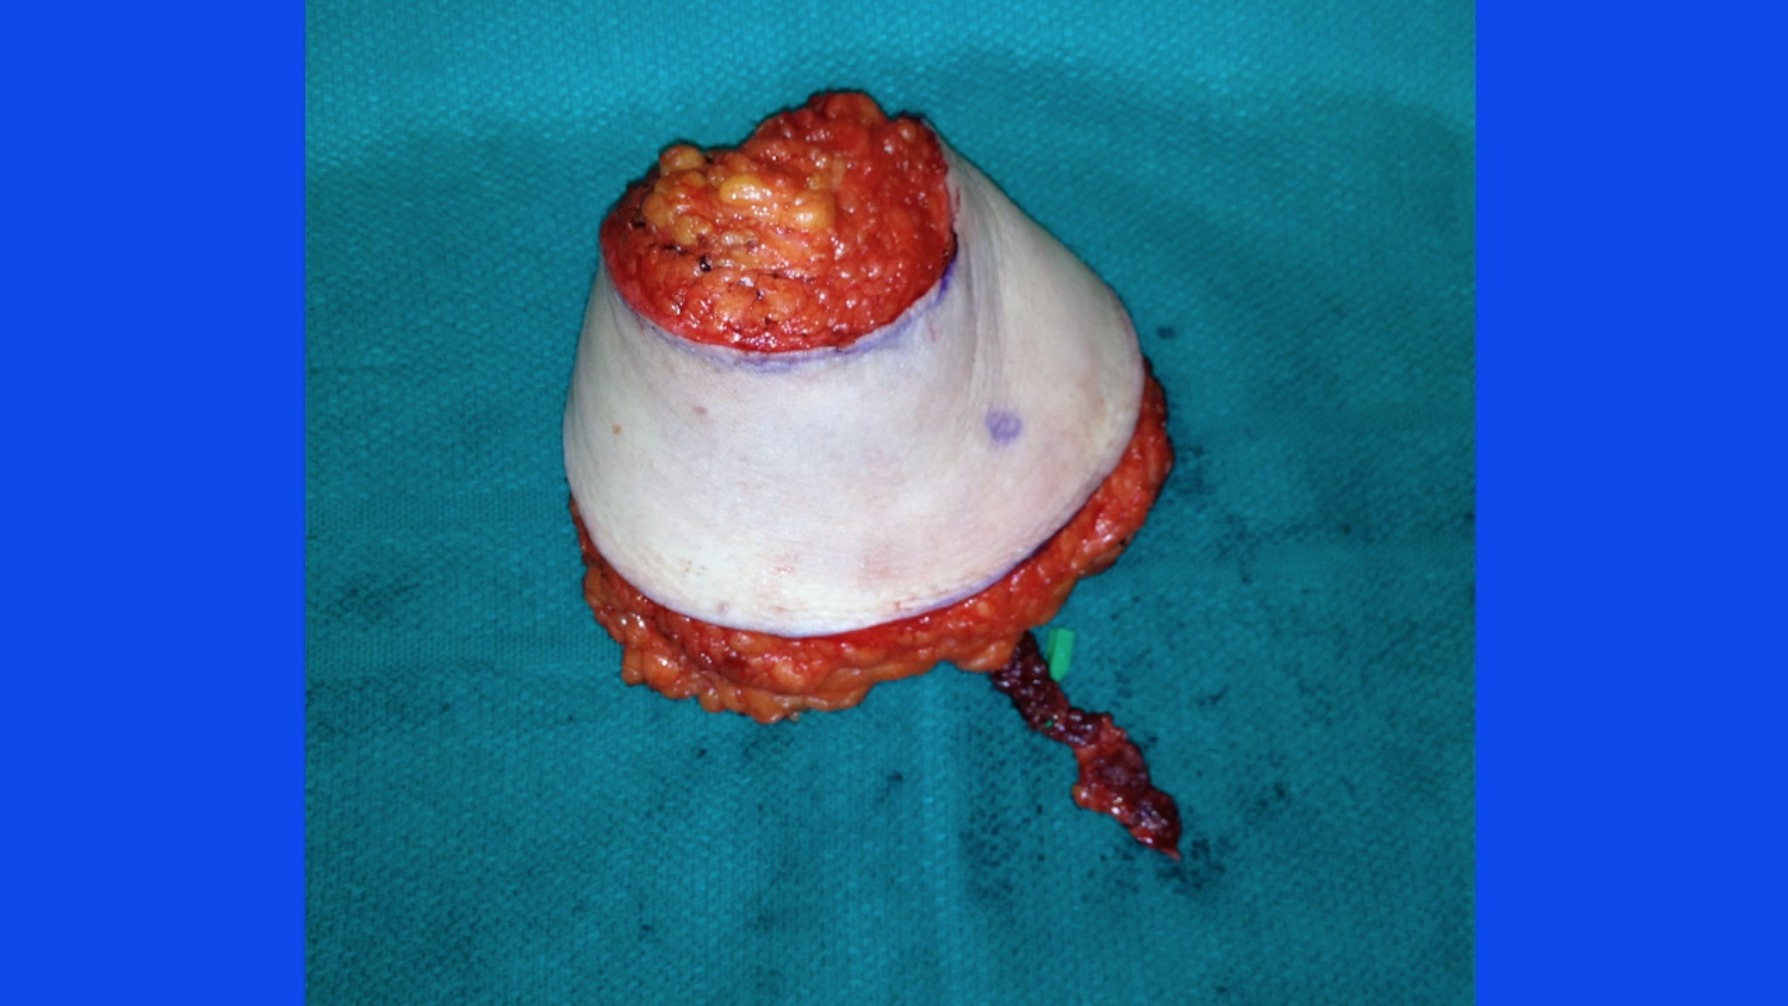
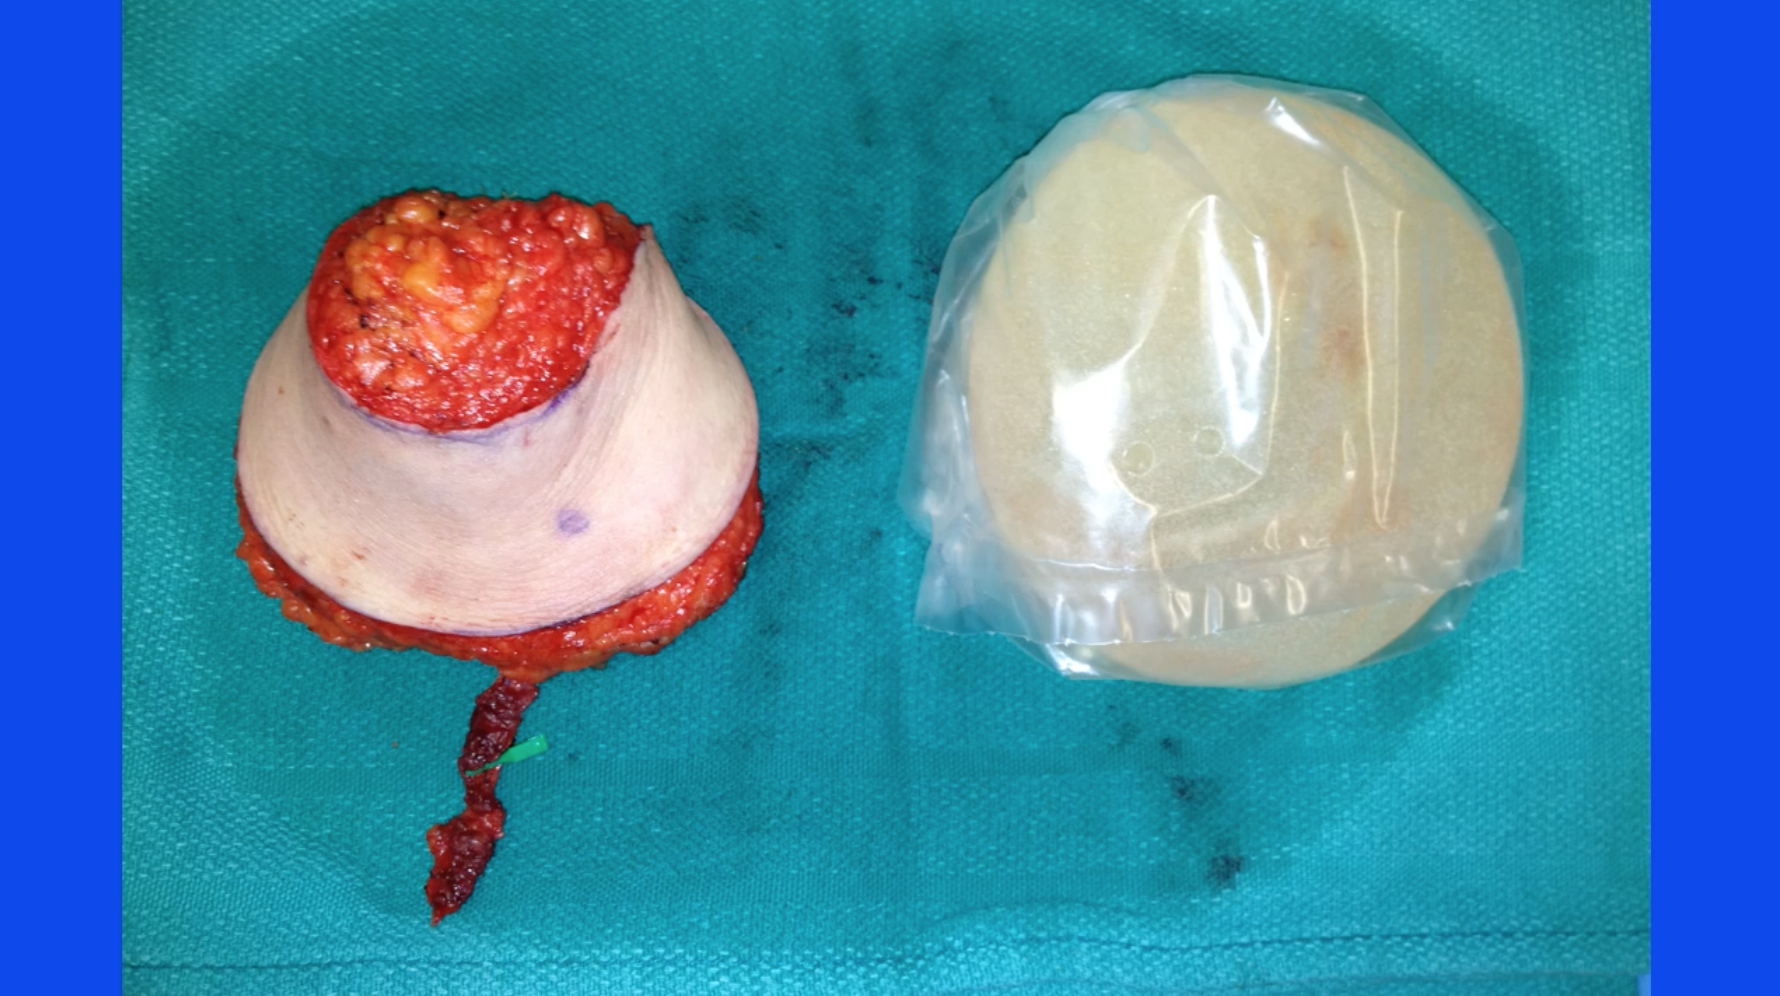
These flaps tend to be long ellipsis- or even crescent-shaped flaps, which gives us a lot of flexibility in terms of insetting.
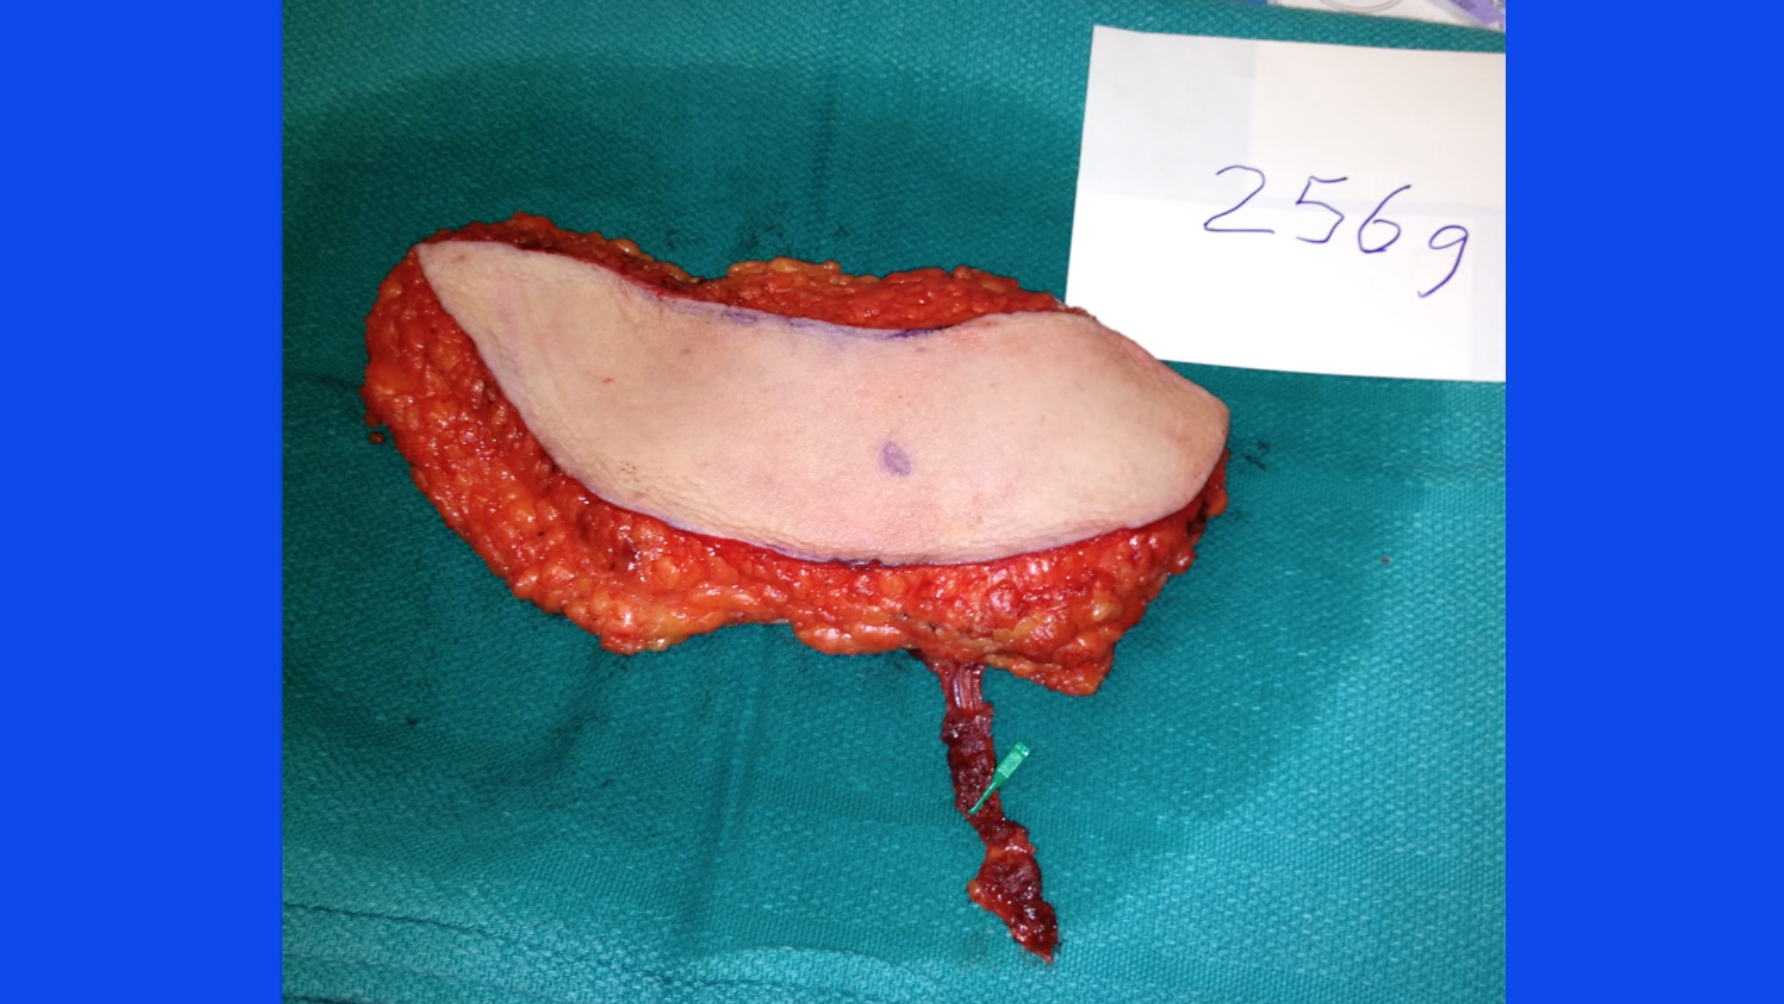
These flaps can be coned no really very nicely resemble an implant and a projected breast.
Typically when we close these incisions we leave drains. They’re brought out anteriorly.
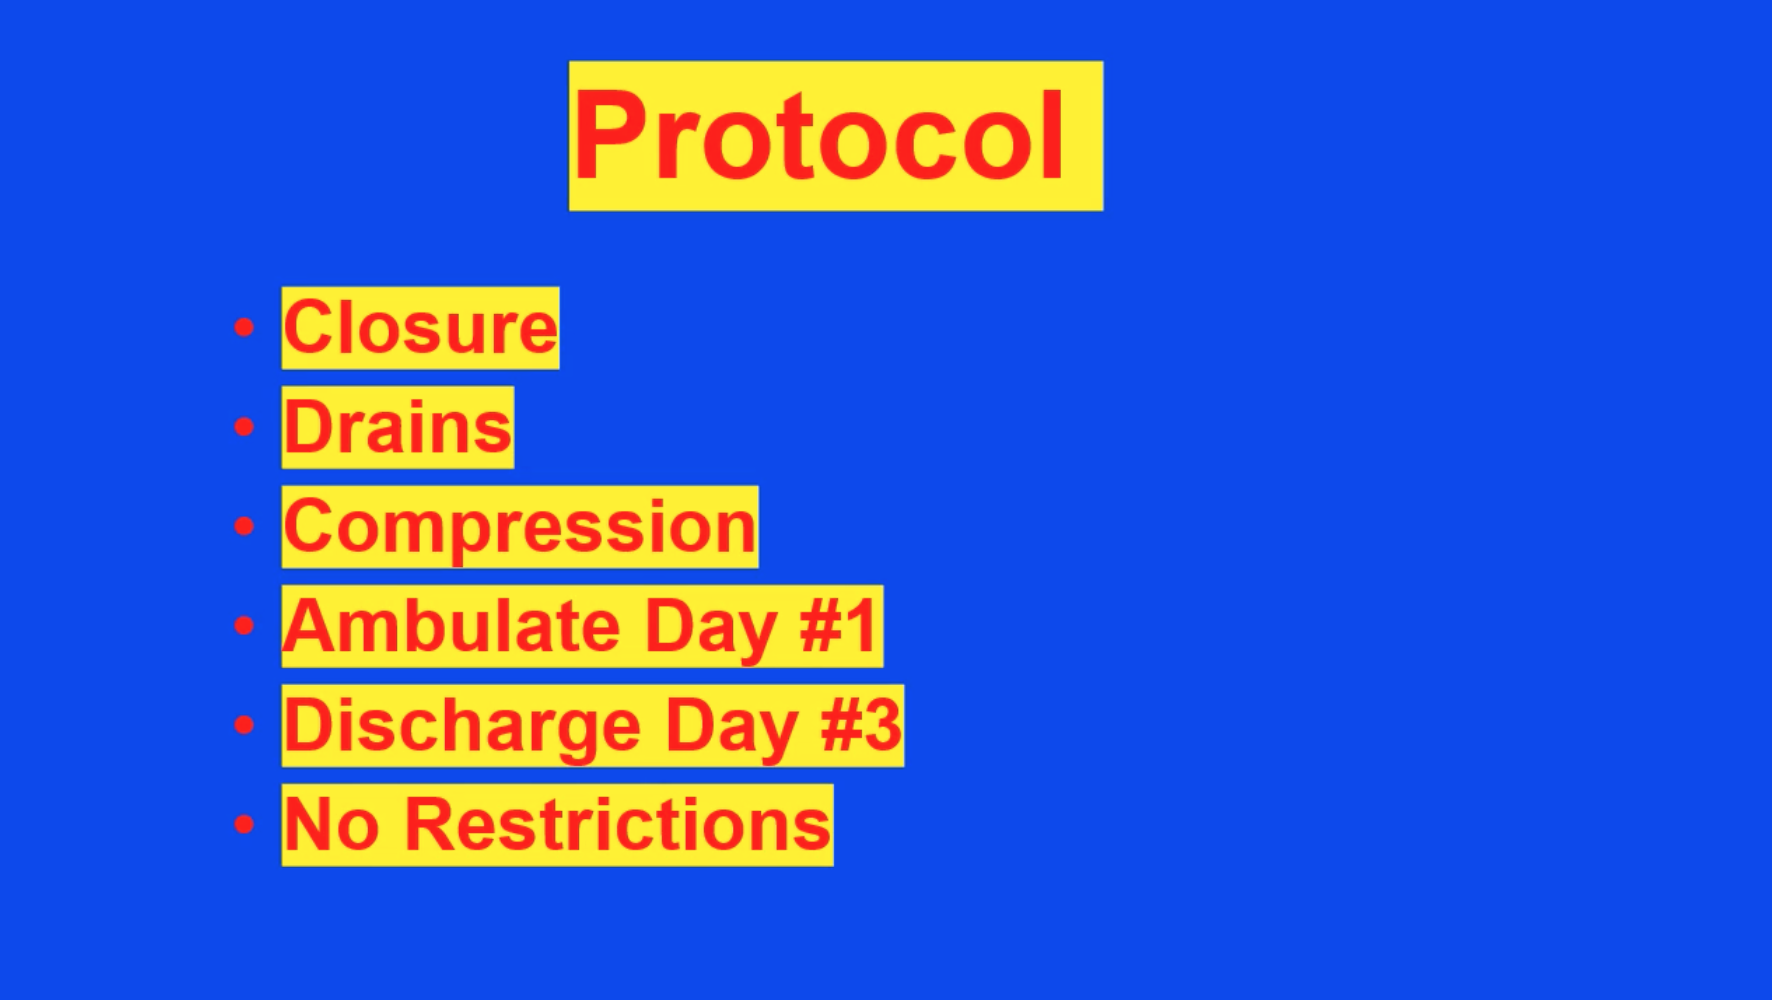
We like compression for a two-week period of time in the form of a compressive garment. Patients are ambulating on postop day one during which time the Foley catheters are moved so they walk to the bathroom. They are discharged on postoperative day three, and by the time they’re home there are no significant restrictions other than no heavy lifting or rigorous activity for one month.
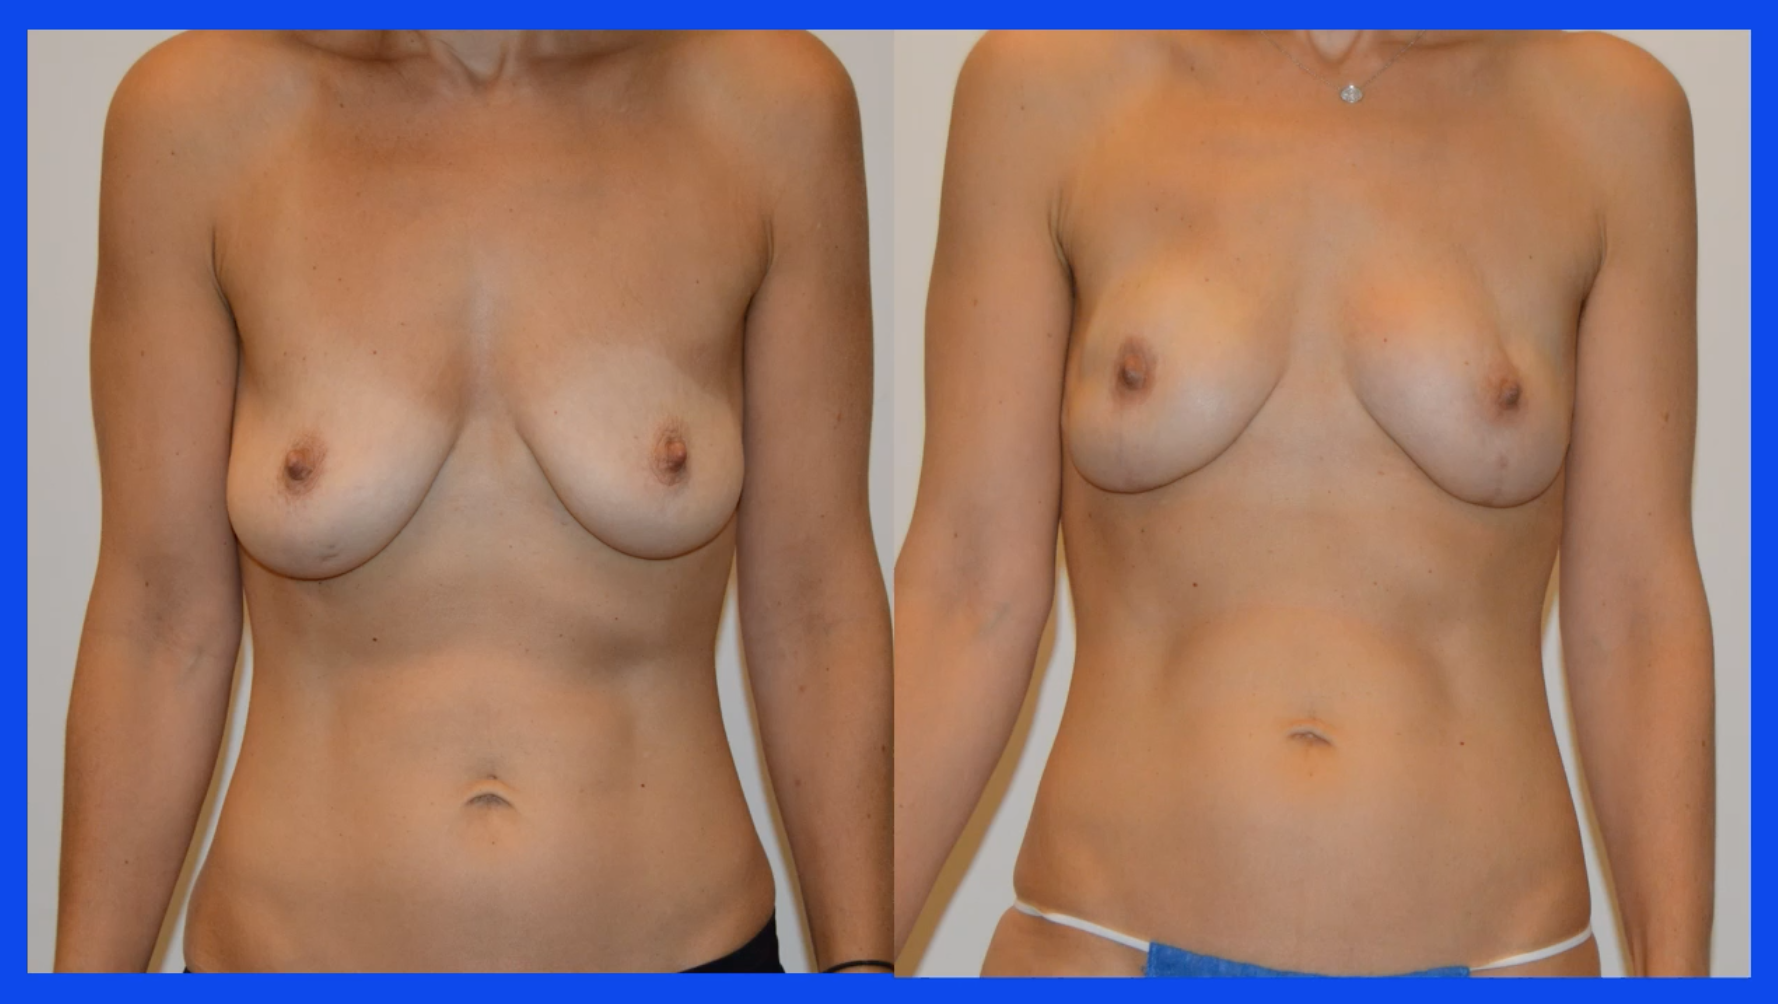
Here are some results. These are the pictures of preop patients I showed you earlier in the presentation. BRCA patient with inadequate abdominal tissue, plenty of thigh tissue, and here she is with the postoperative donor site, bilateral PAP flap.
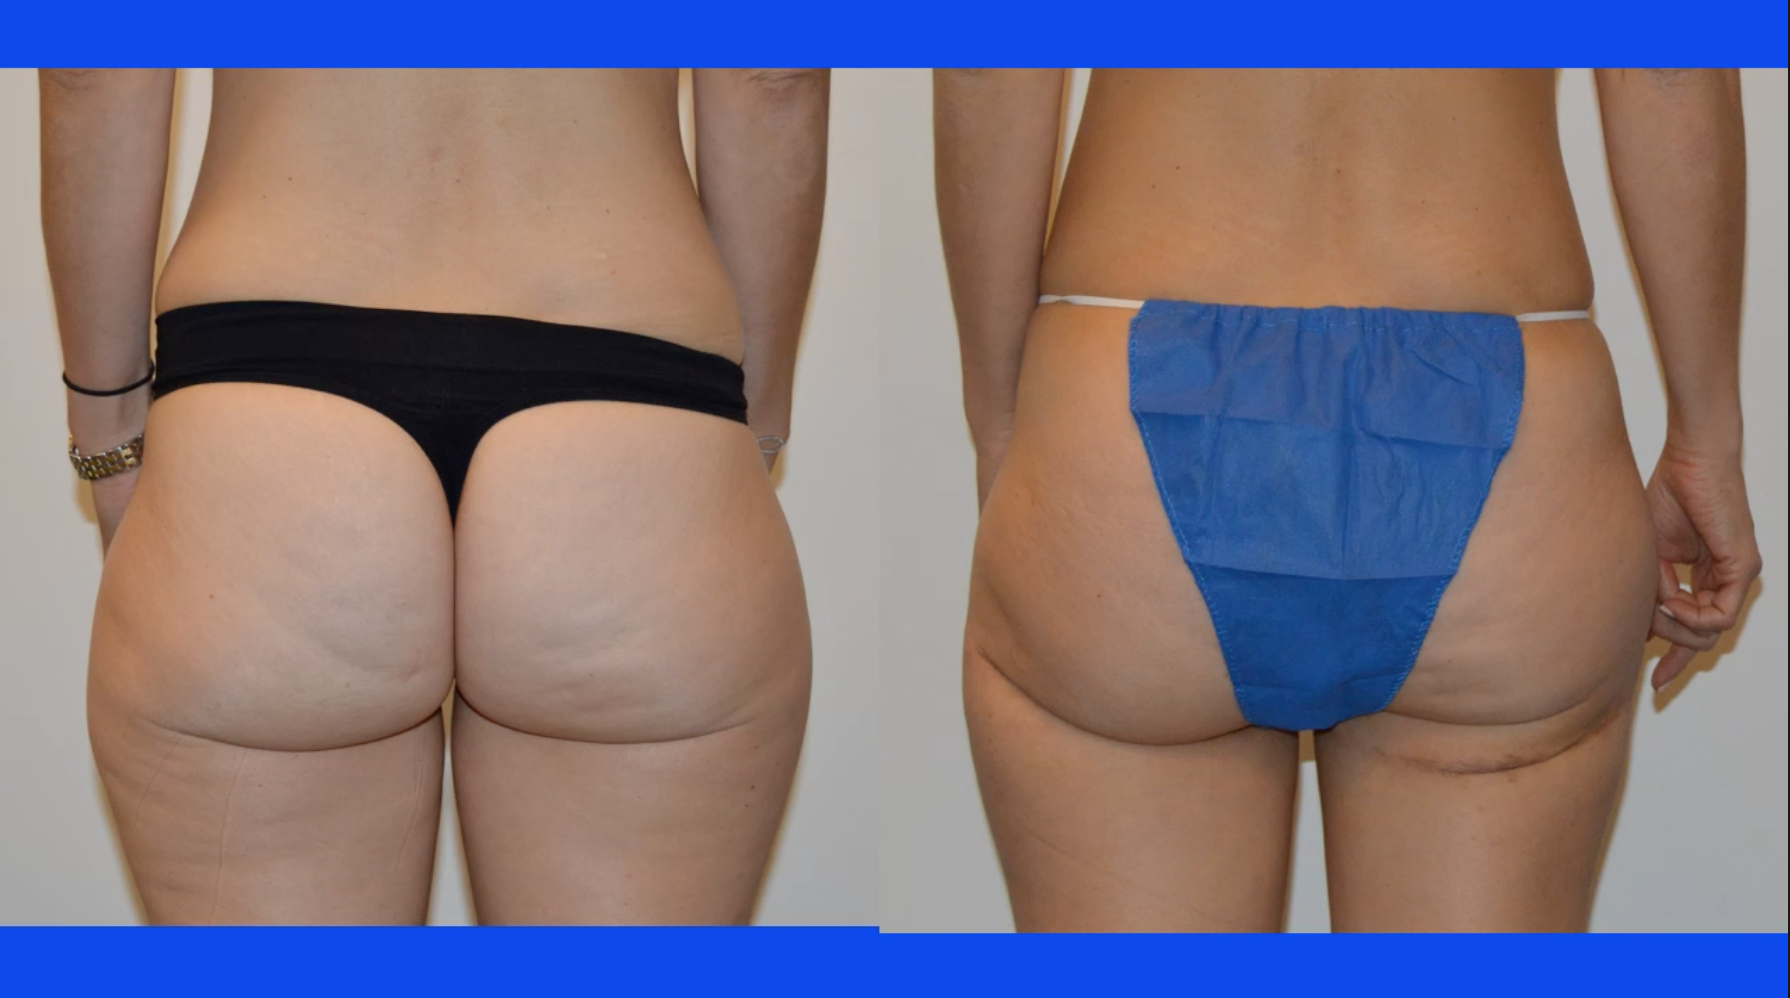
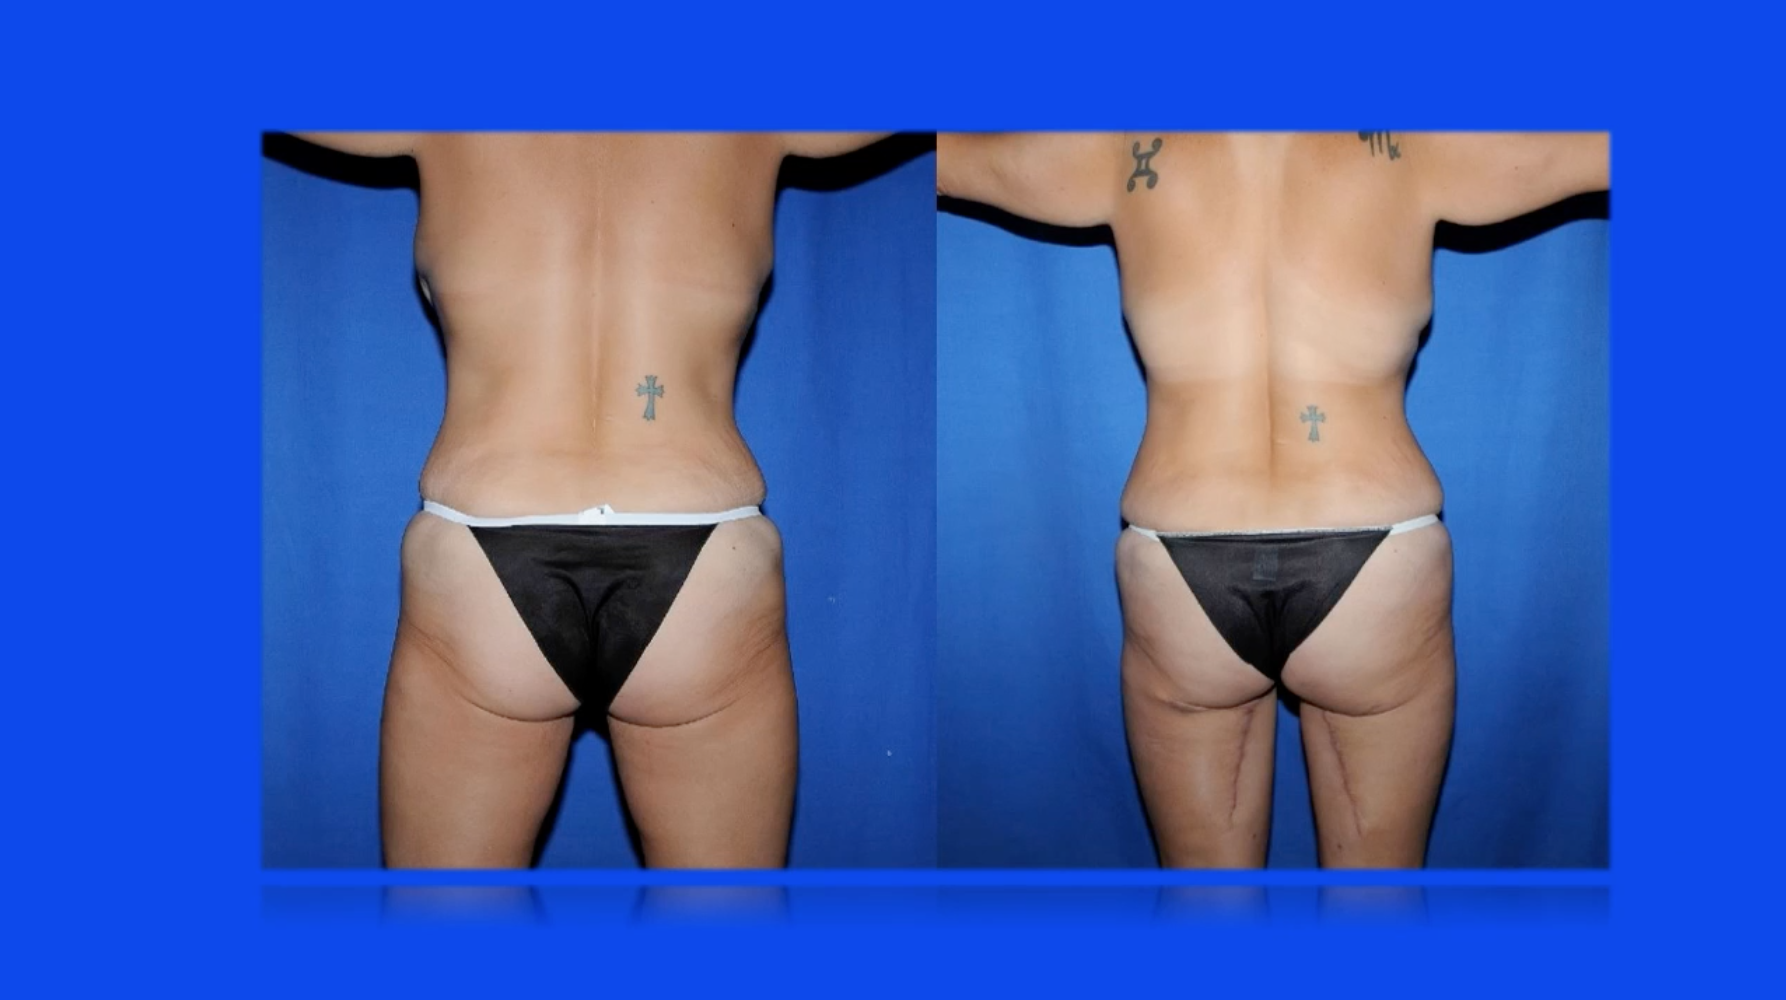
This is the patient who didn’t want to use her abdomen and nice postoperative result, and this is what her posterior thighs look like.

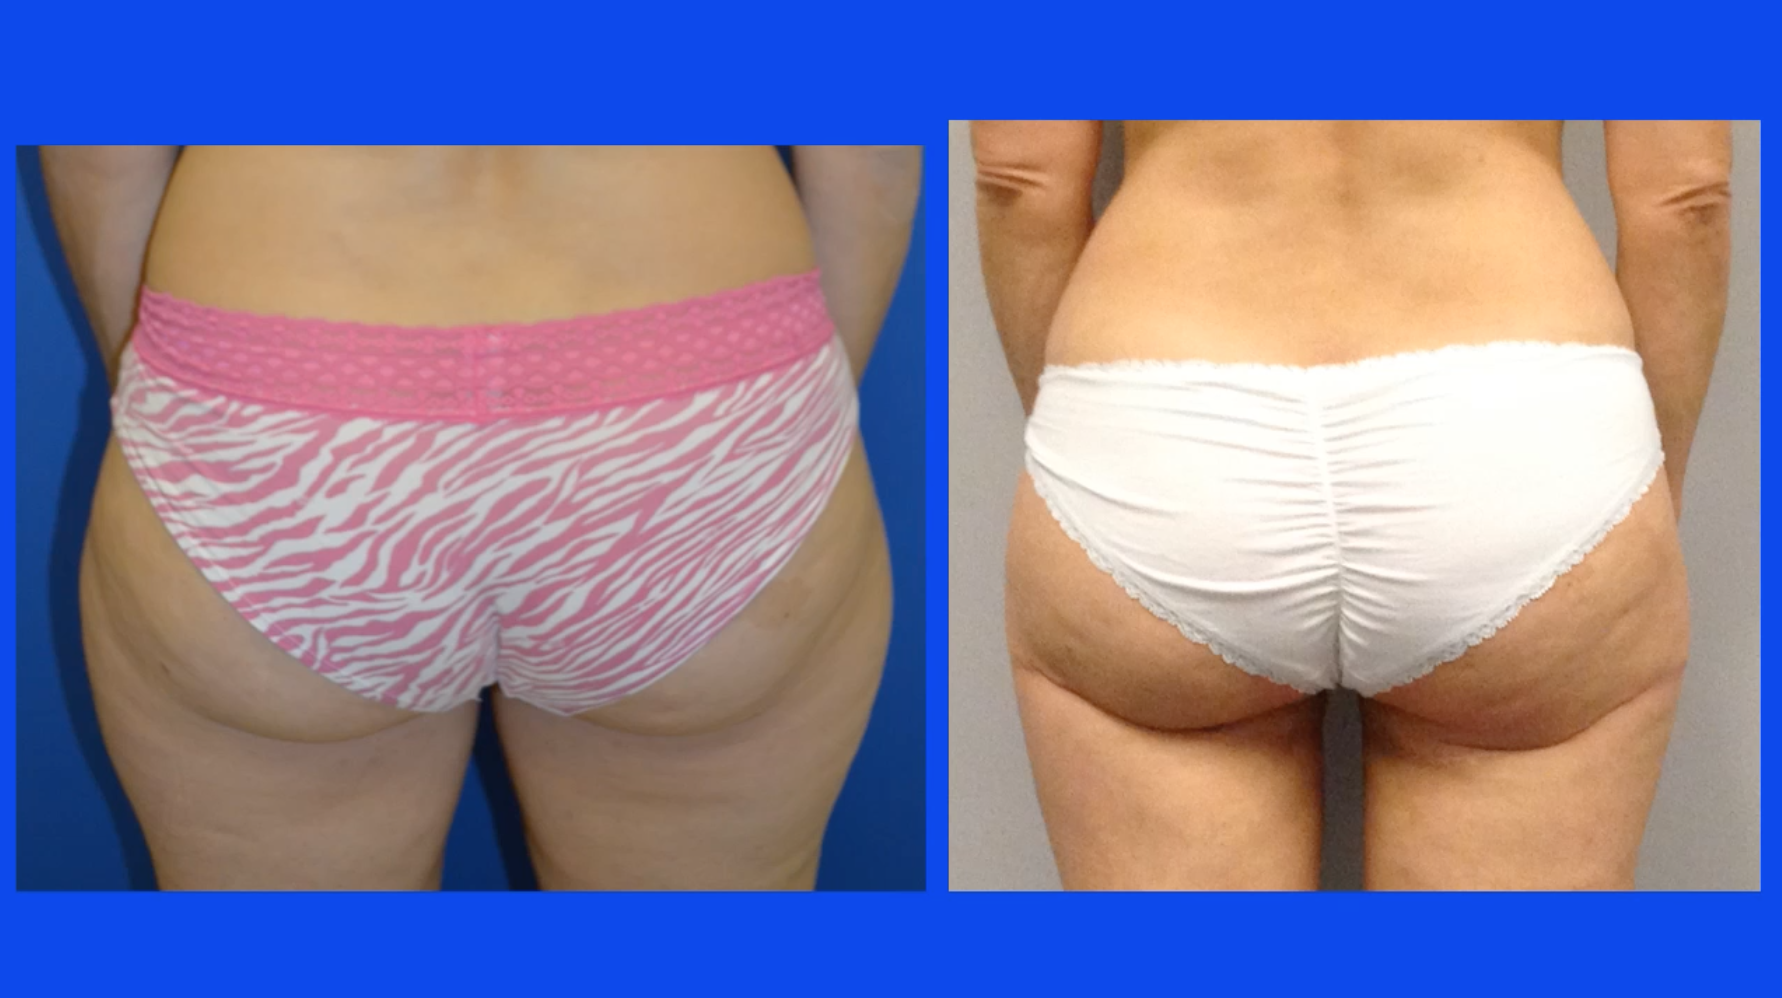
This is a patient with failed implants and postoperative thigh result nicely hidden in the buttock crease.
Another BRCA patient with inadequate abdominal tissue, postoperative breast reconstruction with a prophylactic mastectomy via an inframammary incision.
Here she is preop and postop with the thigh harvest scar within the buttock crease.

And, this is the result from the patient with the vertically oriented incision and her breast reconstruction result.
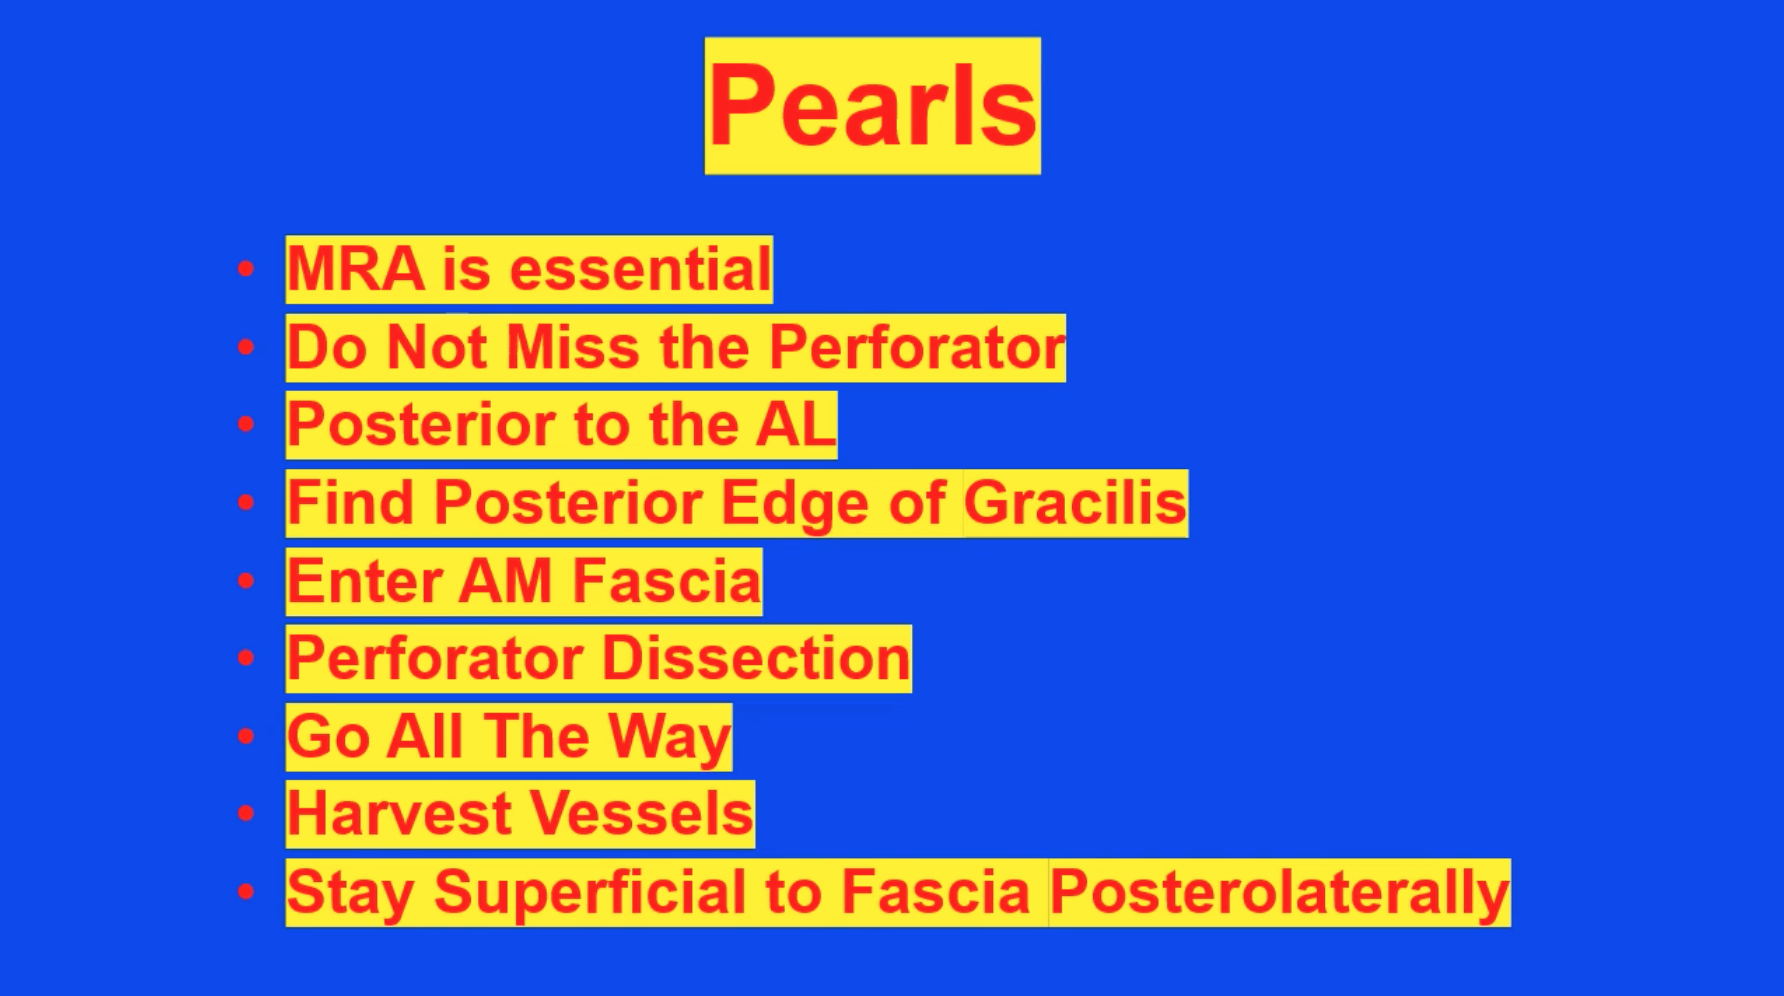
So, some of the important points about the success of this operation and making it systemic in terms of the protocol, to do this operation an MR angiogram or a CTA is absolutely essential. It’s very important not to miss the perforator and the flap design. Remember that the blood vessels enter the flap through adductor magnus, which is posterior to the adductor longus, and the adductor longus tendon is a very, very helpful landmark. We find the gracilis in our anterior incision and then go to the posterior edge, which is another important landmark because at that point you know that you can enter the fascia covering the adductor magnus and begin your perforator flap dissection. It is very important to go all the way to the profunda vessels in order to get the maximum length of the pedicle and the diameter particularly of the artery. Go ahead and harvest the vessels without concern for ischemia time, and stay superficial to the posterior and lateral fascia in order to avoid injury to the posterior femoral cutaneous nerve.

Some of the pitfalls, it’s very important to choose a large vessel. Even if it’s several centimeters below the crease, it’s better to have an unfavorable cosmetic scar than it is to have a vessel that is inadequate for flap transfer. Also, when designing the flap in a transverse orientation, it’s very important to keep the width of the flap down to 6 centimeters or below, particularly in thin patients, so as not to cause too much tension on the closure of the thigh. If you miss the vessel you really are going to have a hard time, so be sure that the vessel is within the flap. Again, taking the dissection all the way to the profunda is important. If you harvest the vessels too soon, the artery will be too small and it’ll be a poor matchup with the internal mammary. Resist the urge to take too much fat laterally—it causes cosmetic issues—and also, again, preservation of the posterior femoral cutaneous nerve is important. As I mentioned before, the flap is elongated with corners and sometimes these corners are not as well perfused as the area where the pedicle enters the flap, and so evaluate those corners for perfusion. If they are inadequately perfused, don’t keep them. Remove them or they will turn into fat necrosis.
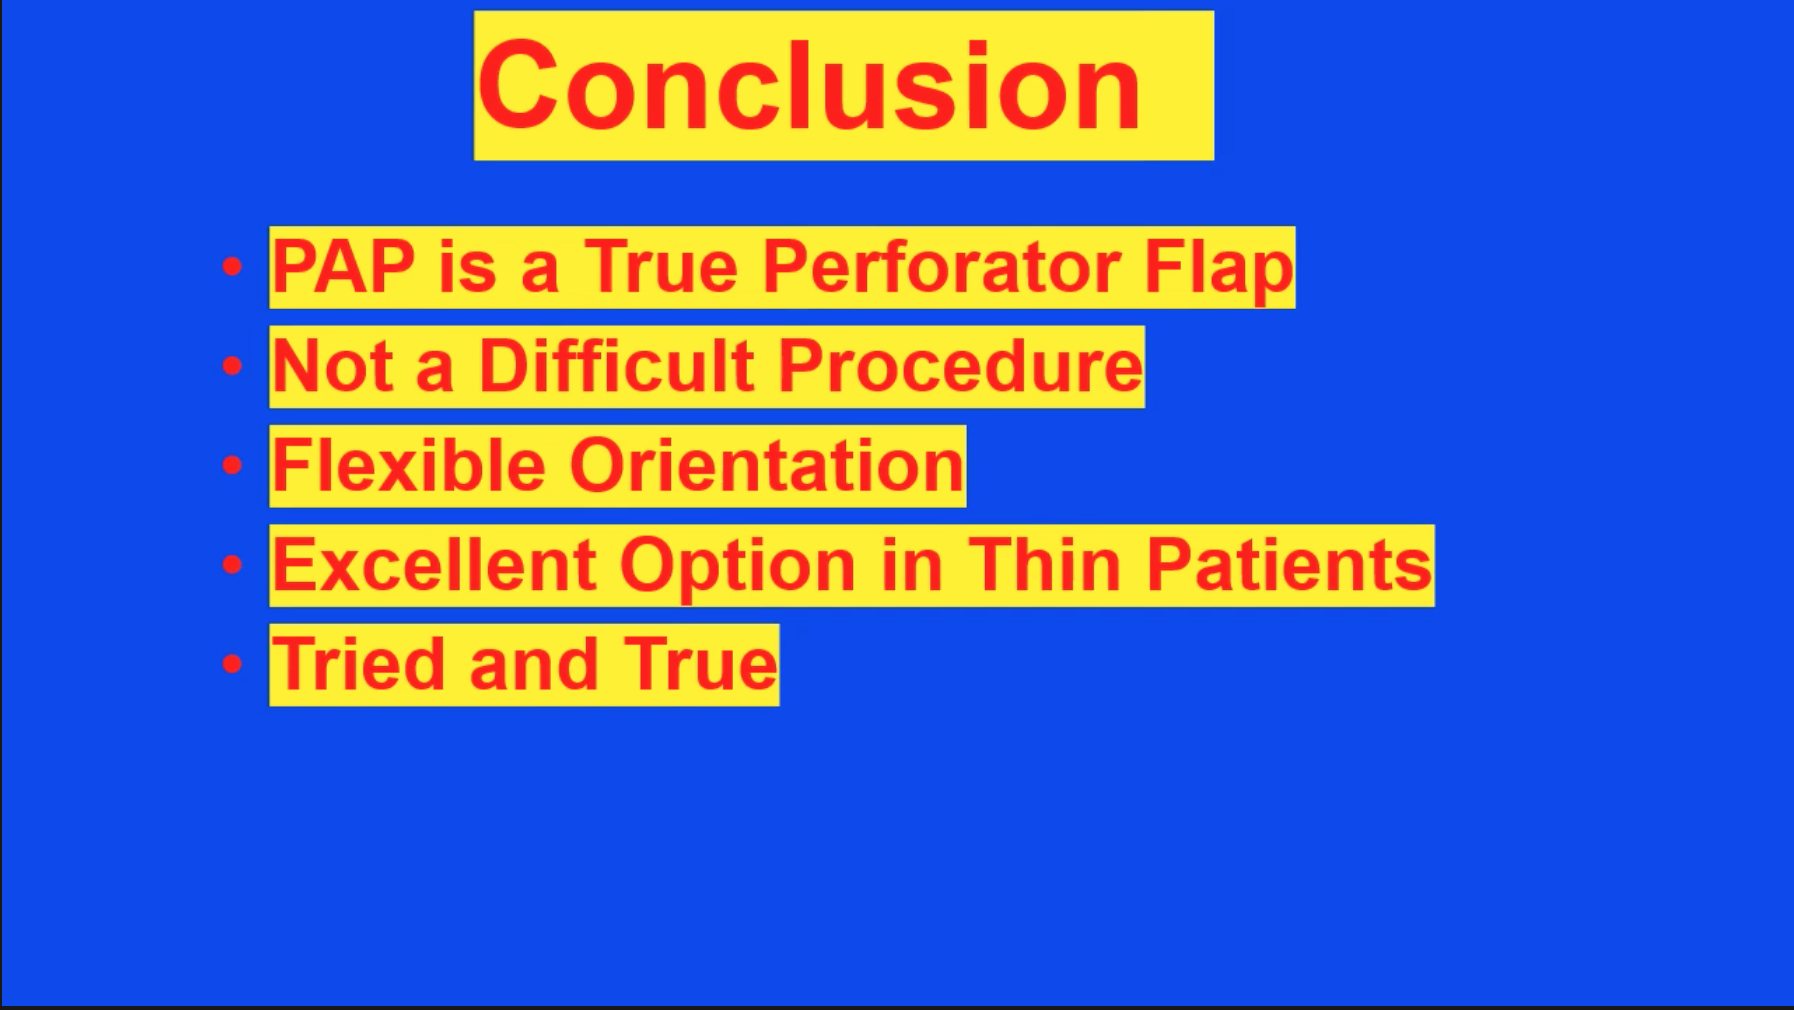
In conclusion, first and foremost, the PAP flap or profunda artery perforator flap is a true perforator flap. There is no muscle sacrificed in this operation in distinction to the TUG flap, which does sacrifice a muscle and, in my opinion, unnecessarily. This is a typical perforator flap dissection. It is not a difficult procedure. It is a very flexible operation in terms of the orientation. It can be oriented transversely or vertically depending upon the desires of the patient and the anatomy of the patient in terms of where the inner thigh fat is and where the blood vessels are. So, it’s an excellent option for thin patients, and we’ve been doing this now for approximately seven years and with a tremendous degree of success and patient satisfaction. There is no reason to destroy muscle, and so using a PAP flap is an obvious choice which is truly advantageous and superior to the other thigh option, which is the TUG flap.
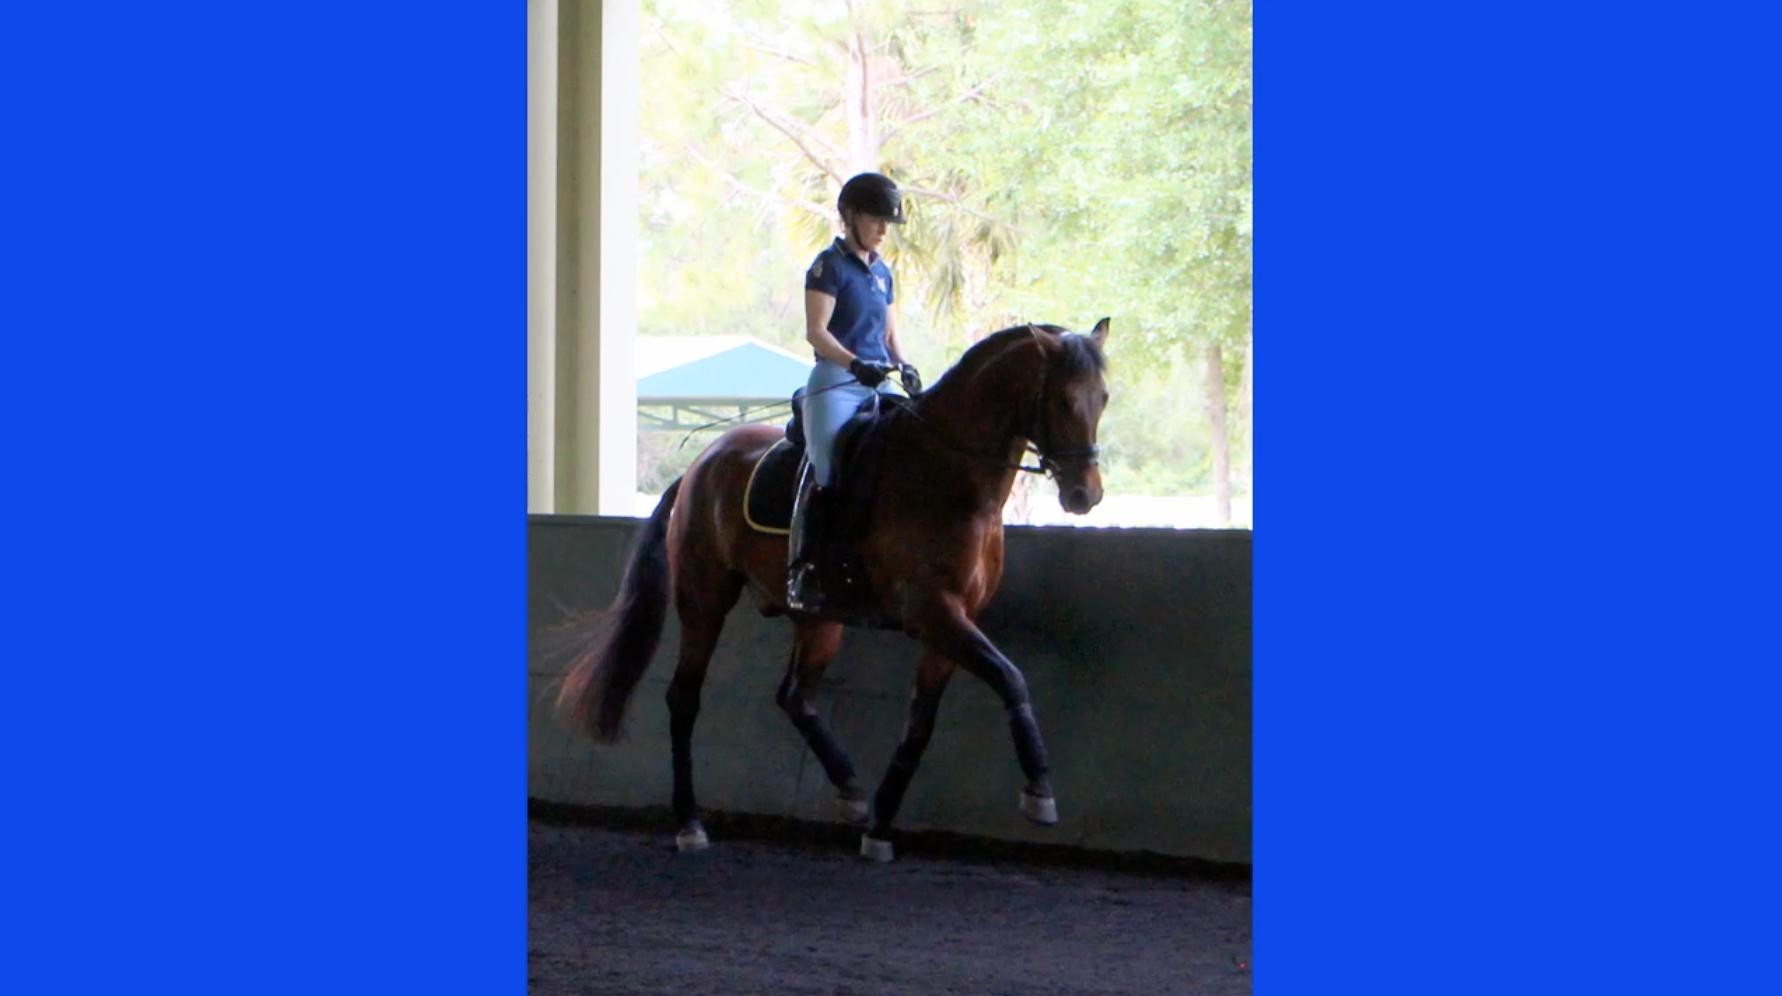
Patients often ask, “What are the postoperative long-term limitations of it to patients who are avid horseback riders?” and this illustrates how well this operation’s tolerated by patients, even patients who really are dependent upon using the posterior thigh in their daily life.

Thank you for your attention. I hope you’ve benefitted from this explanation of the PAP flap.


